Last week I showed a tutorial with sharp eyeliner that you can read about in Sharp eyeliner with Paese Penliner! Now I was going to show a smoky eyeliner step by step.
I get very frequent questions about just sharp eyeliner with wing as many love it but think it's so heavenly, heavenly difficult. Some have difficult eye shapes to make a wing on, you are shaky on the hand, you get it nice on one eye but not on the other, etc. It will not be good but the eyeliner sits like a mountain and then you walk around and are dissatisfied with the makeup instead. Boring!
There is, of course plenty of tips and it's just practice, practice, practice. But do you know what I can feel sometimes? Skip sharp eyeliner completely! Make a smoky eyeliner instead, it is much easier and when you have made a smoky eyeliner enough times, the step to making a sharp eyeliner then does not feel as big :) Then you have learned the basics as well.
Personally, I almost only do soot or semi-soot (not razor sharp) mainly for the reason that I feel nicer in it as well. But it's a matter of taste! :)

Why is it easier with a smoky eyeliner?
- It does not matter if you are shaking your hand
- It does not require as much precision at all
- It is easy to correct if it is wrong or asymmetrical
- You can do a little at a time and "build up" a nice shape.
- Because it is not razor sharp, it does not matter if it becomes uneven. There can be no major disasters.
So you do not have to sit in front of the make-up mirror and quarrel and swear, but still get to enjoy a nice eyeliner with wings! :)

What products do I use for a smoky eyeliner?
What I use for products is different, but often I use a carbon black eyeshadow and moistened brush - I moisturize with a fixing mist instead of water to get better durability.
I also apply with eye primer + powder on the eye before I make the eyeliner, because I have such oily eyelids, I need it to make it sit nicely from morning to evening.
For this eyeliner I use:
- Black eye shadow Paese Kashmir Eyeshadow (602)
- Pixi Makeup Fixing Mist
- Inclined brush Nanshy Angled Detailer
BASE:
Face primer - glo Skin Beauty Tinted Primer (Medium)
Concealer - glo Skin Beauty Under Eye Concealer (Golden)
Powder that neutralizes redness - glo Skin Beauty Redness relief powder
Powder - Paese Bamboo Silk Powder
Contouring - Contouring Palette (2)
Rouge - Paese Powder Blush (57)
Highlighter with glow - Pixi Glow-Y-Powder (London Luster)
Fixing Mist - Pixi Makeup Fixing Mist
Freckles - Benecos Eyebrow Designer (Gentle brown)
Brynpenna - Benecos Eyebrow Designer (Brown)
Bryngel (+ caring) - Refectocil Styling Gel
Colored lip balm - Pixi Shea Butter Lip Balm (Scarlet Sorbet)

Surely it's nice when it's so smoky? :)

Sooted eyeliner step by step:
I spray the fixing mist on the back of the hand and dip the brush in it. Because it is a bit difficult to spray the mist on the small brush, it mostly comes around :)
Then I dip the brush straight into the eye shadow!
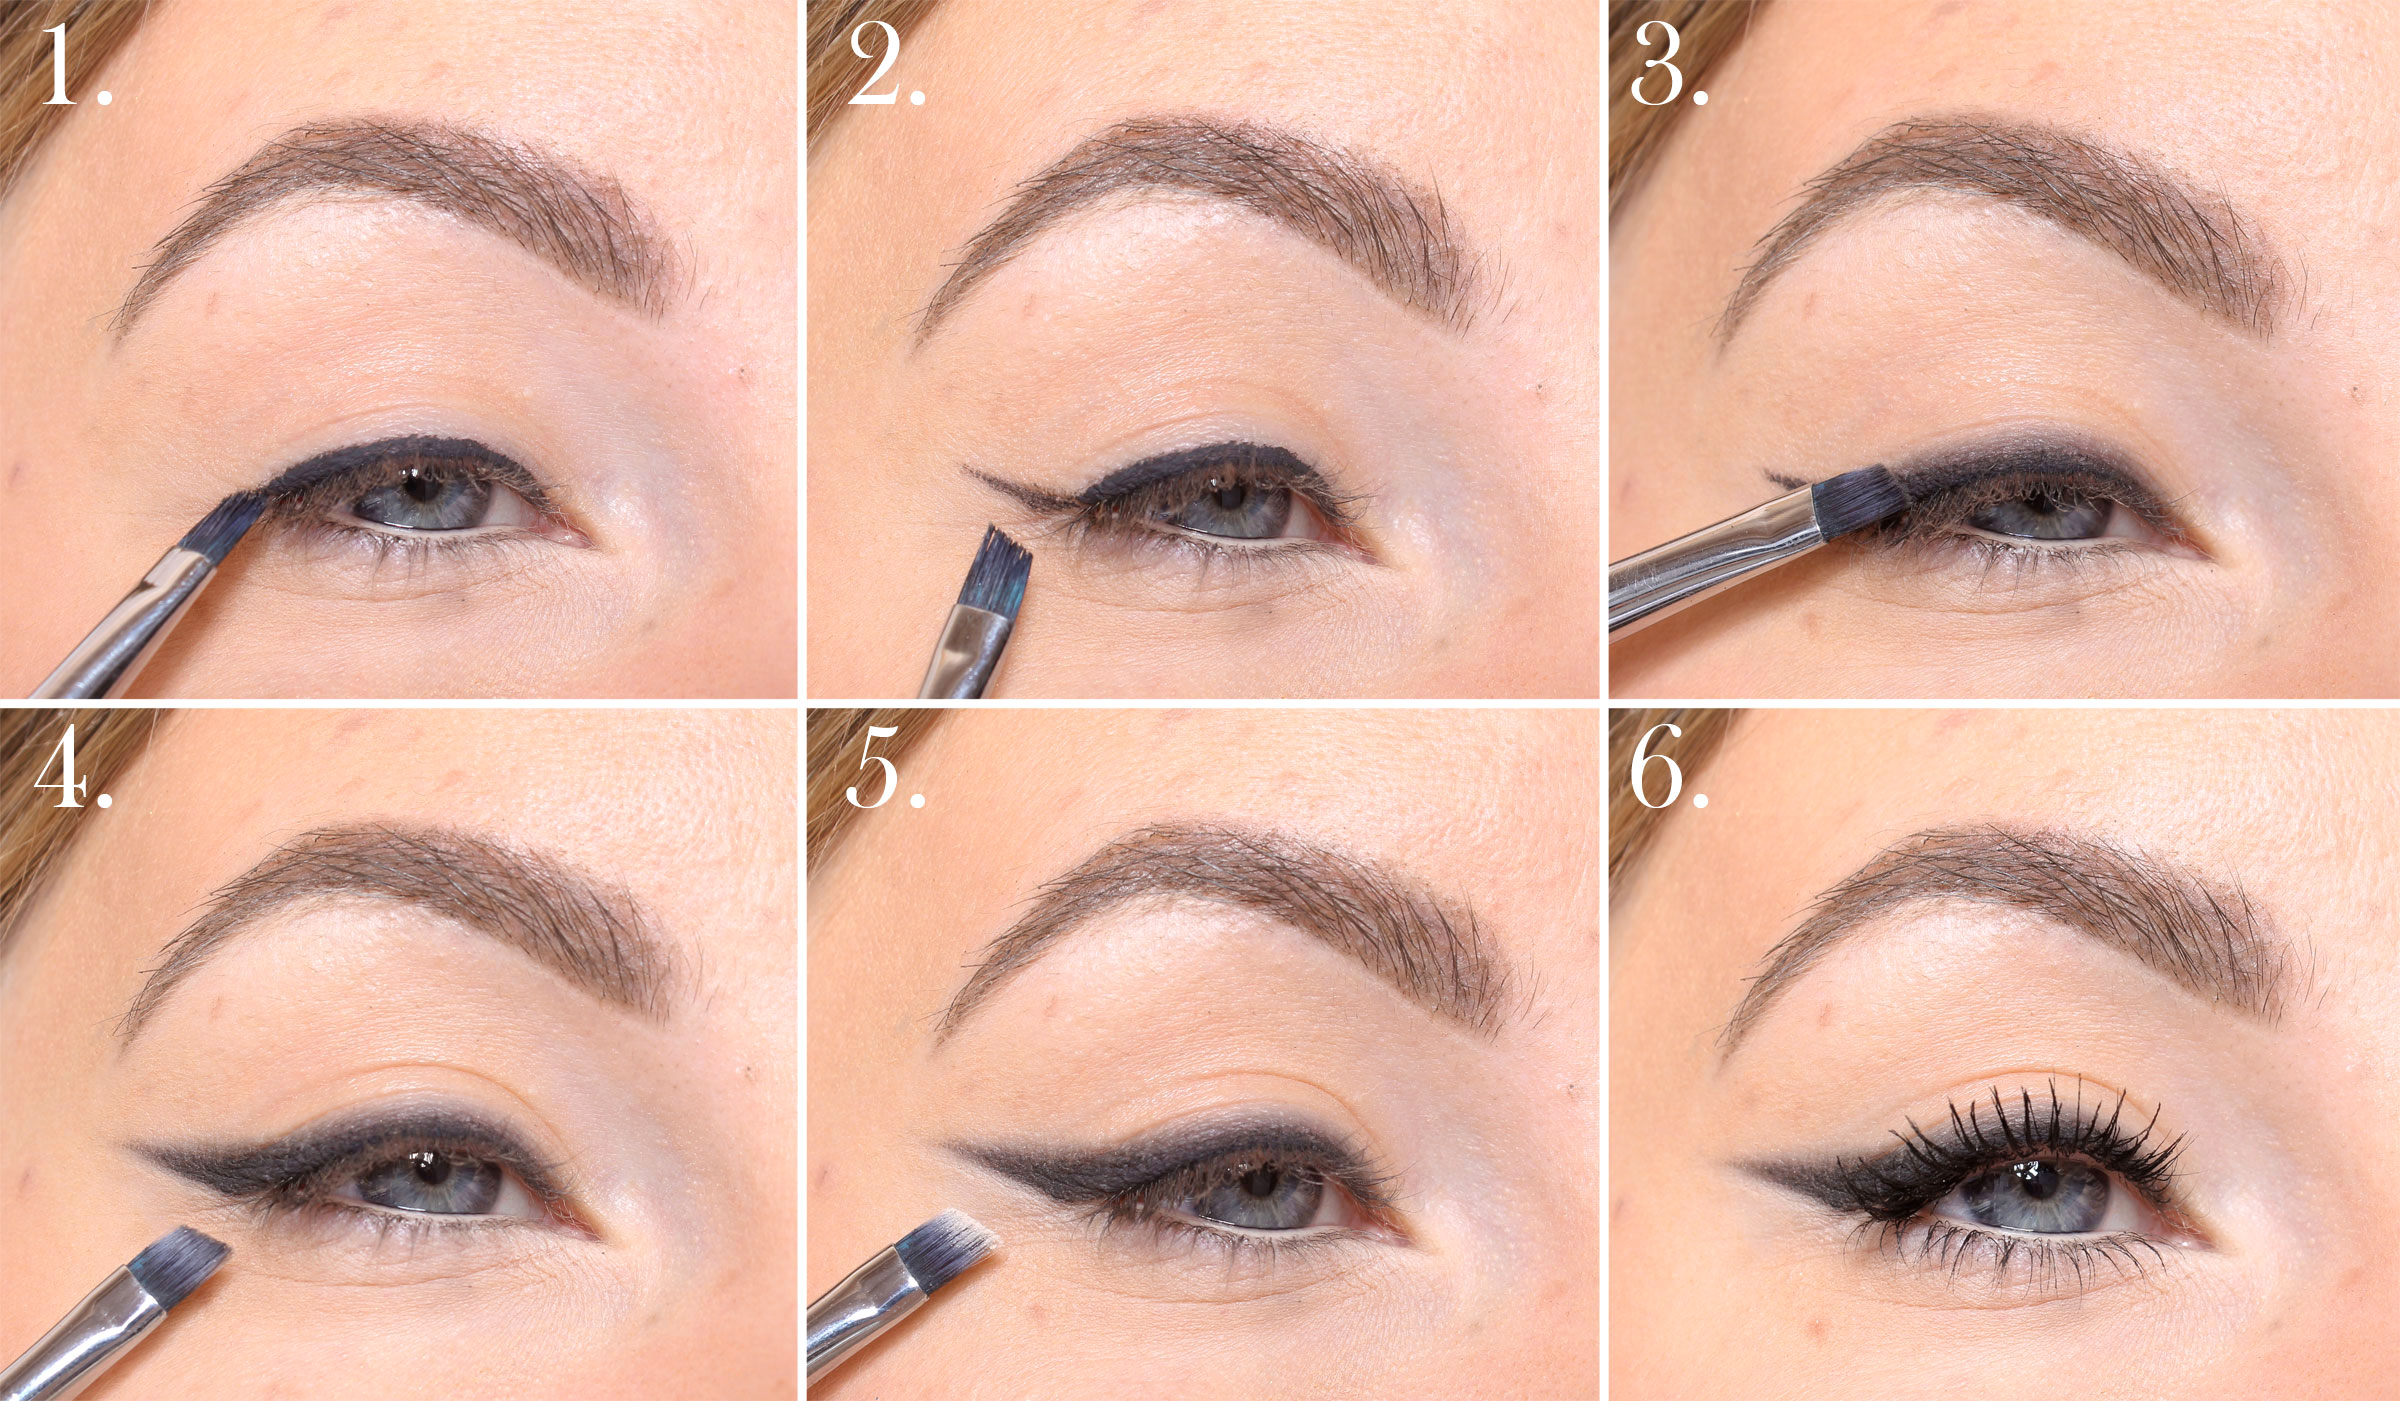
EYES:
Primer with eye primer + powder, Pixi Eye Bright Primer
- Moisturized brush + shadow: Paint the eyeliner along the lash line as close to your eyelashes as possible, Pixi Makeup Fixing Mist + Paese Kashmir Eyeshadow (602)
- Moistened brush + shadow: Paint the lower edge of the eyeliner wing
(Then wipe off excess from the brush so that it still has a little black on it but is not as wet) - Fade the line you just painted, now it has dried and is very easy to soften with a few quick strokes with the brush
- Fill in the eyeliner wing with dry eye shadow (with the same brush, it does not matter that it is still a bit moist)
- Light shadow under the eyeliner (optional), Paese Kashmir Eyeshadow (667)
- Black mascara on the upper lashes, Magnetic lash mascara
Clear!
My waterline is tattooed light. So for exactly the same eyes, you can supplement with glo Skin Beauty Eye Pencil (Peach) too.


Hugs are! ♥
Also read: Sharp eyeliner with Paese Penliner
![]()