Light glitter makeup step by step

I had this make-up when Frida and I were out dancing in Stockholm :) I started to put on make-up at 8.30 and when we went to bed at 04 it was still great!

I had done this makeup a few days before and felt nice in such a soft eye make-up without eyeliner and sharp edges / contrasts. So it became a pretty similar eye makeup as in that post but a little brighter and instead more glittery - even glittery eyebrows!

And instead of light lips, it became one of my favorite lipsticks both in terms of appearance and durability - the matte, dark pink shade Rumor from glo Skin Beauty.

Here is the result:

BASE:

All products are in my web shop Creativemakeup.se!

Face primer - Paese Makeup Base (Matte)
Powder - Paese Bamboo Silk Powder
Foundation -
 Pixi H2O Skintint (2 Nude)
Concealer - glo Under Eye Concealer (Golden)
Powder that neutralizes redness - glo Redness relief powder
Contouring - Contouring Palette (2)
Highlighter - Pixi Glow-Y-Powder (London Luster)
Rouge - glo Blush (Papaya)
Fixing Mist - Pixi Makeup Fixing Mist

Eyebrows - glo Micro Brow Pencil (Light brown)

Lipstick - glo Suede Matte Crayon (Rumor)

As always, the glitter is much more visible in reality than in the picture, especially this kind of glitter with very small and light grains. It's so effective in reality!

EYES:

All products are in my web shop Creativemakeup.se! All eye shadows except the golden one come from the trio palette Paese Matte Trio Eyeshadow (101)

  1. Eyeshadow primer, Pixi eye bright primer
    Light brown eye shadow on the eyelid
  2. The same shadow under the eye
  3. Wrap gold shadow along the globe line, at the inside of the eyelid and in the middle of the lower lash line, Glo Shadow Quartet (Mixed Metals)
  4. Dark brown shadow at the end of the eyelid
  5. Light glitter in the eyebrow, in the corner of the eye, in the innermost part of the eyelid and in the middle under the eye, Pixi Liquid Fairy Lights (Crystalline)
  6. Light shadow at the bottom of the lower lash line and under the brow
  7. Black mascara on all lashes, Magnetic lash mascara

If you want exactly the same results as my pictures, supplement with a light pencil along the waterline as well, e.g. glo Precision Eye Pencil (Peach). Mine is tattooed candle :)

Clear!

I got to learn something new the other day! My self-mixed paint wrap becomes incredibly effective in a short time if I sit in the sun and let it dry in before rinsing it out, hehe. So now the hair changes to purple-pink, but I like it!

I'm starting to get some questions about what I think of my hair now that I've had permanent hair for a while, because when I wrote the post if so, it was completely new. Now I have washed it several times and "got to know" my new hair - and I am SO SO SO happy! So really!

It gets a little flat when I sleep, I sleep in a nightcap and put my hair in it, but the only thing I need to do in the morning is to spray in conditioner water (have mixed myself in a spray bottle) in the lengths and dry shampoo in the scalp. Then I'm Shakira in a minute :) Best lazy hairstyle!

Hugs are ♥

My business week v. 23

This week in pictures looks almost like a holiday week haha, but you can do a lot of computer work outdoors and when you have flexible hours like me, you can also work more in the morning and evening and get a few hours off in the middle of the day, cozy!

You have to be careful while it's sunny - because that's not the case all summer :)

Work in the nice weather
Pictures and such I can not do when it is too bright, then I darken all windows and cave in the attic so that I see the screen properly.

On the other hand, it matched well with the solar week and the end of the month at the same time to fix salary reports, statistics and accounting. the can you actually do outdoors! :)

In the sun you do not see the screen at all, but to be able to sit out in the shade with a cup of coffee and fresh air that blows and at the same time get the job done - it's a luxury!

After a work day like this, you do not feel so good, however, because the day has been so wonderful that you felt free. The worse you feel in the evening, the better you feel hahaha. But this is much better! ;)

Salon job!
This week I have worked from home every day except two and have had four own customers + taken care of the baby when Annika had customers.

On Thursday, all my customers were relatively far away, two go only from Bromma and the third lives 70 km away. I do not write out where she lives because she is afraid of clinging to the salons on her toes now hehe, she told me that she tried to get her eyebrows plucked there several times because she could not go to Uppsala just for this since she moved from Uppsala, but no one gets to her eyebrows, she says. They always get too straight and she wants a high frame so that they can be seen over the glasses.

Here is the result after brow pick and color with me:

She was very happy!

Always fun to meet an old regular again too! She went to me regularly when she lived in Uppsala but now she has tried to go to others (until she now gave up) and it was a whole year since she was with me last - so we had a lot of new things to talk about :)

New company - The fitness family!
Miska and I have a mutual friend who is probably the only "real mutual" friend we have - that is, it is not "Miska's friend that I got to know too" or vice versa, but both knew Hampus before we knew each other! :)

Hampus ran the company Fitnessfamiljen several years ago and helped people lose weight and / or shape the body with muscles with incredibly fast results. But due to private circumstances, he needed to put it on ice. But now he has made an effort to start up the Fitness family again - with no less than the three musketeers Miska, Annika and I! Tjohoo!

All Monday we had a meeting and fix day with Hampus and preparing a real kickstart!

We posted this picture The fitness family on Instagram and Facebook. Feel free to go in and follow there! Right now it is mixed with Hampu's private photos but it will be a pure corporate site later.

To understand the unique, I must first present Hampus a little closer; imagine your nerdiest friend who can google a topic for several hours, multiply that person 50 times and you have Hampus, haha! When he gets interested in something, he sits with it all night!

Annika and he met when Miska turned 30 and they found each other in the common interest about bio-hacking and how the body works.

Hampus was overweight (more or less all his life) and has also had a lot of health problems, including cancer and blindness (!) Of glaucoma. When he recovered from the cancer, he decided to start taking care of his body and after getting really nerdy in various theories, he lost weight at record speed and became really fit.

Then he started helping others achieve results too - because he found a way that is effective without it becoming overwhelming! A special way to adapt diet schedules for what that particular person needs.

The fitness family became very big! Hampus and I did not hang out during that period but I remember that I followed it and cheered from a distance, there was a lot of talk about him in Gimo then even though he had lived in Stockholm for quite some time.

Today, the company has been down for many years and Hampus released everything. He has not felt well but now he is starting to come back into the light! Now he is back on square one again, also physically, and part of the start of the company will be to follow Hampu's journey 2.0!

Here you see Hampus and Annika making a to-do list!

Right now we are working on the structure to get started: We will start with 10 free test persons to collect new before and after pictures. Miska is building a website, we are going through all the old material and are designing a new logo and graphic profile!

Here are Hampus' previous before and after pictures. It will be fun to follow him again soon!

I first had some mixed feelings about writing about weight in the blog for beauty and weight is not the same thing. I'm writing about it now because I'm writing about entrepreneurship, that we should hook on to the Fitness family and do it successfully again. It is not a = character between slim and stylish. In the same way that it is not a = sign between unmade and ugly.

But the Fitness family has slightly healthier values than I experience that many other health accounts and companies have. Hampus trained only two days a week, often ate burgers and never went hungry. In addition, you have free days where you can eat exactly what you want and one day you should also eat more carbohydrates and then you can even eat sweets.

So it is not as strict as it looks but "a lot of results in a short time with as little performance as possible" is the point. As a kickstart to a healthier life! Then you can change your lifestyle so that you keep your results and feel good ♥

In addition, after my years in the beauty industry, I have realized that surface and vanity very rarely belong together. You think so when you read newspapers and follow various Instagram accounts, but for "ordinary private individuals" this is rarely the case. Tattooing the eyebrows and fixing the lashes does not mean that you will not be able to stop and in the end look like a Barbie doll. And getting help to lose a few kilos in weight does not mean that you will develop an eating disorder, but most people feel satisfied when they have reached their goal. However, one must be aware of both of these things why you do it so that it never becomes destructive or a must.

Could write huur far at all about this haha, but now I will stop :)

Speaking of working outdoors, our meeting looked like this on the evening twig when it started to get so cold that Annika and I froze. Miska kept minutes;)

Updated range of Paese
It is always just as boring when products are removed from the range, now several of Paese's eye shadows and blushes will be removed. But instead of being depressed that some of my favorites are disappearing - I am instead happy that we will bring in news!

In the next Paese order, in other words, a whole bunch of new eye shadows and blushes will come! :) KUL!

What takes time with Paese is that all shades are called numbers and not names, so you get completely dizzy when you have to make orders because you do not know the shades in your head. But this is how the list I published to my colleagues ended up:

I was very sad that Paese's blush in shade 35 had been discontinued, my favorite! But one of the new Artist blushes is quite similar and if possible even better so I did not have to be sad for so long :)

More makeup material on g
I also continue to produce makeup materials! Next week you will receive a post about applying eye shadow.

In addition, I have photographed a post about highlighter for oily skin. I have made such a post before as well but I was not so happy with the pictures. Do again do right!

It was my week there; a full day with the Fitness family, two days in Uppsala and other salaries, statistics and reports mixed with beauty articles and make-up studio.

Kind of like that :) Fairly effective on a sunny June week ♥

Hugs are!

5 different smokey eyes - step by step!

How to make a smokey eye? I get that question from time to time and there are several different smokey eyes to do. You can make different shapes, colors and use different products.

A classic smokey eye is black and in my opinion is easiest done with an eye shadow and there are lots of tips and tricks that suit everyone no matter what type of sweeping you want to do.

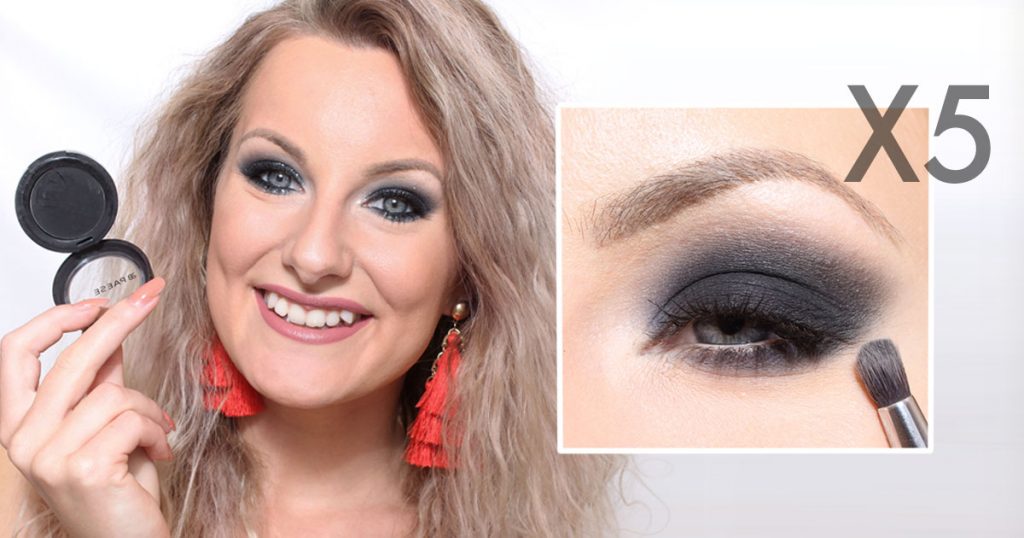
Here are 5 different smokey eyes that you can do!

5 different smokey eyes

Choice of products
When it comes to smoky eyes, you can make it easy for yourself and you can make it difficult for yourself - good products do this so much easier! You do not have to have luxury products to get a good smokey eye, but luxury and quality are not always the same.

Had I used a bad or too large make-up brush, skipped eyeshadow primer and used a bubbly eyeshadow, it would have been very difficult for me as well. Different smokey eyes are not that difficult as long as you have the right conditions :)

In addition to a good black eye shadow and eye shadow primer, I have to hit the makeup brushes:

nanshy makeup brushes

Here you see these three brushes in order of magnitude! If you only have to choose one so it works with only the middle brush Tapered Crease for it you can both apply + soot with, but it will not be as easy.

Small brush under the eye - Nanshy Pencil Brush is perfect for small areas, it is a bit hard but rounded so you get good precision without a sharp line.

Intermediate brush for application on the eyelid - Nanshy Tapered Crease is rounded and soft but quite compact, which means that it can still press properly with pigment. A flat brush often gives a sharper edge and since you want a soft fade, we want to avoid sharp edges, so it is good to apply with a rounded. It is just the right size too, many have an oversized application brush which can make it difficult.

Larger & softer brush for fading - Nanshy blending brush is bigger and softer without being too big or too soft;) An oversized brush gives no precision and it is easy to erase too close to the brow and get a panda effect. A too fluffy brush does not move the pigments and you have to press a lot with the brush to make something happen. This blurs effectively even though you are light on the hand and are the right size for you to have control over what you do :)


Smokey eye #1 - Top of the eyes

The first variant is to just soot on the top of the eye and it suits you who want a more discreet sooting. It does not enlarge the eyes - but it lifts the gaze!

It is also a good beginner-sweeper if you are not used to seeing yourself in dark eyes, because immediately when you get dark during eyes, you feel more made up, but on the top you can usually put on quite properly and still feel comfortable.

All remaining variants are an extension of this, so you do these steps regardless of whether you make a more intense variant further down in the post :)

Apply eyeshadow primer and dab with your fingertip.

Many people think it is an unnecessary product but I promise the difference is huge! On the one hand, the shadow attaches directly so that you both get a pigment-rich result, but also avoid the shadow falling under the eyes.

In addition, the make-up lasts all day and evening - otherwise the sweeping is like three black lines on the eyelid when you blink for a few hours, and that's not fun.

2. Wrap a little powder in the globe line, but not on the entire eyelid.

This makes it easier to get a soft fade later, because the primer is creamy until you apply eye shadow, so the more you work with the brush, the more pigment it attaches - if you have not already fixed the primer with a powder!

Dab / press the eyeshadow on the entire eyelid, out to the outer edge where your lashes end.

Be sure to place the shadow firmly down at the lash roots. Apply firmly with shade. Rather have a little shadow on the brush and dip several times, if you have too much on the brush it will fall under the eyes.

4. How high should you cast the shadow? Do this: Relax your forehead and look straight into the mirror, then apply the shadow over the crease line fold so that it is visible over the skin fold even though you are looking straight ahead.

Because if you lay too far down, the fading ends up inside this fold when you look straight ahead, then it looks like a sharp edge and not like a soft sweep.

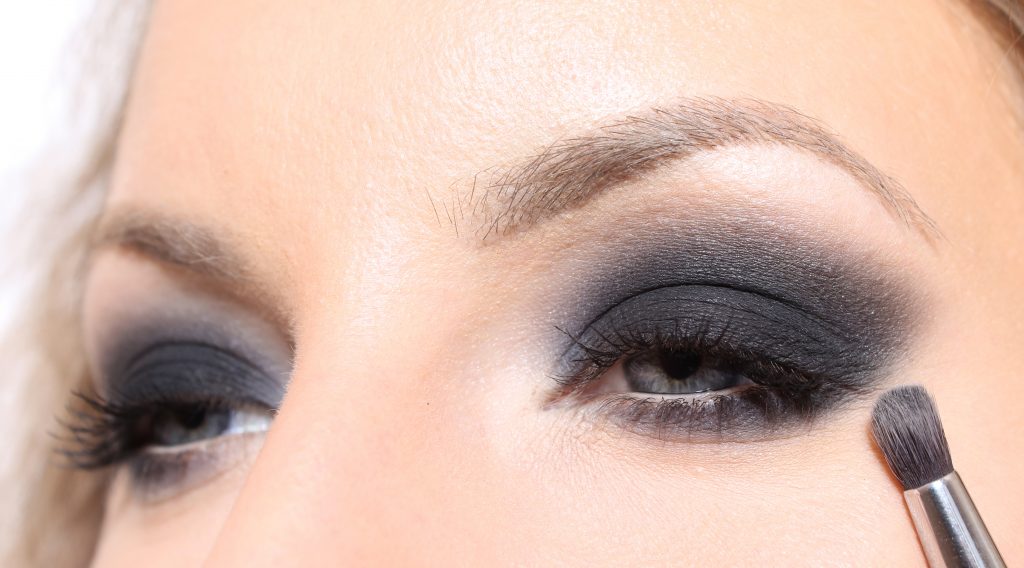
5. Place the blending brush right on the edge of the eyeshadow and sweep back and forth sideways (not upwards, you do not want the color closer to the eyebrows).

Thanks to the brush I first applied with is rounded and soft + that we put powder in the fade before we applied the black shadow, the fade was already quite soft before this step. But for a nice smokey eye, you want a very soft fade so I fade out a little extra.

If you tone out correctly (sideways and with a good brush), there is no risk that you tone too much! Blur until you are satisfied. The worst that can happen is that you have to add a little more shadow if you erase too much and it's not the whole world :)

Finish with a light eye shadow in the corner of the eye and under the brow for an invigorating effect.

7. Black mascara on the lashes. Then it's ready!
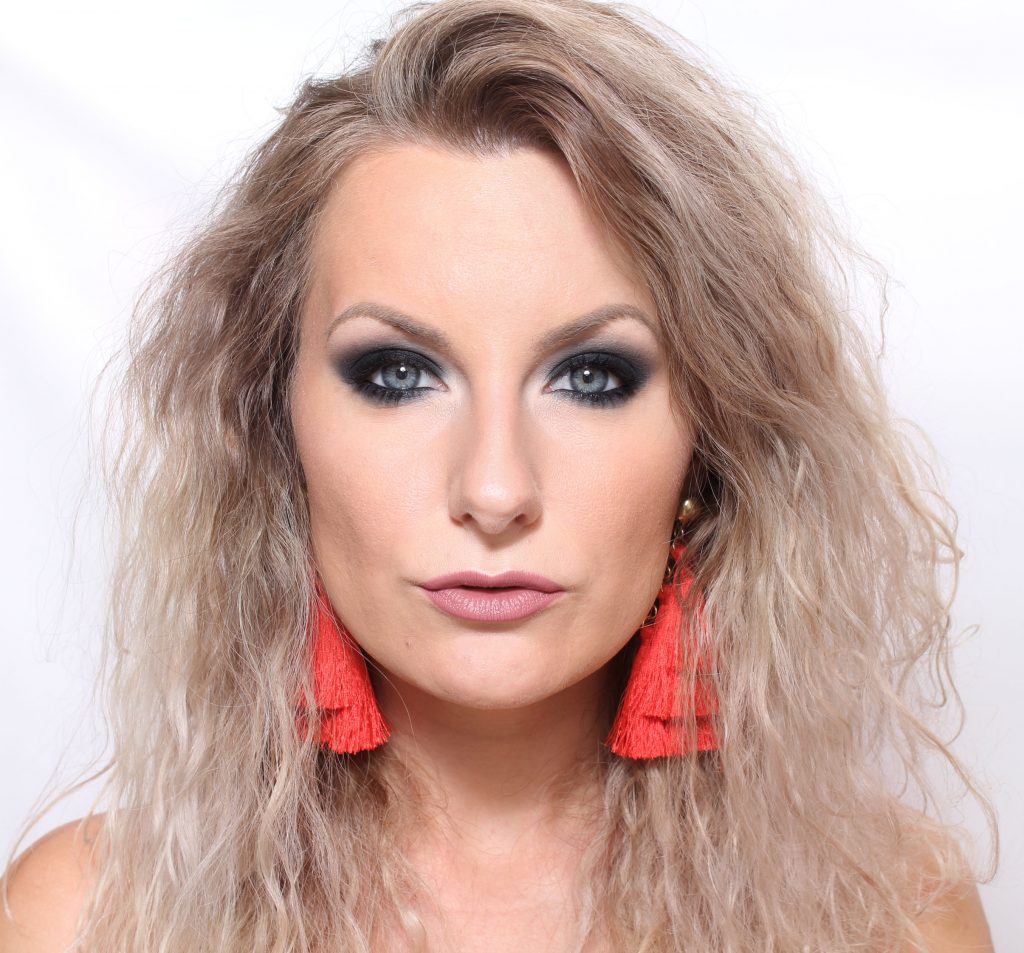
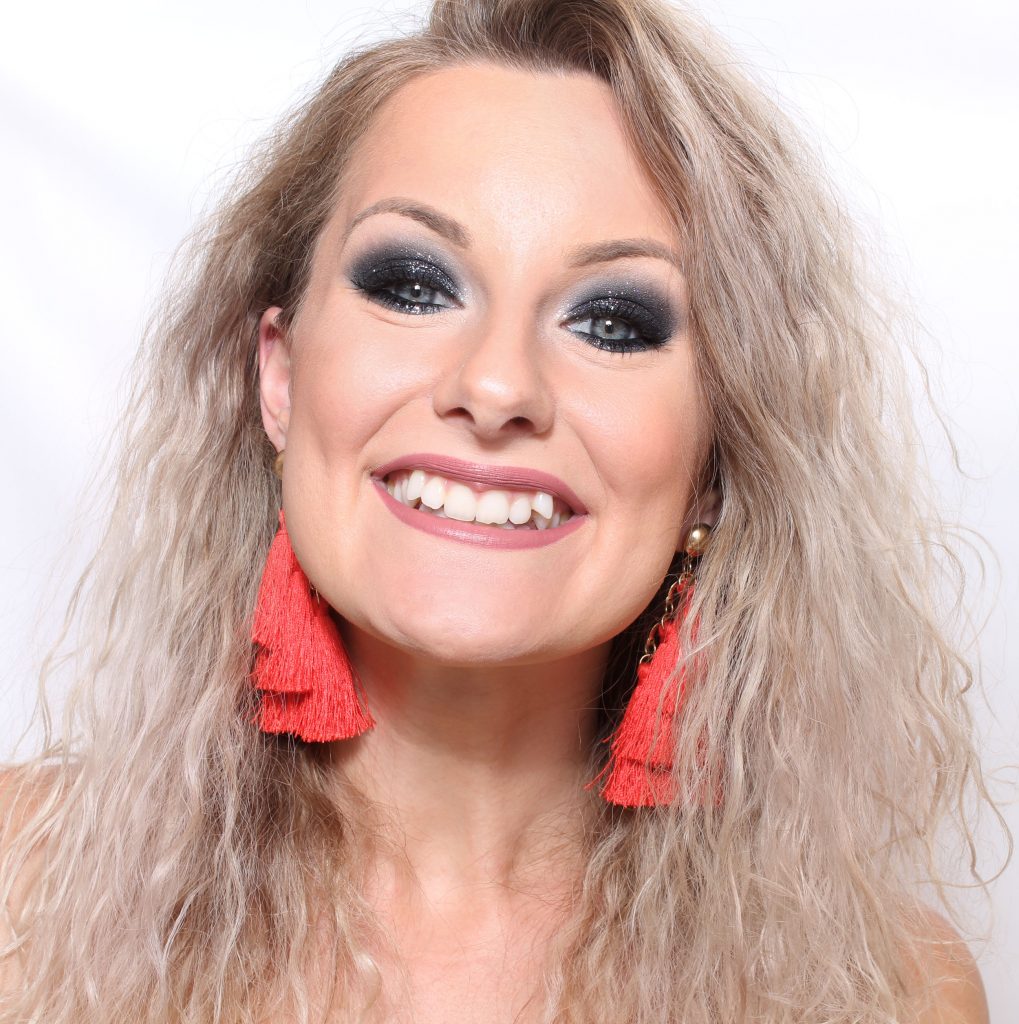
Here is the result!

Did you understand what I mean by the importance of making the fade across the globe line? Many people think it's scary to do so high up because when you half - close your eyes it looks like you lay very high - but you do not walk around and half - close your eyes later;) But if the fading ends up inside the globe line fold, the make-up looks hard because it becomes a sharp edge between the black on the eyelid and the skin tone under the brow.


Smokey eye #2 - Top & bottom

The former variant raises the gaze, but if you also want to enlarge the gaze + have a little more gunpowder in the soot, you can also put the eye shadow under the eye!

On this makeup, I have started from my own eye shape, which is also one of the easier ways to make a smokey eye. So that in the far corner of the eye I just tie together the shadow on the top and bottom so that the shape is still rounded like your own eye.

makeup smoky eyes

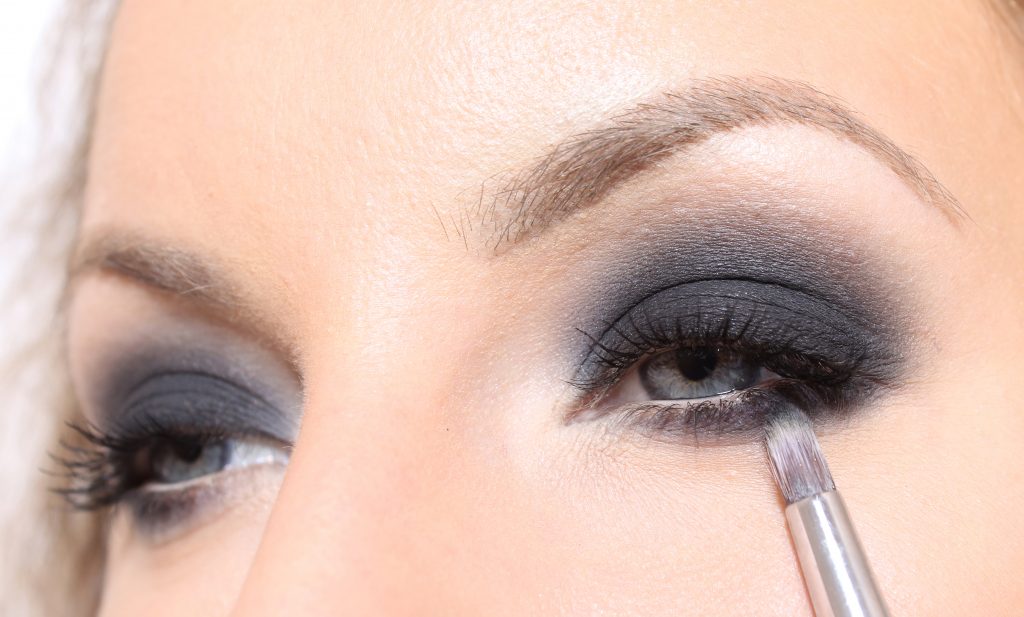
Here I have used Nanshy Pencil Brush which as I said is a bit rounded but small and harder. Perfect under the eye!

smoky eye makeup

Here is the result with soot both above and below the eyes!


Look #3 - Cat eyes

An elongated shape on the soot gives both larger eyes and an incredible lift when the eyes become more feline in shape. Very nice!

smokey eyes close up

In the outer corner, soot the shadow obliquely upwards. I usually aim approximately at the end of the eyebrow, but it depends a bit on how your eyebrows look as well, but the point is not to pull so far that you approach the temple. Not that it's wrong, but that's not the look we're looking for in this post :)

When you have placed the shadow diagonally upwards, you tie it together with the shading in the globe line.

gray smokey eyes

This is the result then!

I want to emphasize that I have tattooed my waterline in the eye light, so if you want that effect you can supplement with a light eyeliner, e.g. glo Eye Pencil (Peach)


Look #4 - Intense look

Now we have come to my personal favorite - the intense sweeping!

A carbon black and really, really intense smokey eye does not have to mean more eye shadow, but what makes the most difference is to put a black eyeliner along the waterline:

black smokey eyes

Here I use the Pixi Endless Silky Eye Pen in the shade Black Noir which is really carbon black. I paint both along the waterline, down under the lower lashes and as an eyeliner on the eyelid. It is waterproof and fits very well.

Tip! Draw a line with the pen along the waterline, allow to dry (the pen is creamy but dries quickly) and then paint again along the waterline. Then it sits like a rock late!

smokey eyes

And here is the result! Meow!


Look #5 - Glitter

Now I have shown the four simplest forms of a sweep, but I can not help but also talk a little about how to pimp a sweep, it's great fun!

One of my favorite ways is to dab light yellow eye shadow in the corner of the eye instead of the light one. But you can add color in a lot of ways, e.g. a colored eyeliner along the waterline instead of a black, colored mascara on the lower lashes, or dab colored eye shadow basically anywhere on the makeup.

But the easiest and unbelievable effective way is to add glitter! I went all in with glitter on this variant to show you, but you can dab a little in the corner of your eye only if you want. Or glitter in the eyebrows, I love that too! ♥

glitter smokey eyes

Pixi Liquid Fairy Lights is a liquid glitter in a sleeve with applicator, kind of like a lip gloss fixed with liquid glitter. The shade Crystalline is light with transparent gel and it is super easy to dab on a finished make-up! Great on top of light eye shadows too!

gorgeous smokey eyes

And here is the result of the last smokey eye look for today!

PRODUCT LIST:
All products are available for purchase in my webshop creativemakeup.se:

Eyeshadow primerPixi Eye Bright Primer
Black eye shadowPaese Kashmir Eyeshadow (602)
Light eye shadow – Paese Kashmir Eyeshadow (667)
Black eyelinerPixi Endless Silky Eye Pen (Black Noir)
Light eyeliner along the waterline - glo Precision Eye Pencil (Peach) (have not used it in the post because I have tattooed light, but you can supplement with this for the same effect)
GlitterPixi Liquid Fairy Lights (Crystalline)
Black mascaraMagnetic Lash Mascara
Makeup brush under the eye - Nanshy Pencil Brush
Makeup brush for application - Nanshy Tapered Crease Brush
Makeup brush for fading - Nanshy Blending Brush


Inspiration

I love smoky eyes and as I said, it is possible to make thousands of different variations!

Here is a selection of my different smokey eyes make-up:

different smokey eyes

Links to all these different smokey eyes:

If you want to see the entire product list (base, lips, eyebrows, etc.) and more pictures of the glittery variant, you can read my post Smokey eyes with glitter - step by step which I published last week.

Hope you liked the post on all the different smokey eyes and that the tips were helpful! :)

Hug ♥

Soft eye makeup & bright lips

A perfect look for you who want to emphasize the eyes but still want a soft make-up - no eyeliner or sharp edges and only soft transitions between the shadows.

To still have a lot of focus on the eyes, I added a little glitter in the corner of the eye and supplemented with bright lips, yummy! :)

BASE:

All products are in my web shop Creativemakeup.se!

Face primer - Paese Makeup Base (Matte)
Powder - Paese Bamboo Silk Powder
Foundation -
 Pixi H2O Skintint (2 Nude)
Concealer - glo Under Eye Concealer (Golden)
Powder that neutralizes redness - glo Redness relief powder
Contouring - Contouring Palette (2)
Highlighter - Pixi Glow-Y-Powder (London Luster)
Rouge - glo Blush (Papaya)
Fixing Mist - Pixi Makeup Fixing Mist

Eyebrows - glo Micro Brow Pencil (Light brown)

Lipstick - Paese Silky Matte Liquid Lipstick (706)

This eye makeup had been really, really good looking for colorful lips too, kind of dark pink. Or a matte red lipstick, so heavenly nice.

EYES:

All products are in my web shop Creativemakeup.se!

Eyeshadows are from the palette Glo Shadow Quartet (Mixed Metals)

  1. Eyeshadow primer, Pixi eye bright primer
    Brown eye shadow on the entire eyelid and globe line
  2. Tone out
  3. Gold shadow in the corner of the eye, in the inner part of the eyelid and in the fading. I applied with a damp brush.
  4. Light glitter in the corner of the eye, Pixi Liquid Fairy Lights (Crystalline)
    Brown shadow even under the eye
  5. Gold shade in the middle of the lower lash line, like a dot
  6. Black mascara on all lashes, Magnetic lash mascara

If you want exactly the same results as my pictures, supplement with a light pencil along the waterline as well, e.g. glo Precision Eye Pencil (Peach). Mine is tattooed candle :)

Clear!

Hope you liked the makeup!

Hug ♥

Smokey eyes with glitter (Step by step)

Coming soon is a great post with step by step tips on 5 different smokey eyes!

But before that, you get a smoky glitter bomb that is suitable when you want to be really glamorous! So heavenly nice I think :)

BASE:

Face primer - Paese Makeup Base (Matte)
Powder - Paese Bamboo Silk Powder
Foundation -
 Pixi H2O Skintint (2 Nude)
Concealer - glo Under Eye Concealer (Golden)
Powder that neutralizes redness - glo Redness relief powder
Contouring - Contouring Palette (2)
Highlighter - Pixi Glow-Y-Powder (London Luster)
Rouge - glo Blush (Papaya)
Fixing Mist - Pixi Makeup Fixing Mist

Eyebrows - glo Micro Brow Pencil (Light brown)

Lipstick - glo Lipstick (Pillow Talk)

Dark and intense but still glittery and happy! ♥

EYES:

  1. Eyeshadow primer, Pixi eye bright primer
  2. Wrap powder in the globe line (not on the entire lid) to facilitate the fading of the black shadow then, Paese Bamboo Silk Powder
  3. Black eye shadow dabbed on the eyelid, Paese Kashmir Eyeshadow (602)
  4. Soot it over the globe line with the same brush
  5. Fade out extra with a softer brush
  6. Light eye shadow in the corner of the eye and under the brow, Paese Kashmir Eyeshadow (667)
  7. Black mascara, Magnetic lash mascara
    (because I used the pictures for the smokey eye post that will come soon, I added mascara already here, but the easiest is of course to paint the mascara at the end)
  8. Black shadow along the lower lash line
  9. … And outwards in the corner of the eye for a cat eye shape
  10. Black eyeliner along the waterline, down below the lower lashes and along the upper lash line as well, Pixi Endless Silky Eye Pen (Black Noir)
  11. Light glitter in the corner of the eye, under the eye and on the eyelid, Pixi Liquid Fairy Lights (Crystalline)
  12. Mascara on the lower lashes as well

Clear!

Hope you were inspired ♥

Hug!


en_USEnglish