Make-up before & after

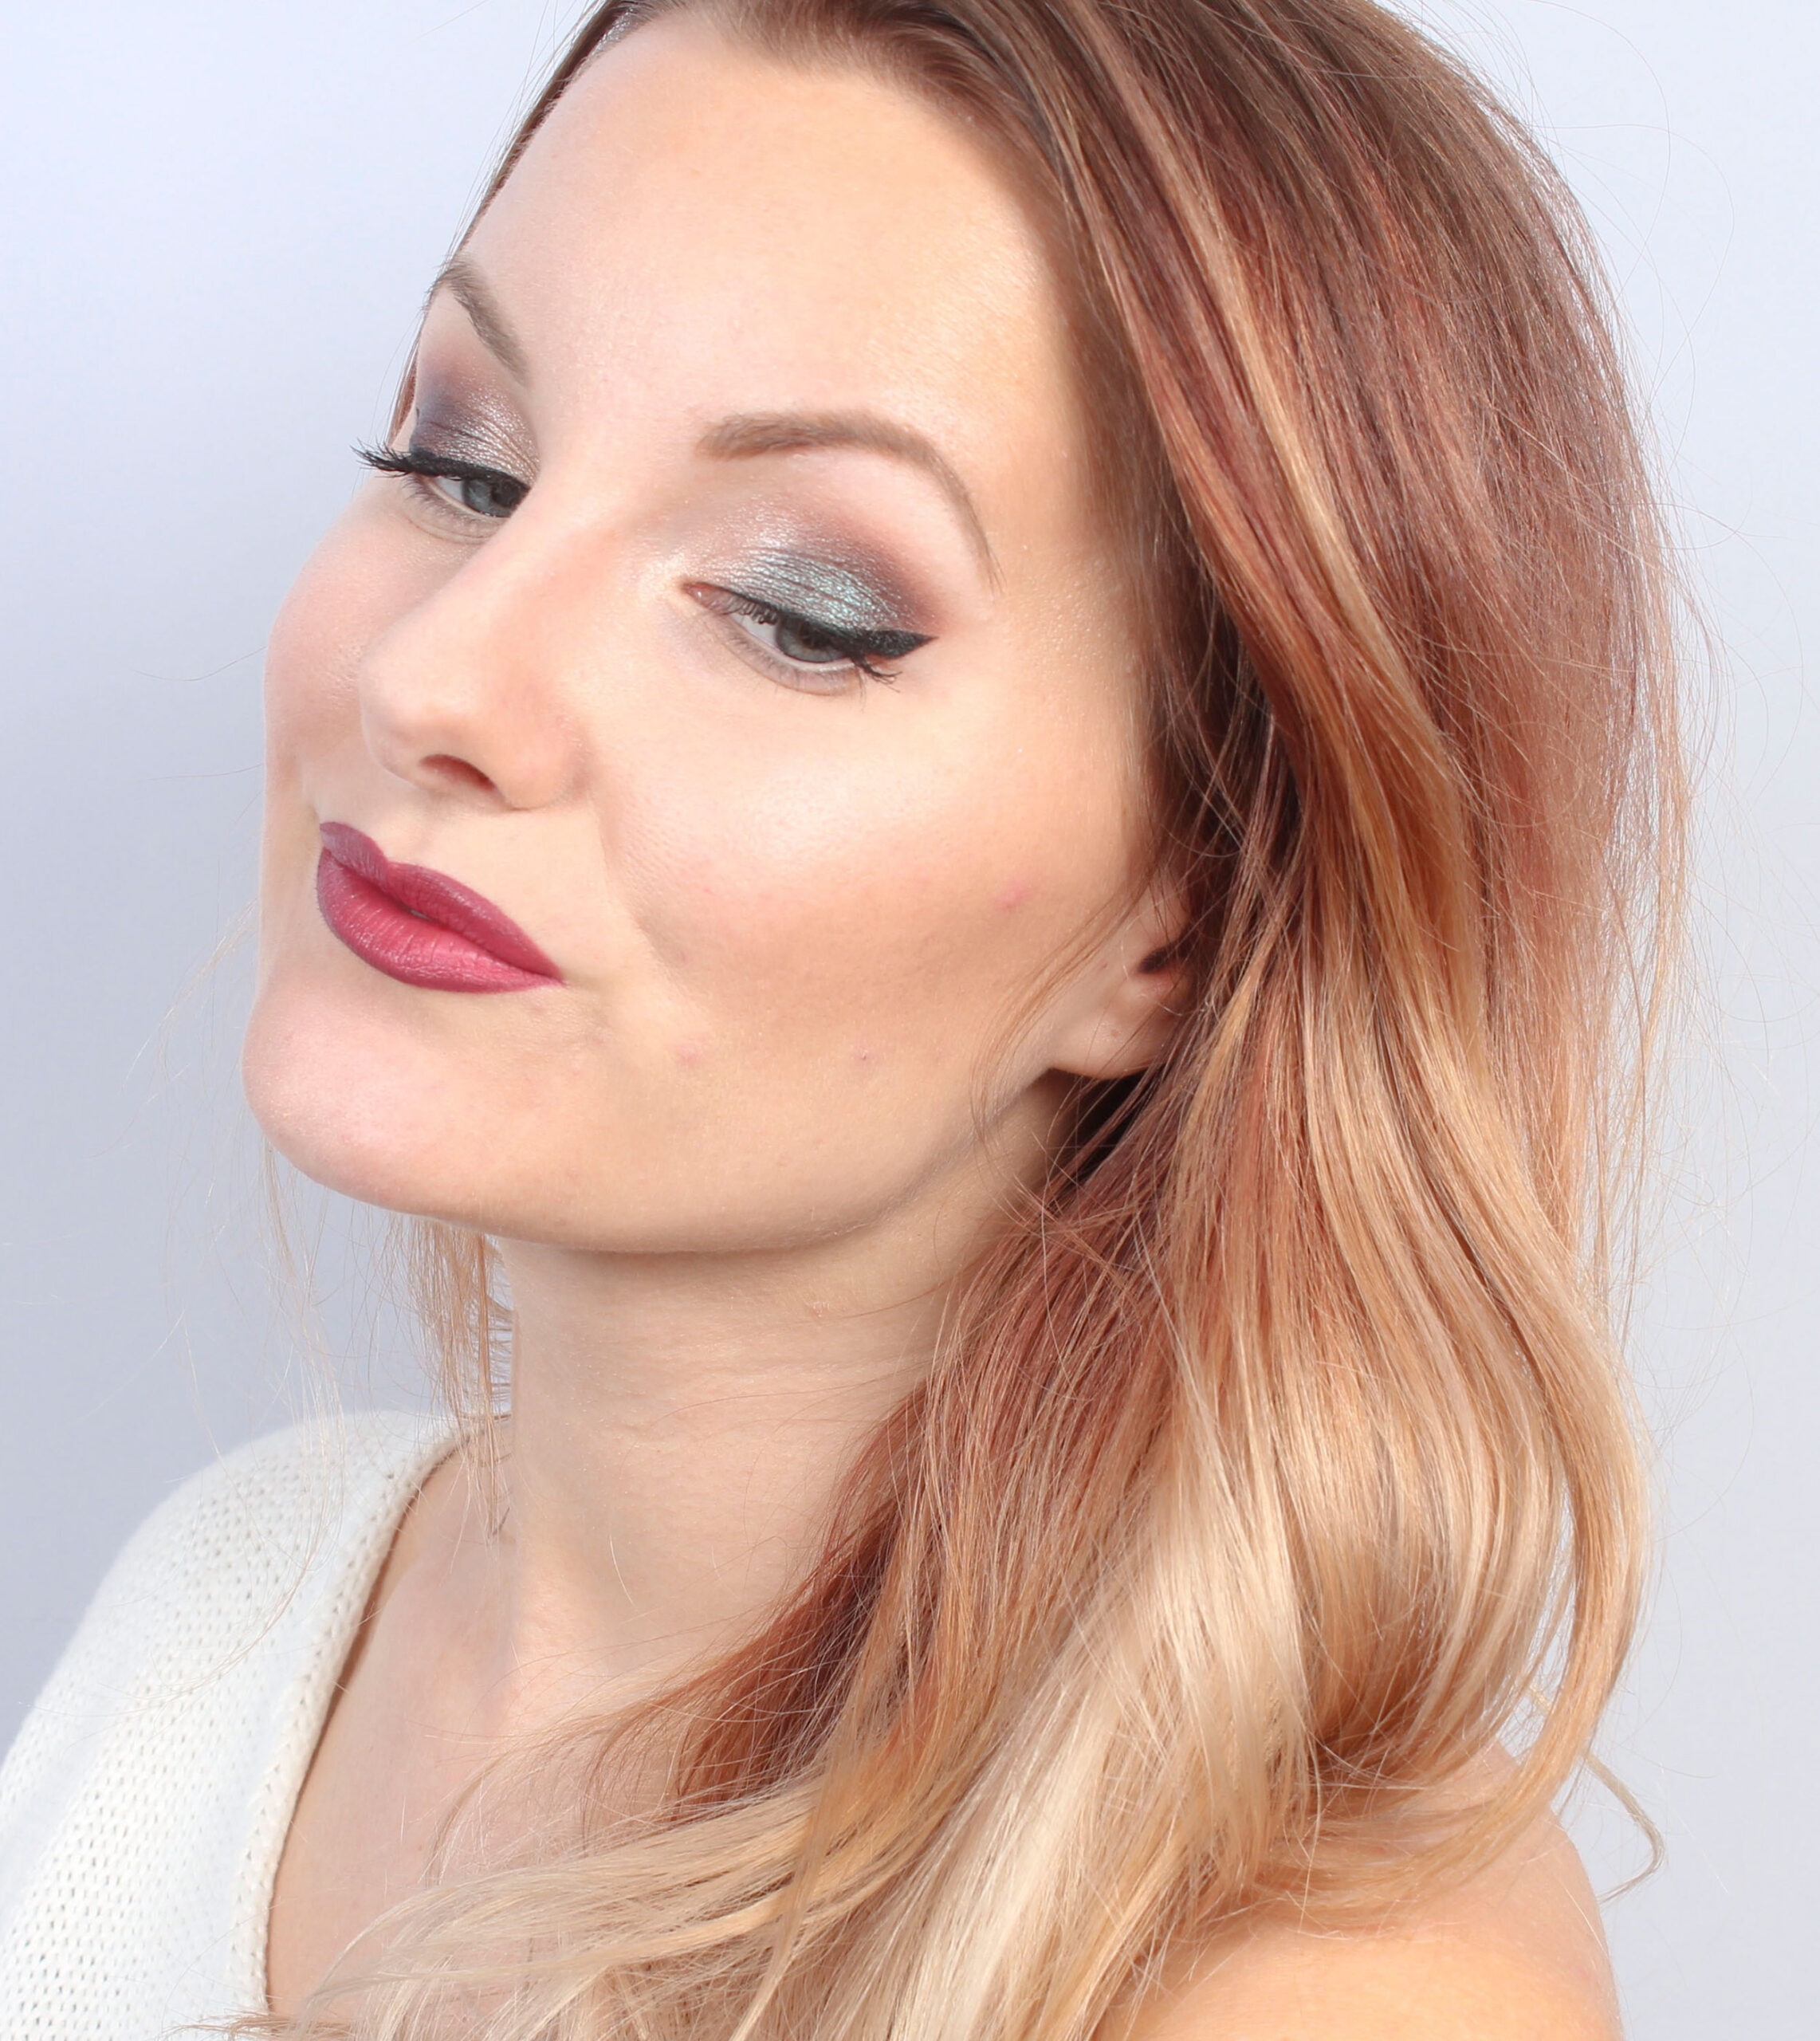
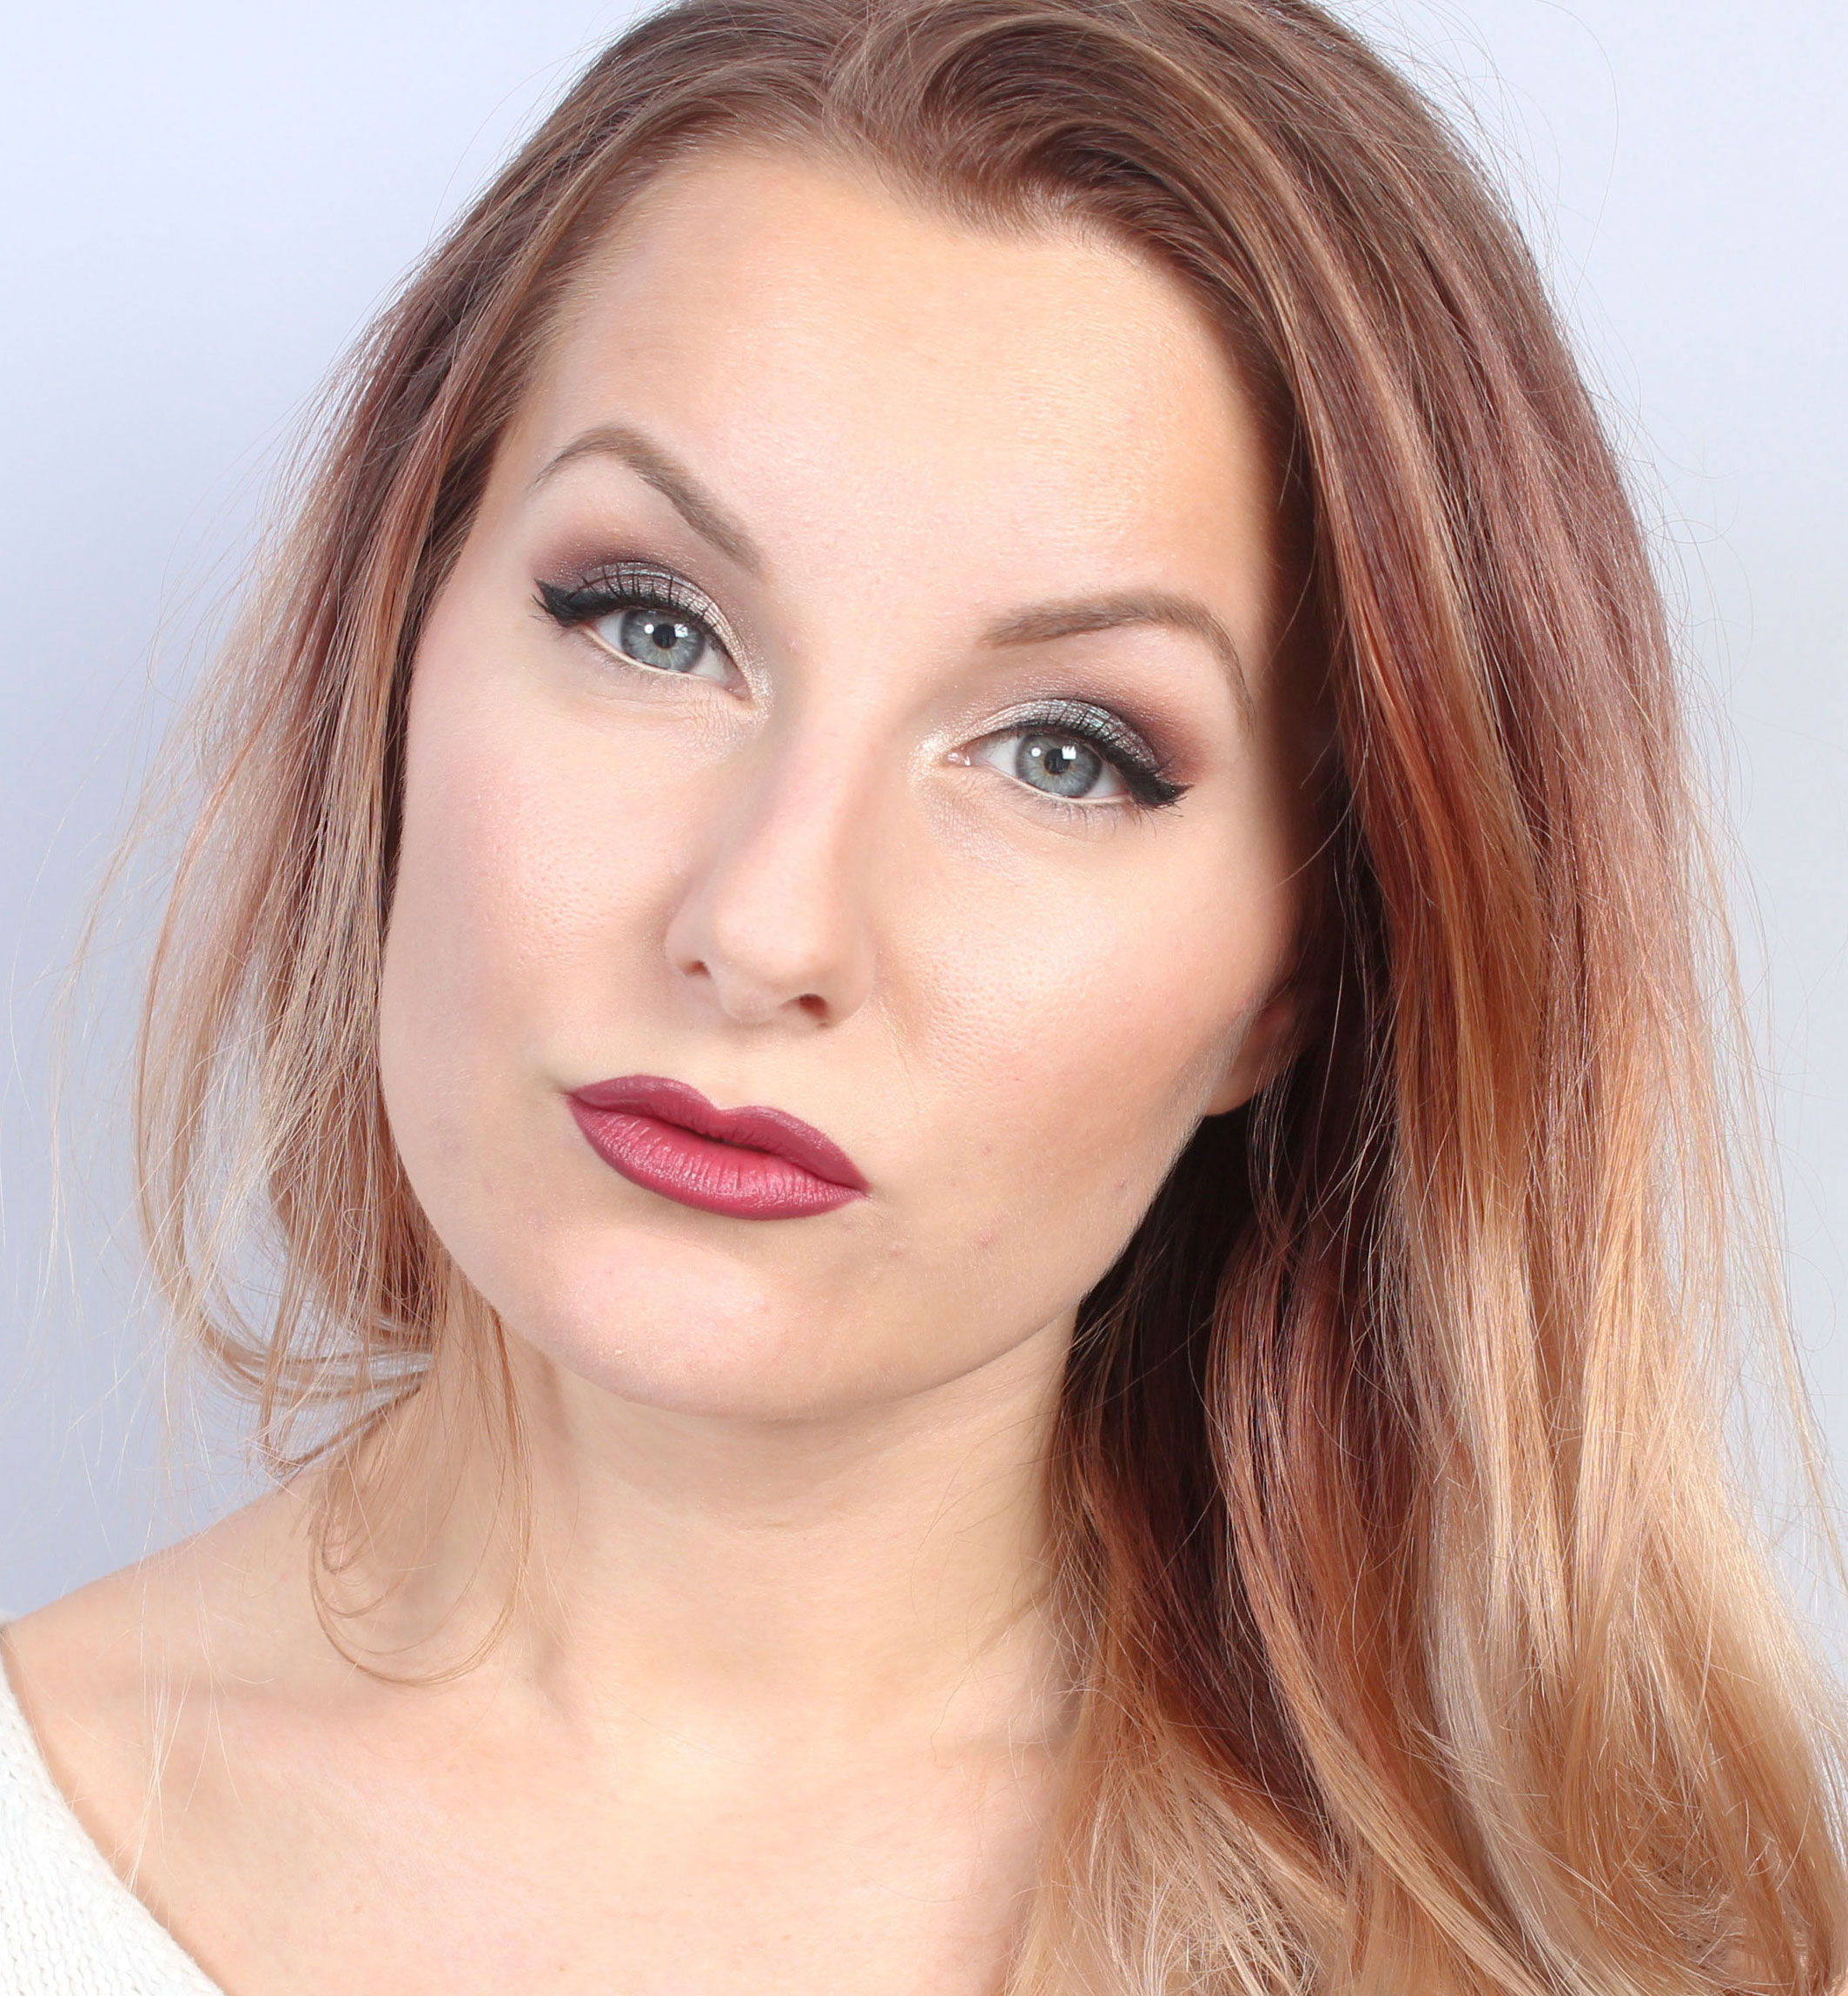
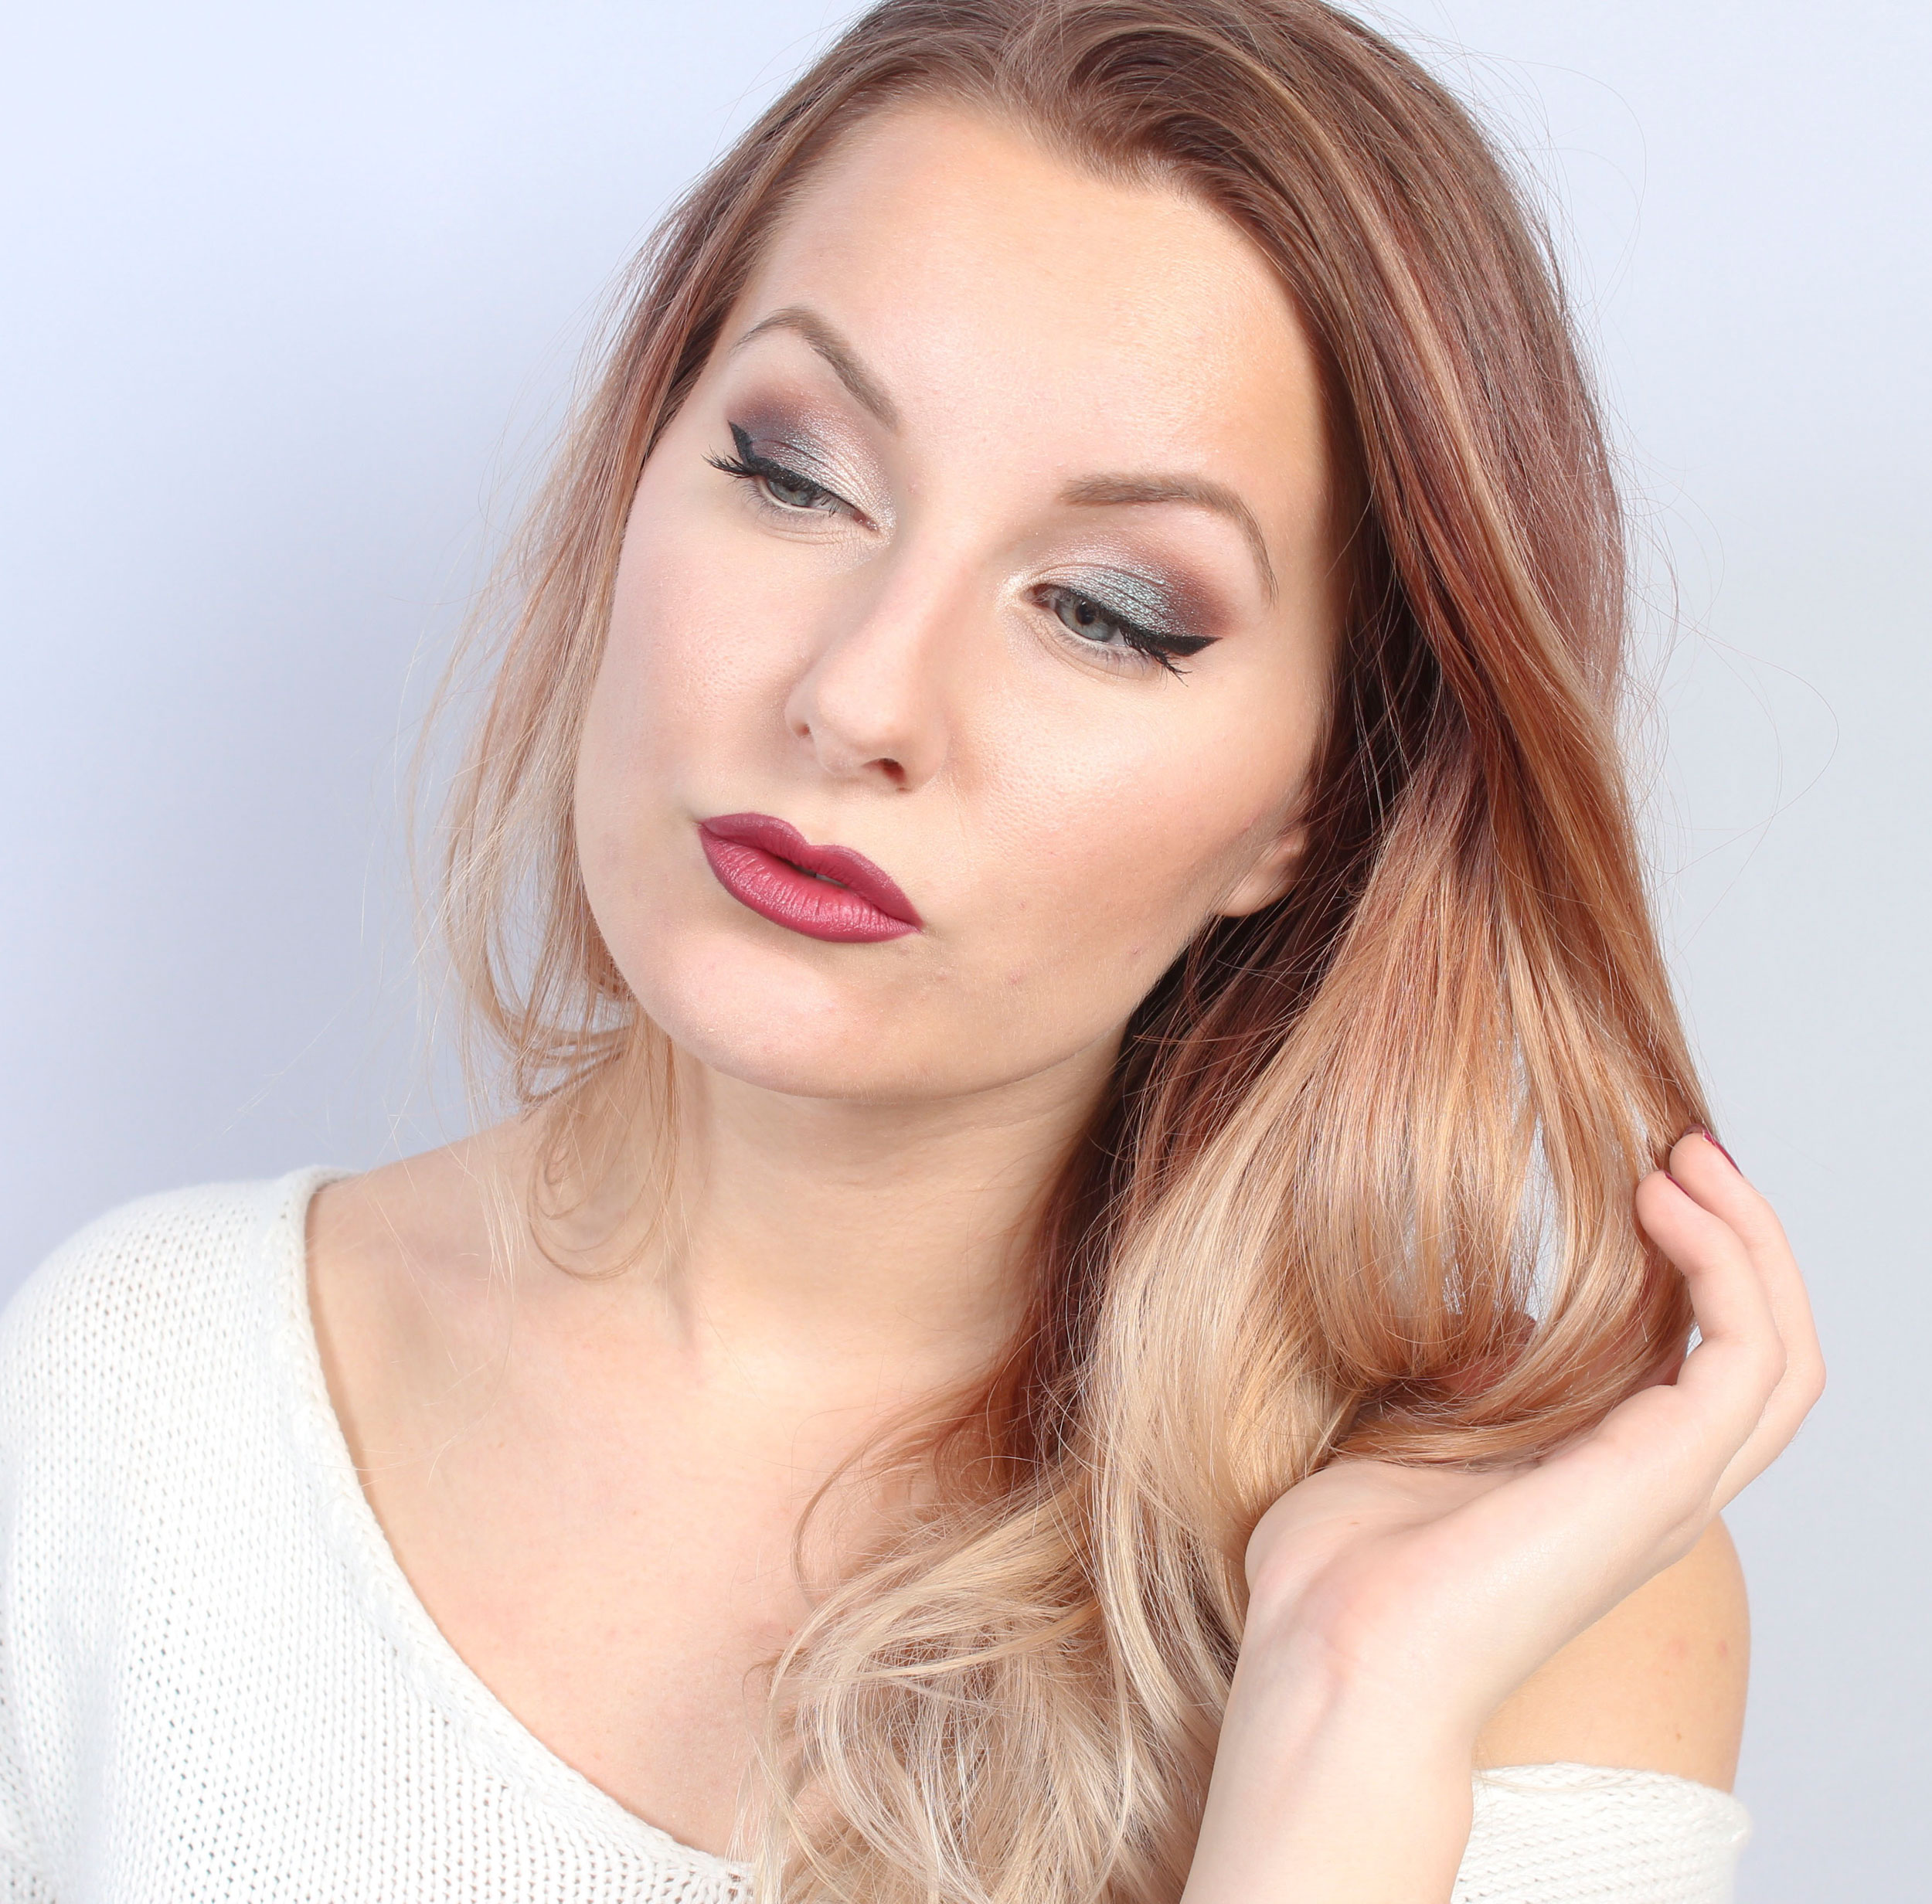
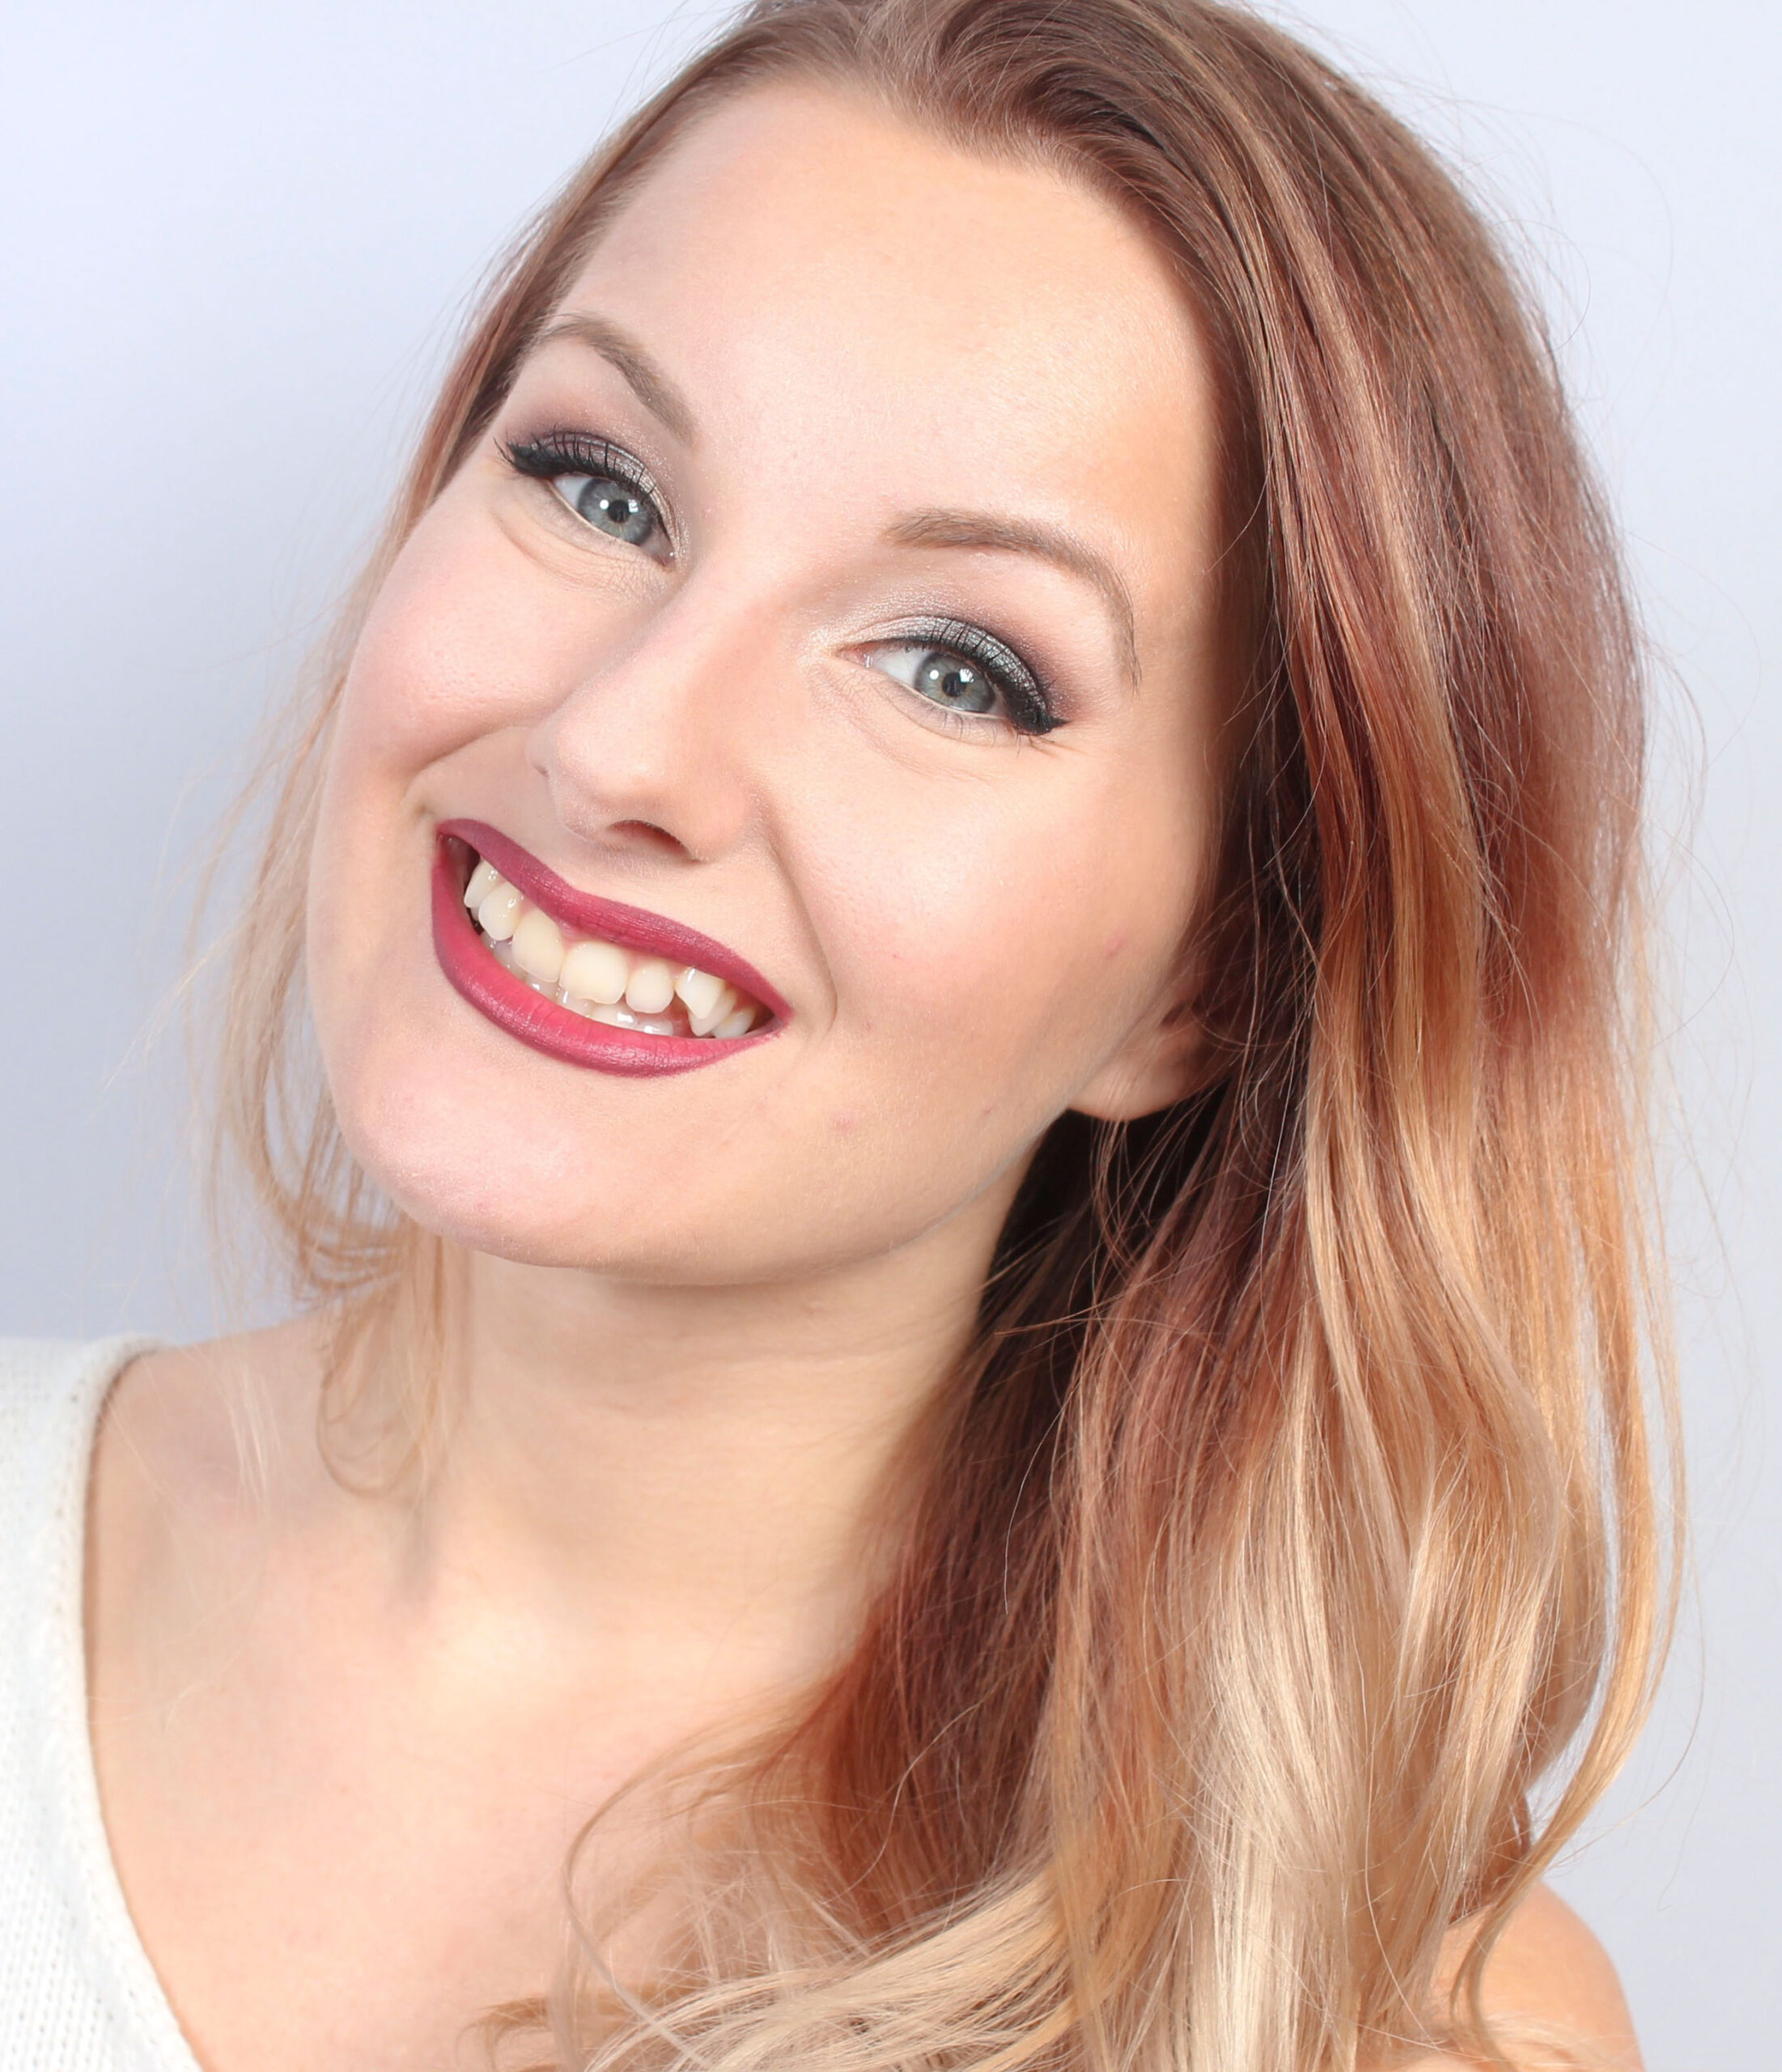
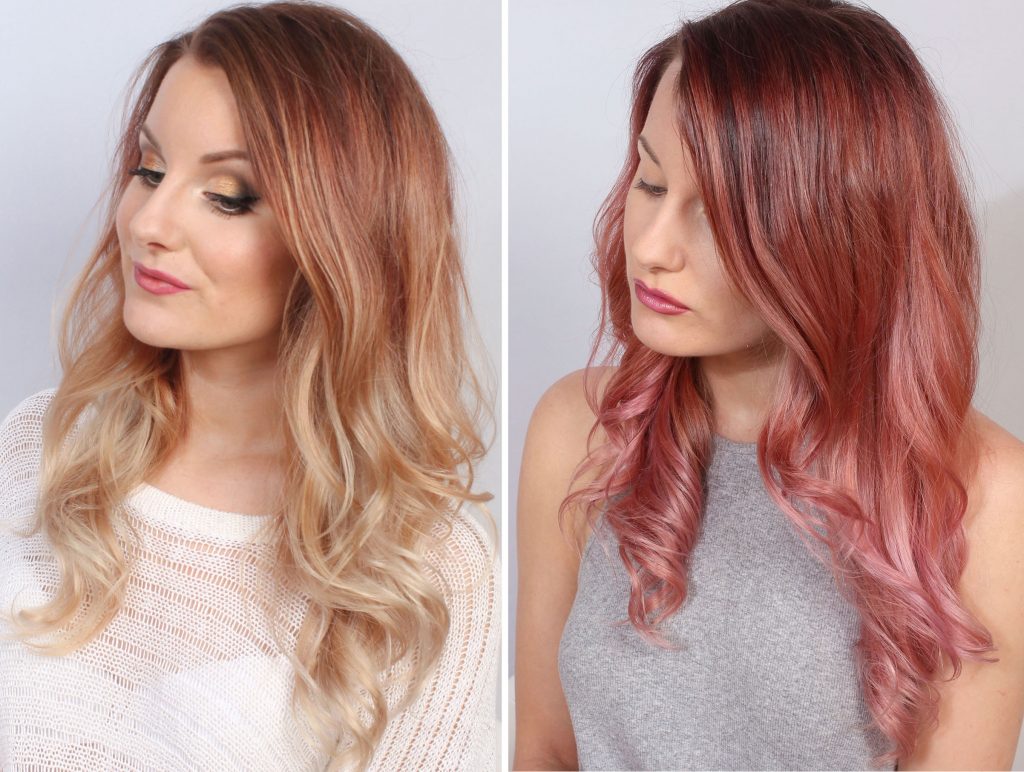
Here are before and after pictures of a make-up consultation I did on a customer at the salon last Friday:

img_6682_vattenstampel

Fast & natural bass
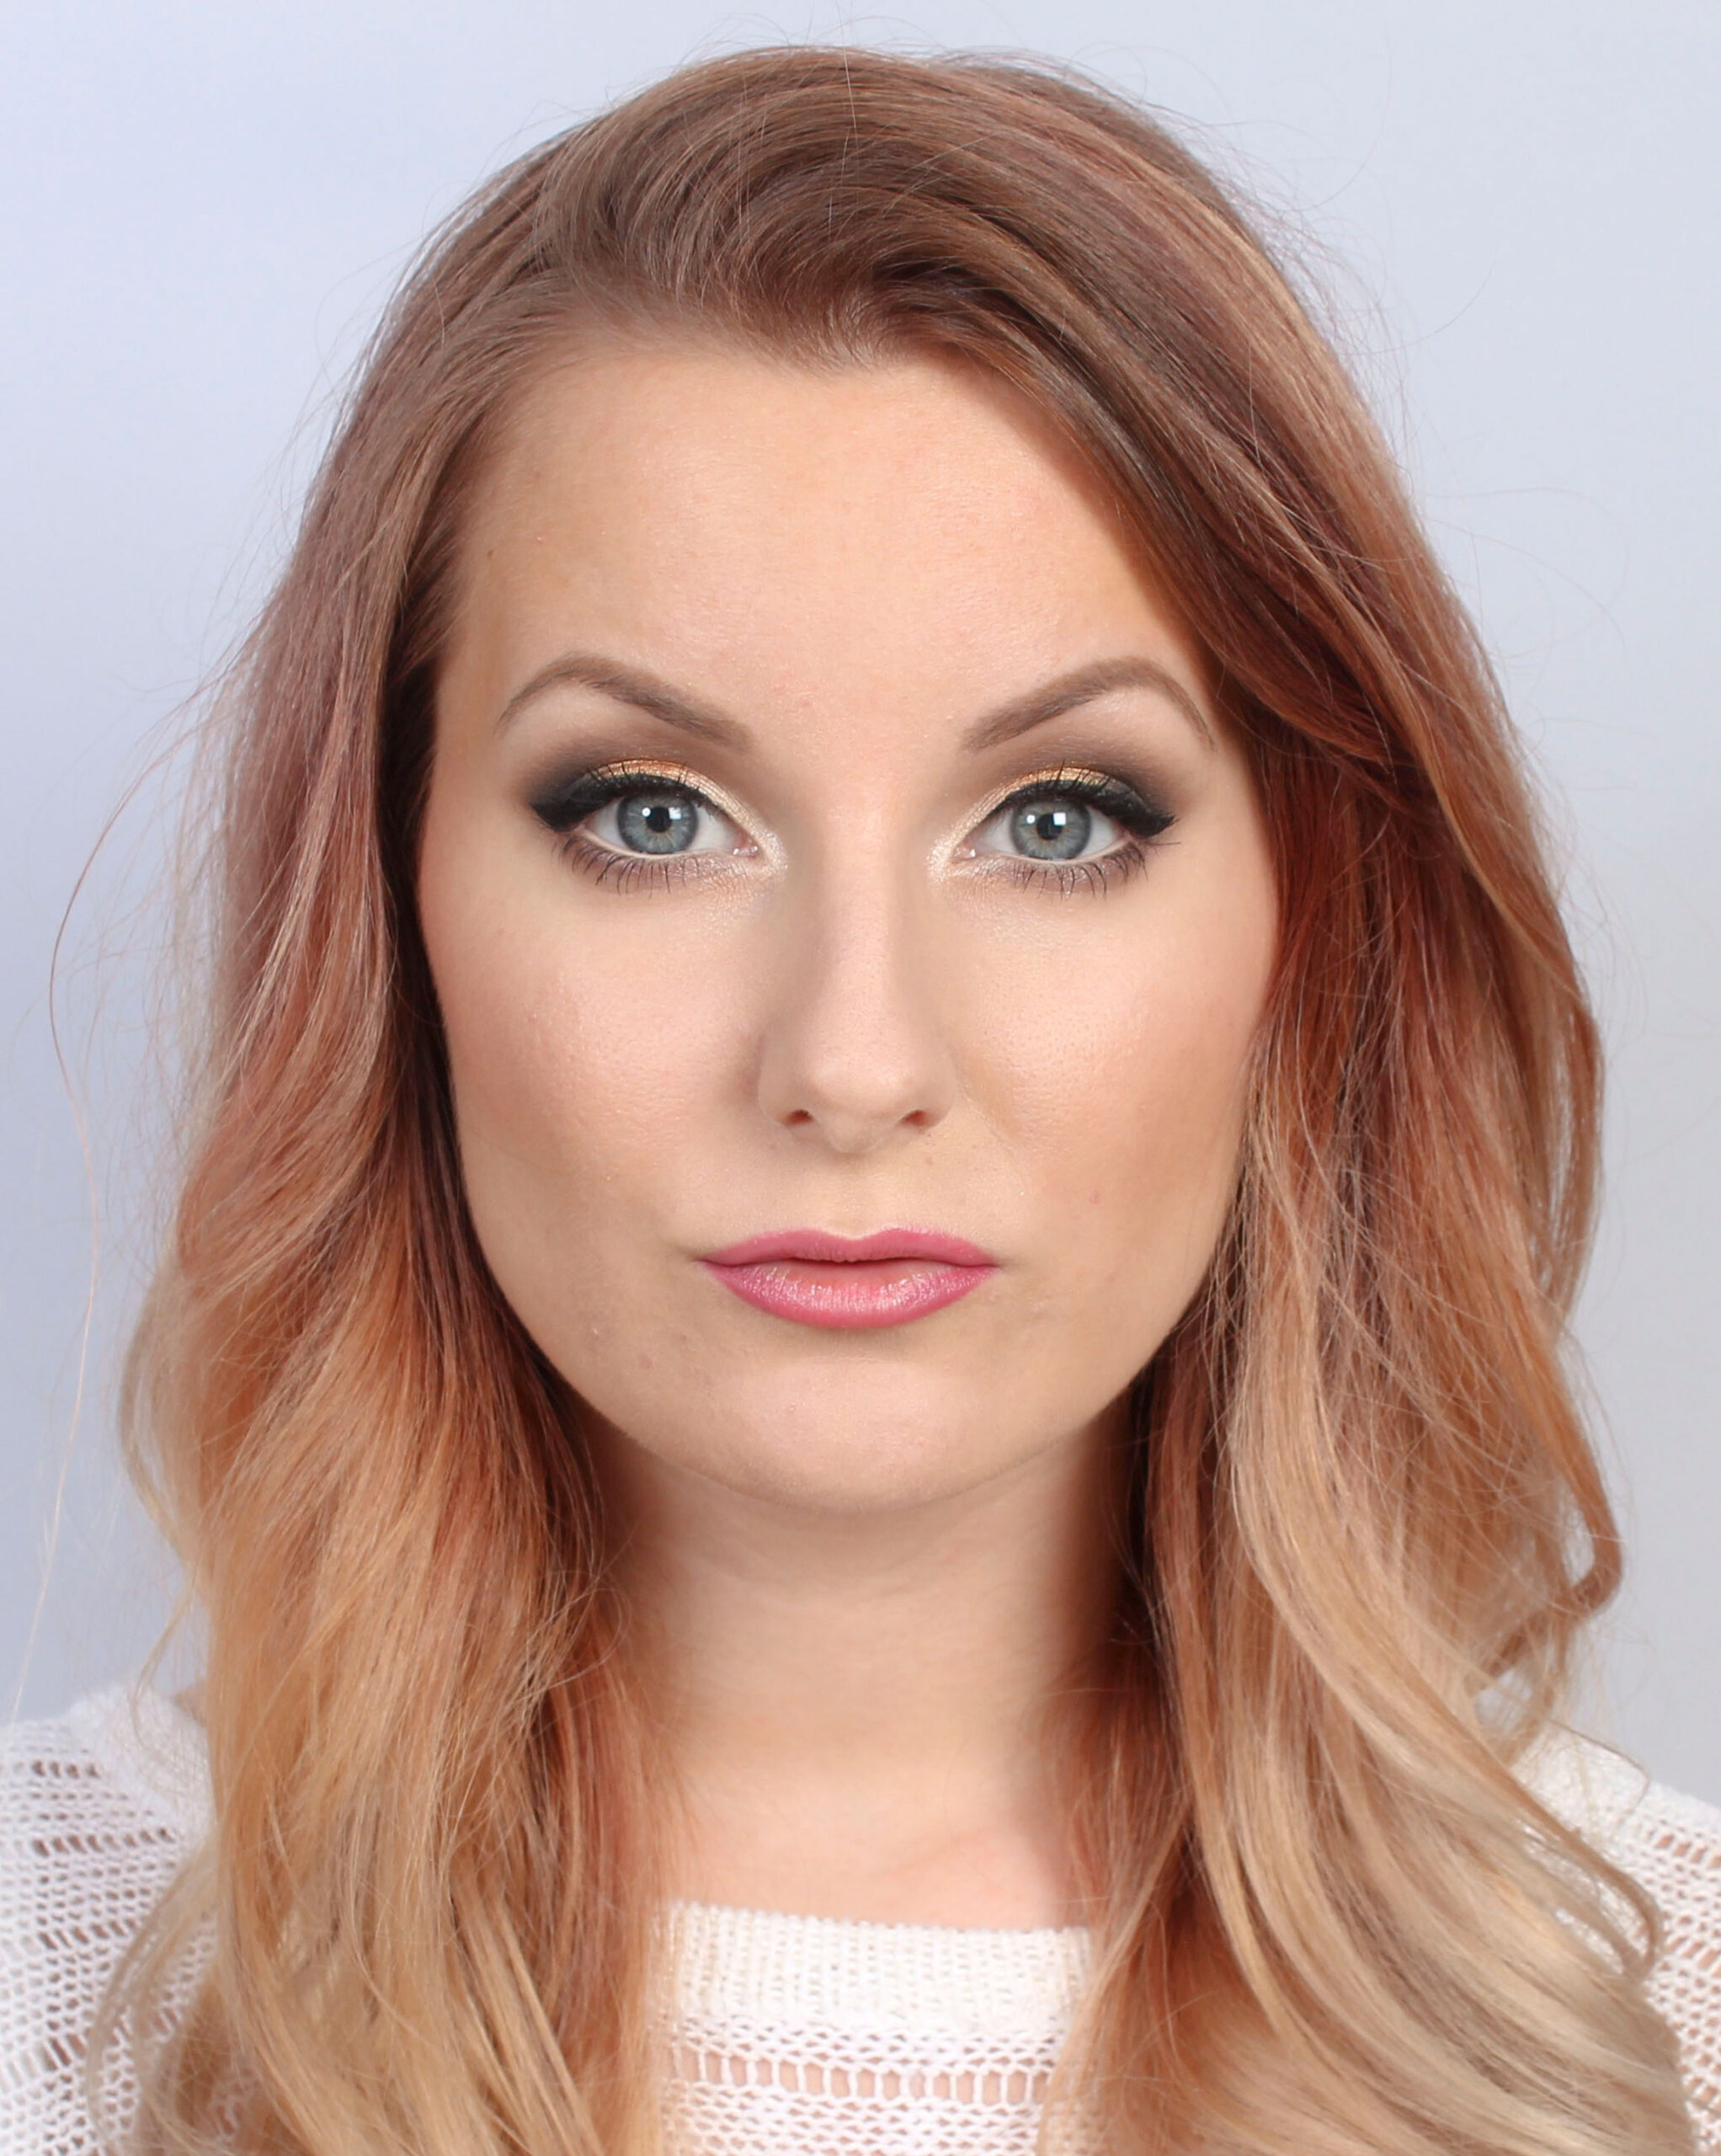
She wanted a fast base that neutralizes redness and is very natural. So we started with green face primer, then added a colored day cream (which also gives luster) that has a concealer in the cork that we dabbed on some small dots and visible blood vessels.

Then some sun powder and blush for more color, and the brows she just wanted some gel in so I combed in a little colored brow in them only :)
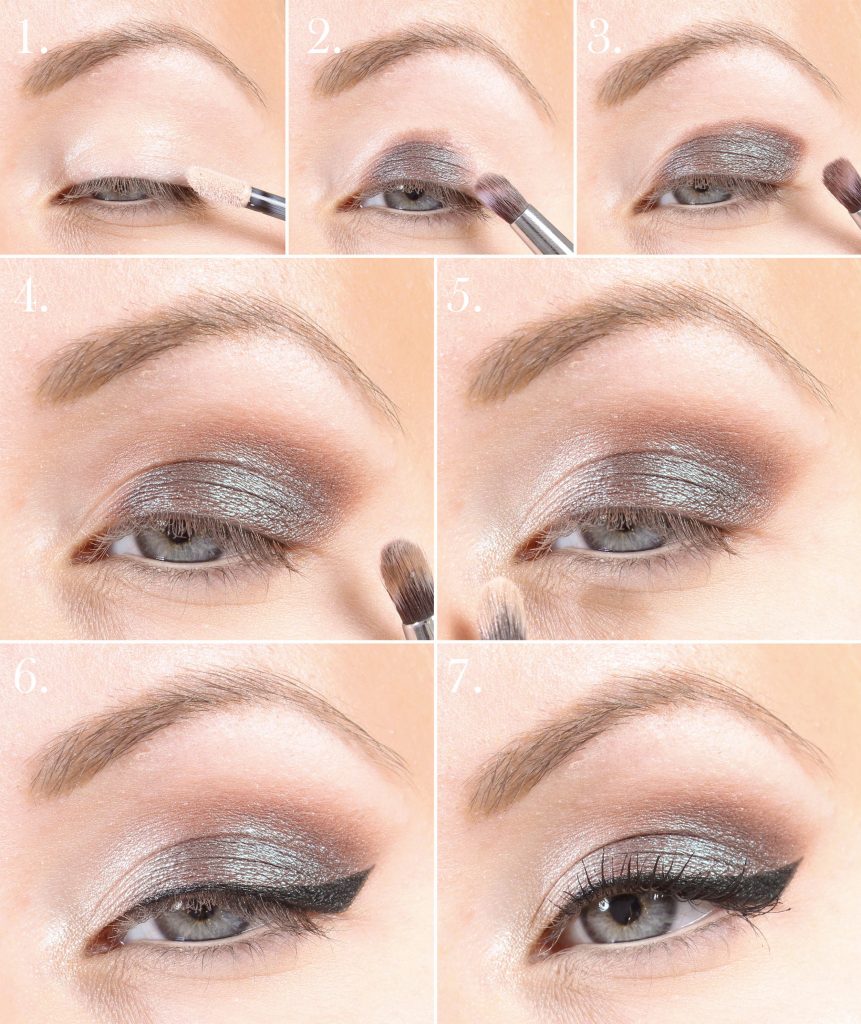
Eyes
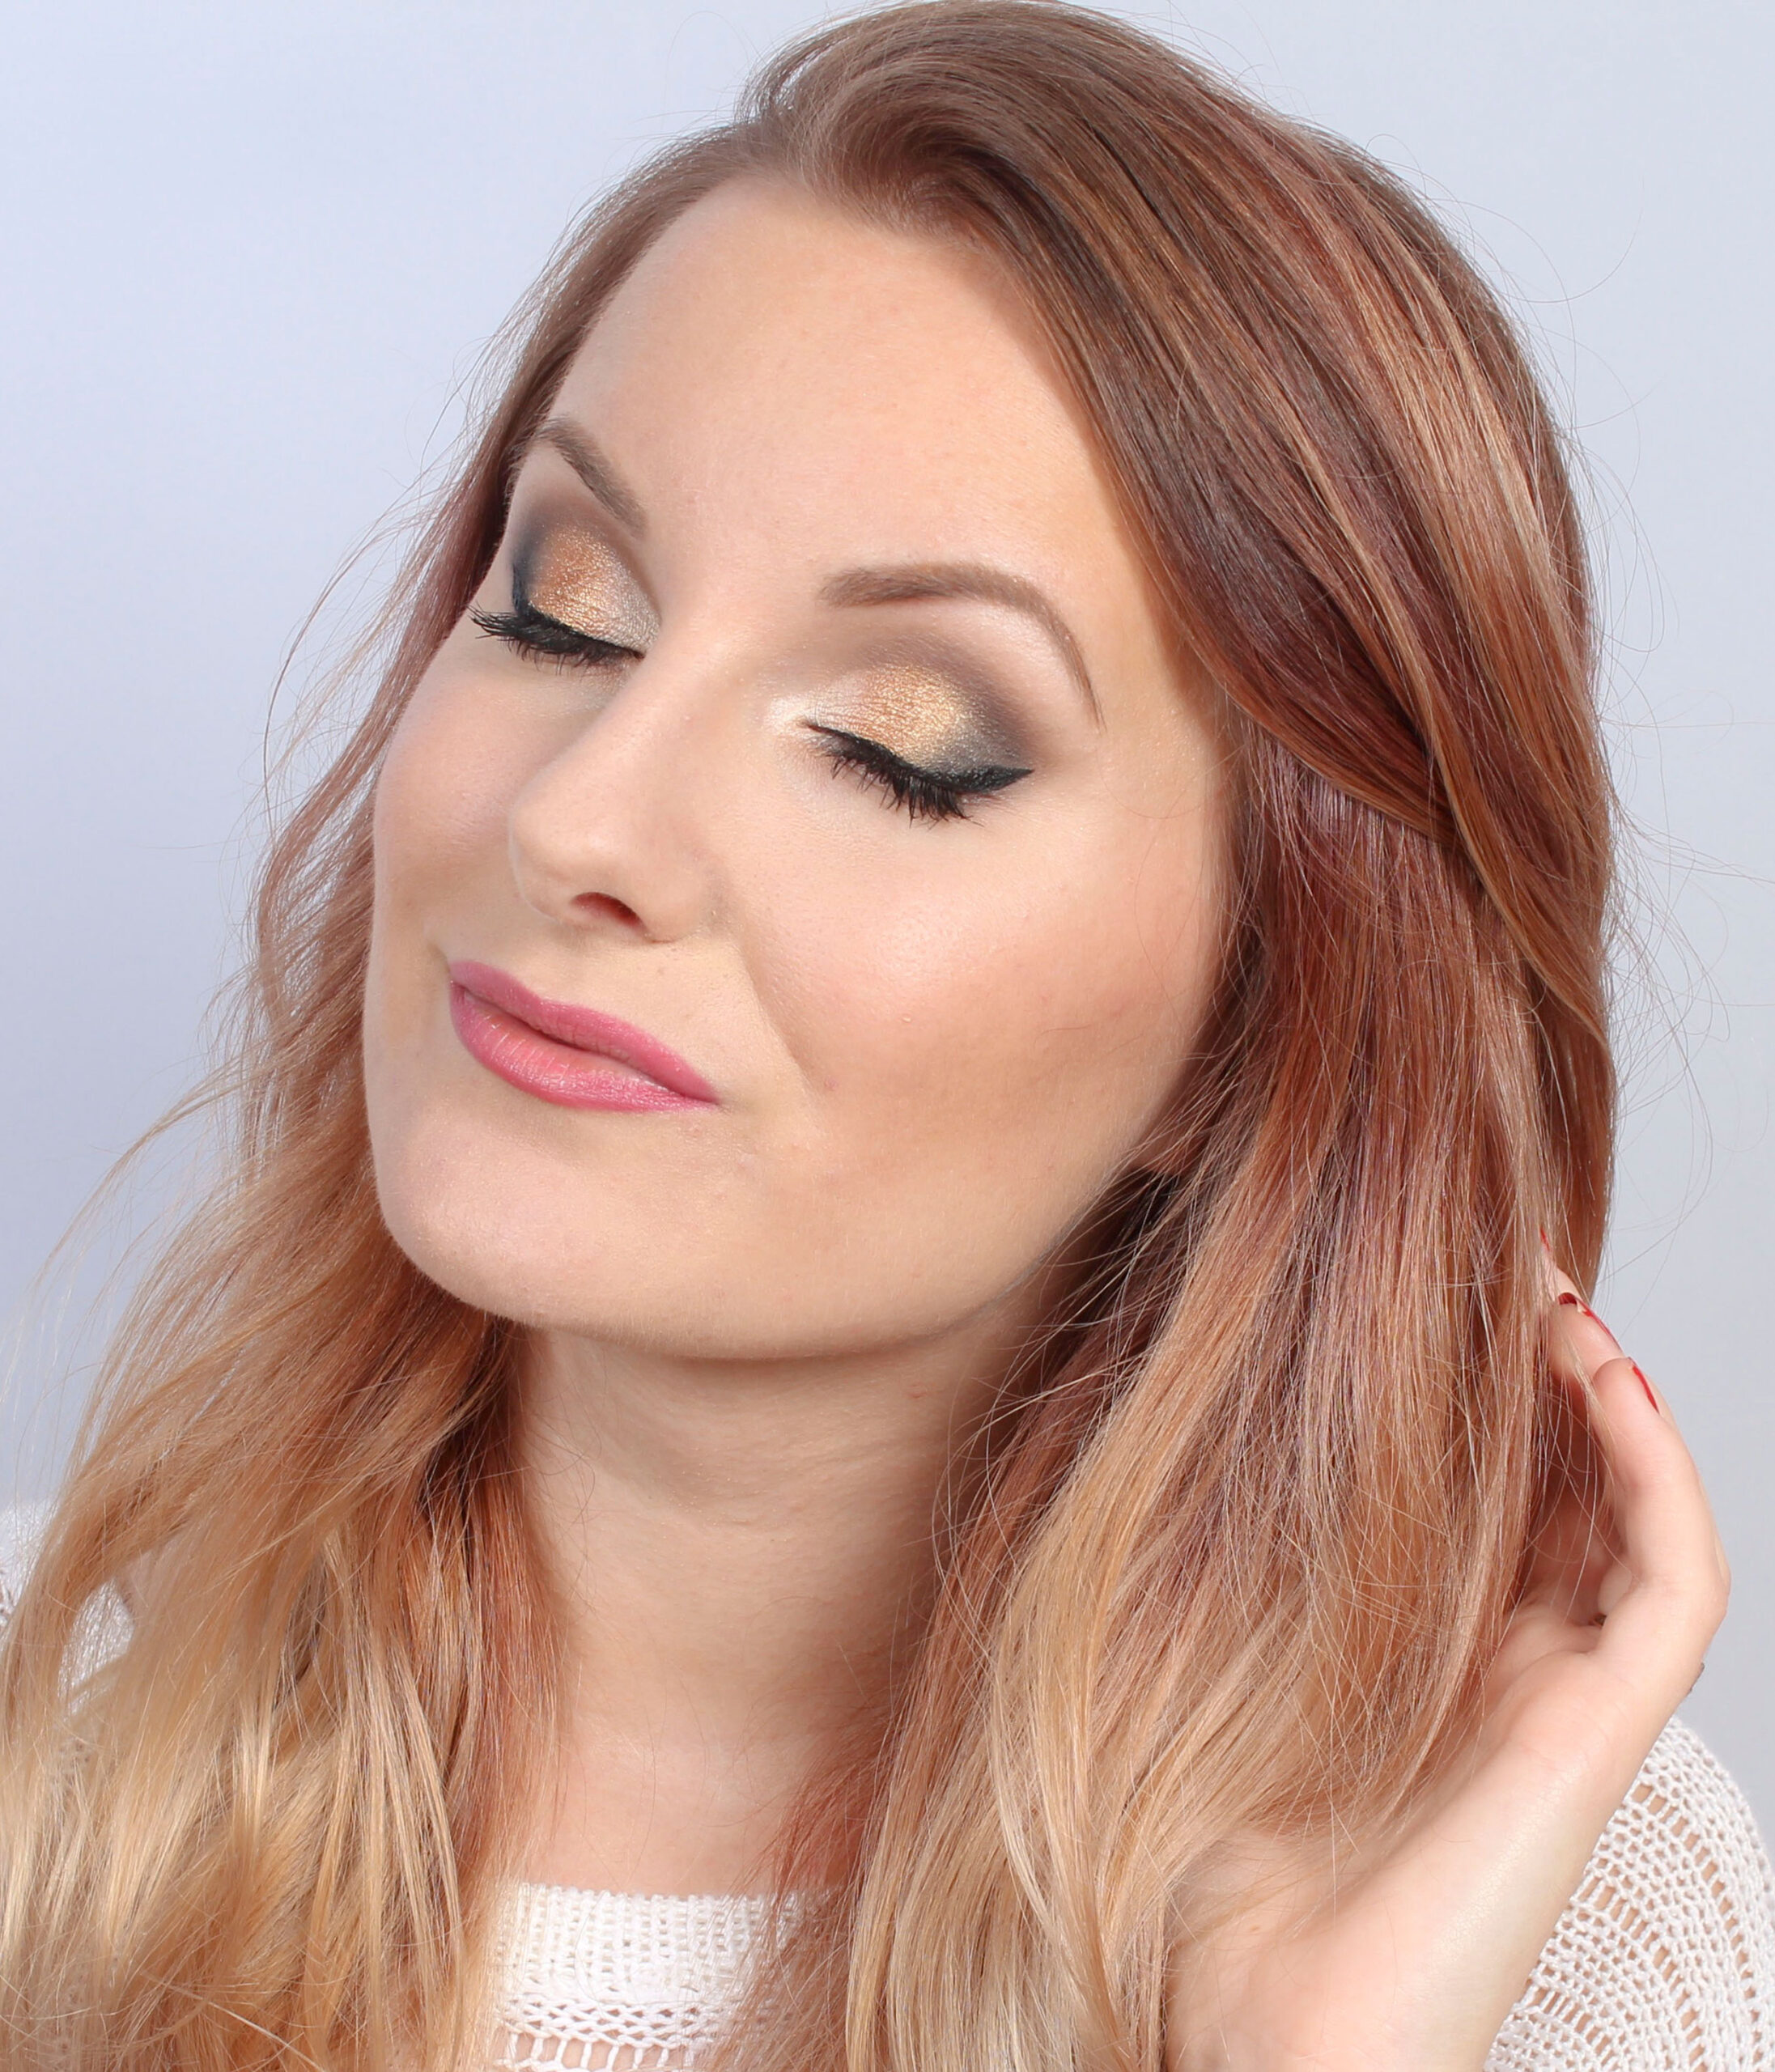
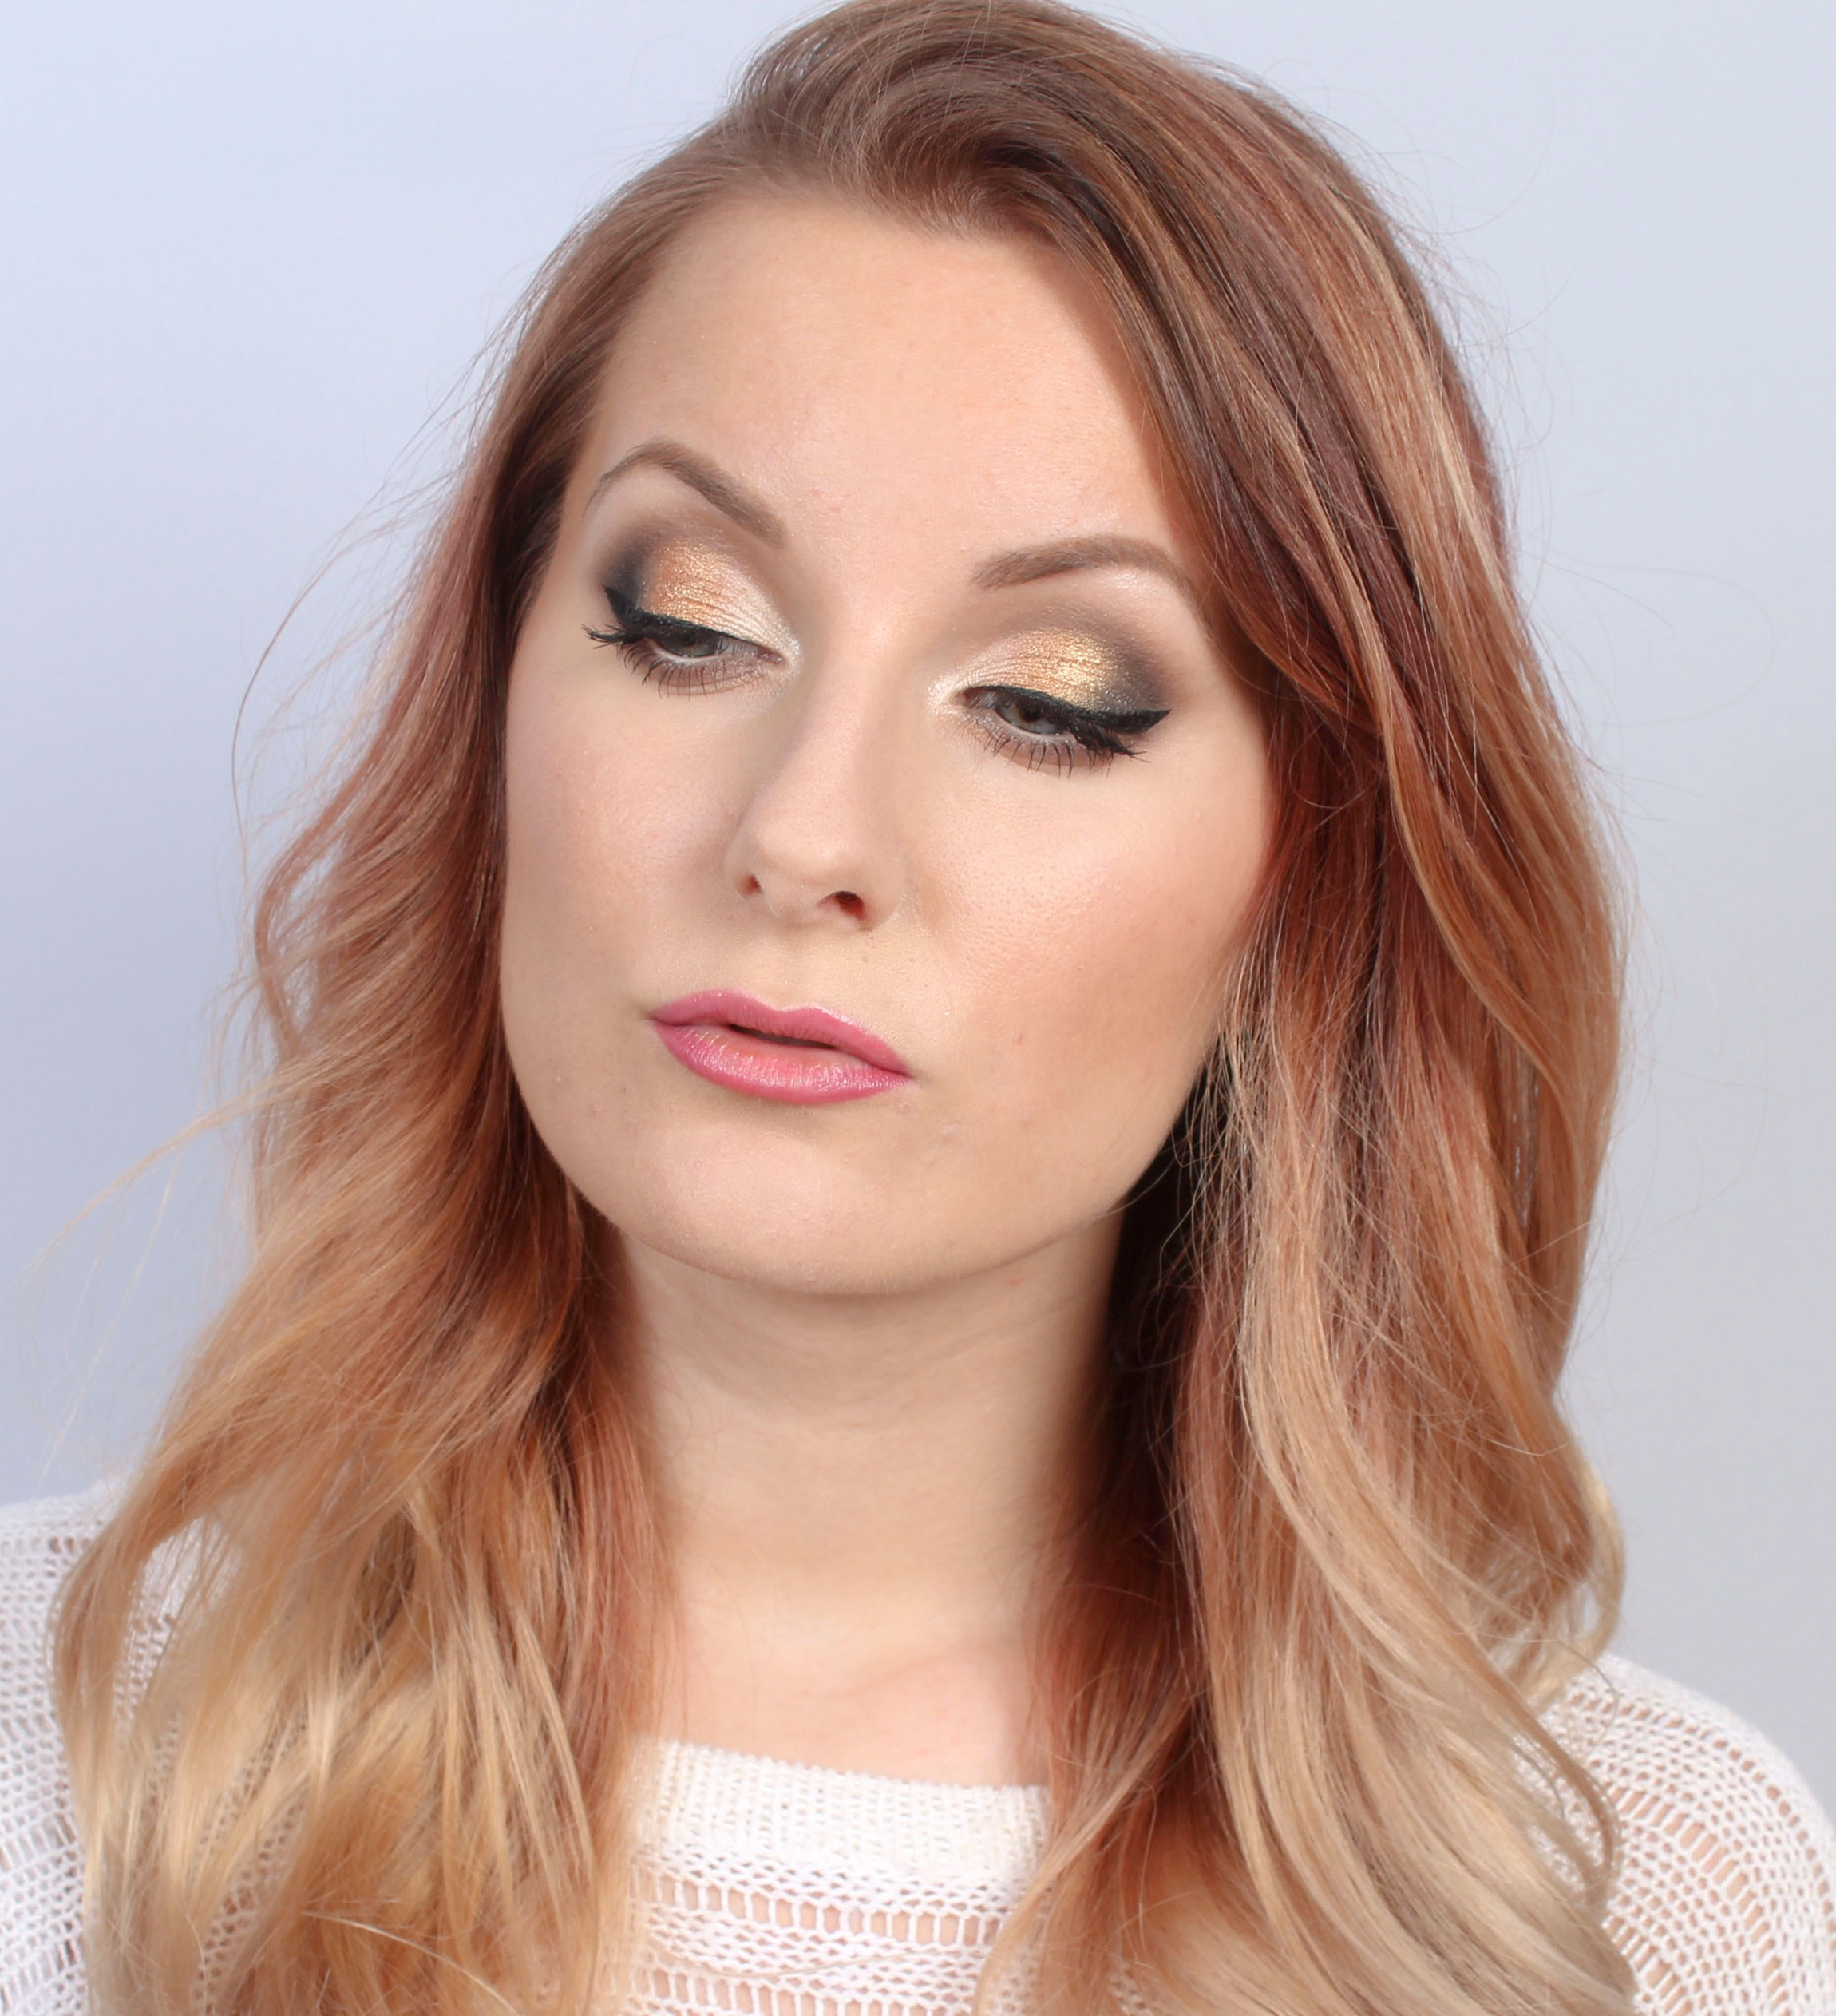
She wanted to see a make-up in silver and gray, and preferably a little turquoise green as she thinks it is so heavenly nice - and we have a eyeliner in a super nice turquoise green shade so it was perfect!

Product list of the products I have used:

Face:
Face primer - Pixi Redness Reducing primer*
Colored day cream + concealer - Pixi Illuminating Tint & Conceal (Nude Glow)*
Contouring - Paese Bronzing Powder (1p) *
Rouge - gloMinerals blush (Papaya)*

Eyebrows - gloMinerals Brow Gel (taupe)*
Lips - gloMinerals Suede Matte Crayon (Demure) *

Eyes:
Eyeshadow Primer - Pixi eye bright primer*
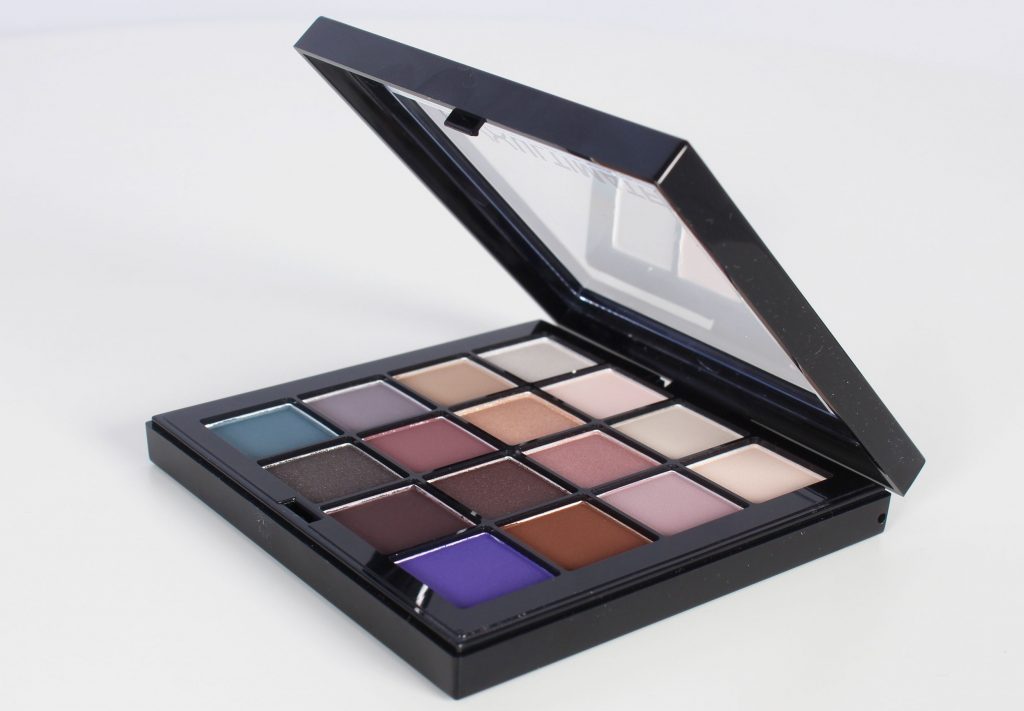
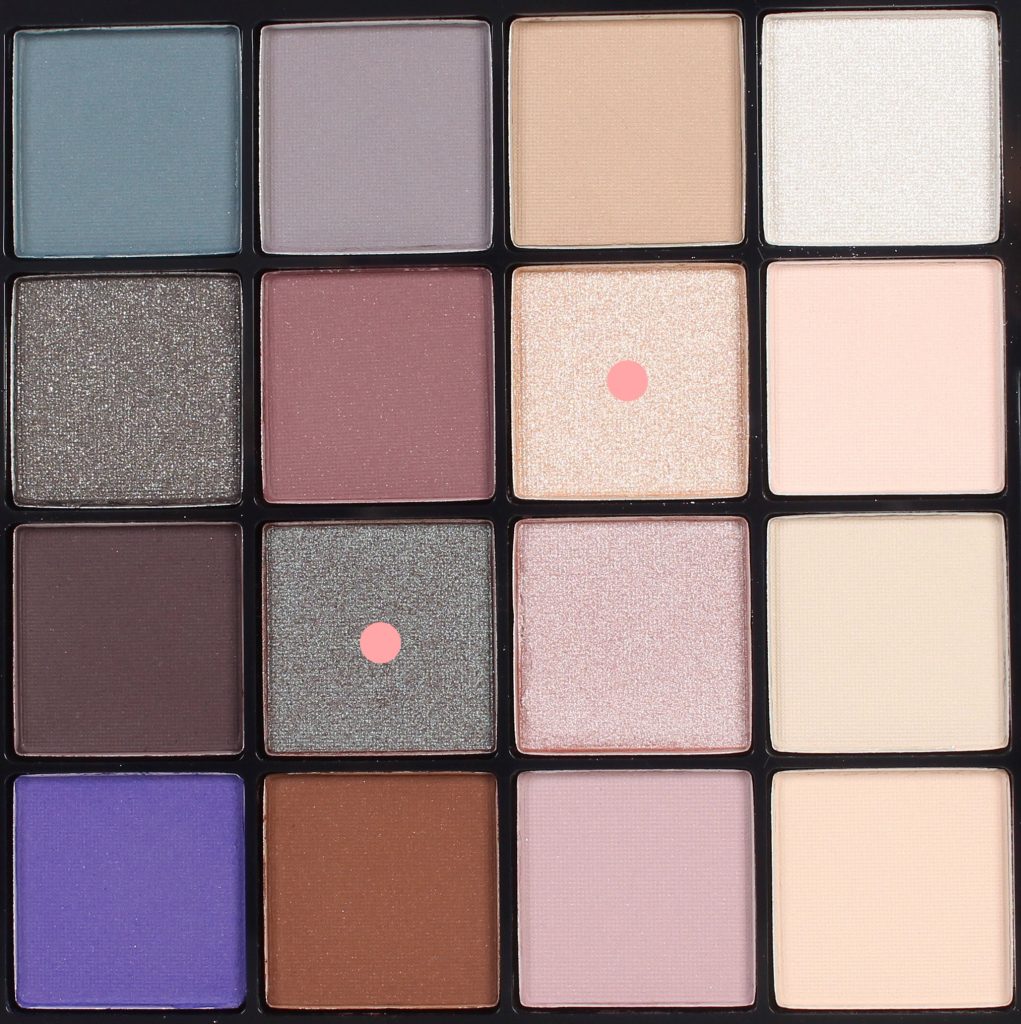
Eyeshadows - Paese Opal Trio Eyeshadow (Ice Queen)*
Black eyeliner - Pixi Endless silky eye pen (Black noir)*
Light eyeliner - Benecos Natural White Kajal*
Black mascara - Magnetic Lash Mascara*

img_6695_vattenstampel2

If you want to book an appointment with us, you do it as usual online Creativemakeup.se :)

Hugs are!min-webshop

Nyx Ultimate Shadow Palette (Test & Review)

I have received a home test on NYX's new eyeshadow palette that Linda Hallberg is the face of - NYX Ultimate Shadow Palette in the shade Cool Neutrals. The eye shadow that appealed to me immediately when I looked at the colors was without a doubt the moss green shimmery shade, the 11th color in the palette, so beautiful!

That eye shadow is a bit special, as it is greenish where the light is on, and where the light is not reflected, it is brown. I think it has an incredibly nice effect, you get a nice transition between the green and the brown without having to use two eye shadows. But if you want the green on the whole eyelid, it will be impossible, so in that way it is a shame. Depends on what you want simply :)

I personally love the eye shadows that I tested and think they look awesome!

img_6632_111

Bassmink:
Face primer - Paese Makeup Base (Matte)
Foundation - Make Up Store Glow Dual Foundation + lite gloMinerals Pressed Base Foundation (Golden medium) over when I discovered that it from the Make Up Store is not particularly opaque. Review coming soon!
Contouring - Maybelline Master Contour V-Shape Duo Stick Light
Rouge - Paese powder blush (35)
Fixing Mist - Pixi Makeup Fixing Mist

Eyebrows - Pixi natural brow duo (Natural Brown)
Lip pencil - IsaDora Sculpting Lipliner Waterproof (Marsala)
Lipstick -
IsaDora Lip Desire Sculpting Lipstick (Marsala)

img_6378_111 img_6381_prick

Here you see the eye shadows and which two colors I have used. Is it any other color you want me to do a make-up with?

tutorial444_1111

  1. Eyeshadow primer, NYX HD Eyeshadow Base
  2. Green-brown eye shadow in the middle of the eyelid
  3. The same shadow at the outer edge in a cat eye shape
  4. Fade the edges (now you see that it turns brown in the shadow in the globe line)
  5. Light eye shadow on the inside of the eyelid
  6. Black eyeliner with wing, Paese Liquid eyeliner
  7. Black mascara on the upper lashes, Magnetic Lash Mascara

img_6615_11122img_6649_111 img_6657_111

Hugs are! ♥

Hair color from red to blonde

5

Something that I have always thought is super fun, both on blogs but also on friends' private Facebook and the like, it is when people post photo collages with different hair colors you have had! :)

Before I started going to Monica Werner's, I've basically always been blonde. I had a period when I was 8 years old where I had dark purple hair, and a period in high school when I was a brunette for a year, but beyond that I have been blonde all my life. Miska's best friend told me before I checked in old school catalogs, and you have damn well looked the same all the time, from 9 years to 16 years it is kind of the same picture on all school photos" Lol. There's something in it, actually.

But now finally I have actually changed my hair color regularly for the last two years, so now I will enjoy publishing a photo collage with MY hair colors from spring 2014 to now autumn 2016 :)

Which is your favorite?

hair-color-from-red-to-blonde

In May I had hair extensions from Hairtalk which I was very happy with! So expensive only otherwise I would have continued without a doubt (though not expensive compared to many other extension methods that take several hours at the hairdresser). I made that extension at the salon Creative Zone which helped me put it in when I was sponsored with hair extensions from Hairtalk, but now they do not use that brand anymore so now you can also do Hairtalk extensions at Monica :)

I was also very happy with Hairtalk, but did not like their products very much and thought it felt unserious that the guarantee only applies if you use their products, while they said that you were not allowed to use products with silicones - while their own products contained silicones. . How strange is that not? So I was super happy with the hair and the method, but used natural and organic silicone-free shampoo and conditioner.

har-uppsala

My favorites is probably without a doubt the last two in fact, pastel pink in June and the color I have today! Because I prefer to be light, but get tired very quickly and easily find that the color feels dull if nothing "happens". So these are completely to my liking :)

You can book an appointment with Monica Werner online at her website. She has quite long waiting times so book quite well in advance. She is cruel to change and has also attended a specific bayalage training :) For more inspiration and before and after pictures, you can also check out her Facebook.

Hug! ♥name logo

The video podcast is back!

2

When I asked in a post the other day if you would rather see a film in half quality than none at all, before I got a feel for the technology;) I got the comment, among other things "Oh what fun with movies! Drive even though it does not feel completely perfect, learn by doing! : D”And that sentence, learn by doing, I have in the back of my mind now and just drive!

Film is so sick much harder than picture and there is a lot that has to work. Every time I have tried to start, it has only taken an extremely long time, energy and a lot of irritation before it is finally published and then you are still not happy because it does not feel perfect. But I will get better and better for each film so now I simply intend to publish everything on a conveyor belt so you can follow how it goes :)

I'm starting with a new episode of my and Malin's video podcast! Woop wooop! I still get comments from time to time (both in the blog and out among people) if they want us to start with it again, feels great!

In this section I show makeup brushes from Nanshy Masterful Collection*, talks a little about our salon, gets interrupted by Malin's neighbor outside the window and reveals Malin's new job!

Hope you like the movie ♥

https://youtu.be/U9zrhDF3SEg

You will find my Youtube channel Helenaronnblad and my old movies and tutorials here!

Golden Cut Crease

Hi fine ni!

In today's make-up, I tried to do a cut crease make-up in a different way than I usually do. I usually apply primer on the entire eyelid and then make sharp edges in the crease directly with the eye shadows, but I have seen on Instagram that many do it by first doing a soft sweep along the crease and then marking the eyelid sharply with a cream eye shadow.

I have not tested it before as I do not have a good light cream eyeshadow that I think lasts super well, but now I realized that I can test do it with a little eyeshadow primer instead :) It did not hold mega good either because it got a little thick with primer , but will test again sometime, if you are more economical with the second layer of primer, I think it can be really good without being too much "layer upon layer".

Anyway, here is a tutorial on makeup that I took step by step :)

img_6257_111

Bassmink:
Face primer - Paese Makeup Base (Matte)
Foundation - gloMinerals Pressed Base Foundation (Golden medium)
Contouring - Paese Bronzing Powder (1M)
Highlighter - Pixi Book of beauty (Glow Getters)
Rouge - Paese powder blush (35)
Fixing Mist - Pixi Makeup Fixing Mist

Eyebrows - Pixi natural brow duo (Natural Brown)
Lips - My lip tattoo

tutorial123_111

  1. Eyeshadow primer, Pixi eye bright primer
    Brown eyeshadow along the globe line, Paese Kashmir eyeshadow (604)
  2. Brown eyeshadow at the end of the lower lash line
  3. Tie the globe line and the lower lash line together and form a cat eye shape with eye shadow at the end of the eyelid.
  4. Fade the edges
  5. Black eye shadow at the end of the eyelid, Paese cashmere eyeshadow (602)
  6. Eyeshadow primer on the inside of the eyelid, so that there is a sharp edge at the crease line
  7. Golden eye shadow in the middle of the eyelid, Yag Mineral eyeshadow (Rose Gold)
  8. Light, shimmery eye shadow in the inner part of the eyelid and in the corner of the eye, Paese Diamond Trio (707)*
  9. Brown, shimmery eye shadow along the lower lash line, Paese Diamond Trio (707)
  10. Black eyeliner with wing, Paese liquid eyeliner
    Black mascara on all lashes, Magnetic Lash Mascara

Then it's ready! :)

The makeup brushes I have used are from Nanshy - Tapered Crease, Crease, Flat Definer and Pencil.

img_6286_111 img_6269_111 img_6310_111

Hope you were inspired!

en_USEnglish