Cover pimples with duo concealer!

A duo concealer is among the best I have in my makeup bag at the moment! It is thus a concealer that contains two shades. The one I will show you today has a lighter shade, and a darker one, but in the same color scale.

I have a lot of stress around me at the moment (positive stress at work, but still stess) and have gotten a lot more pimples lately. And I, who do not usually have so much darkness under my eyes, see how it starts to creep up as well. I sleep well but dream a lot, have dreamed different stress dreams about cars lately, usually red cars, dream interpretation anyone? Lol :)

Anyway, a duo concealer is my salvation right now to make away fatigue! Here's how I use it:

img_5313_111

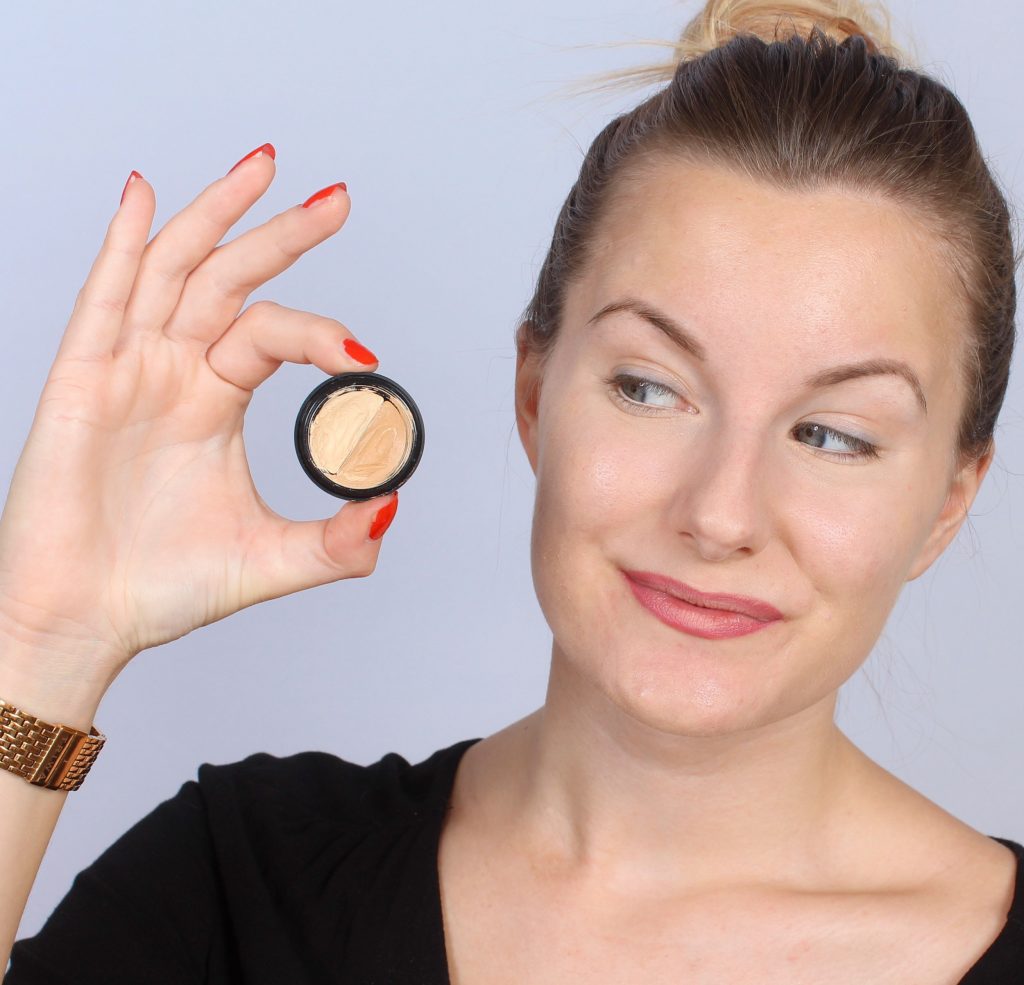
I use gloMinerals Under Eye Concealer, it is available in more shades and I use the shade Golden. Available HERE and costs SEK 289.

Under the eyes - I use the light concealer when I put make-up under the eyes. It both covers and brightens, and is thin enough in the formula that it folds naturally and nicely. Extremely well!

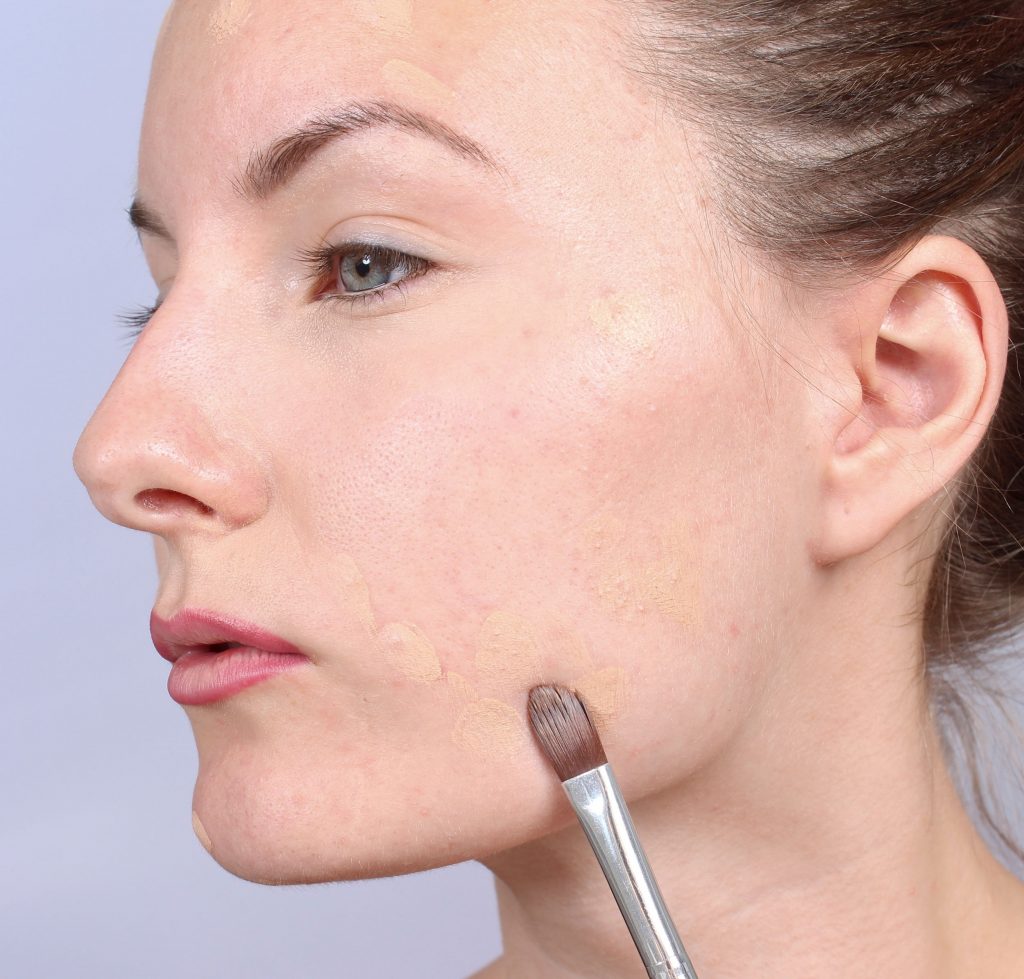
On blemishes and the like - In the rest of the face I mix the light and the dark concealer to get a shade that is similar to my skin tone, during the summer I could only have the dark but now I need to mix them to get a perfect tone. Then I cover pimples and such bumps with it.

img_5240_11_111

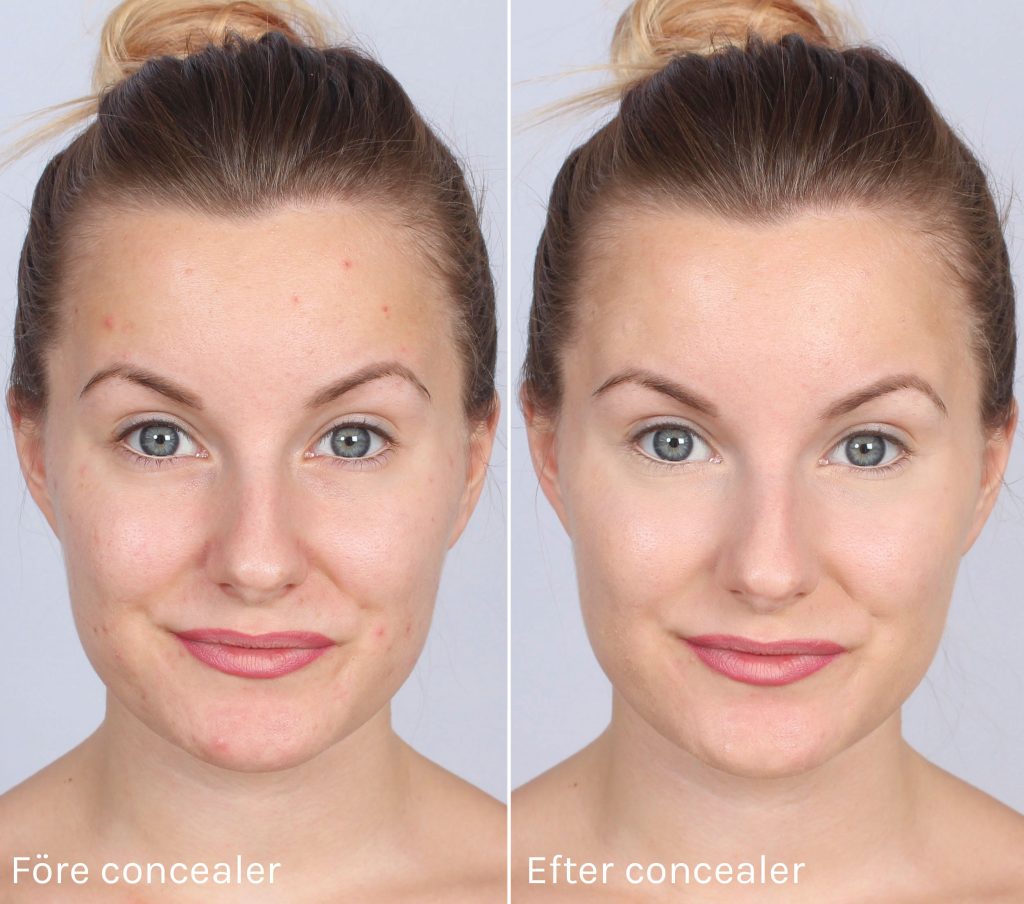
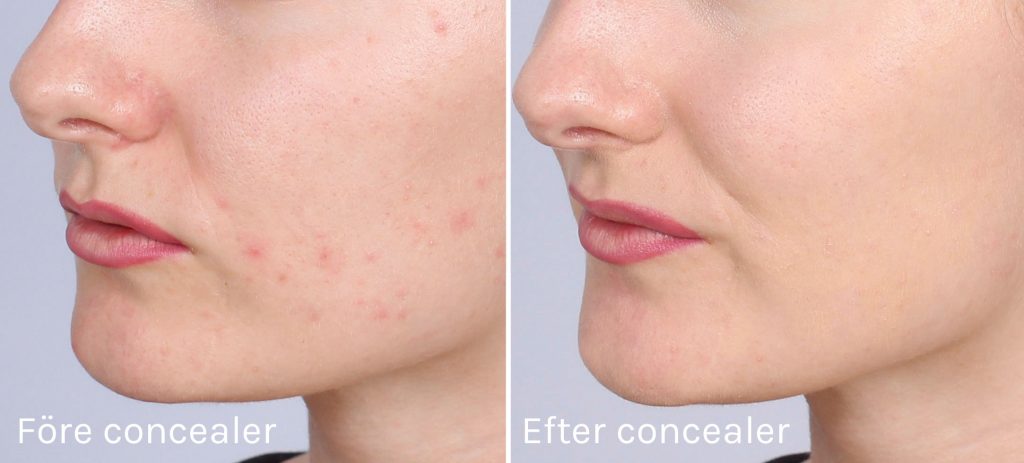
What a difference huh ?! The pimples are gone and the darkness under the eyes looks almost retouched, although I can promise you that it is not;)
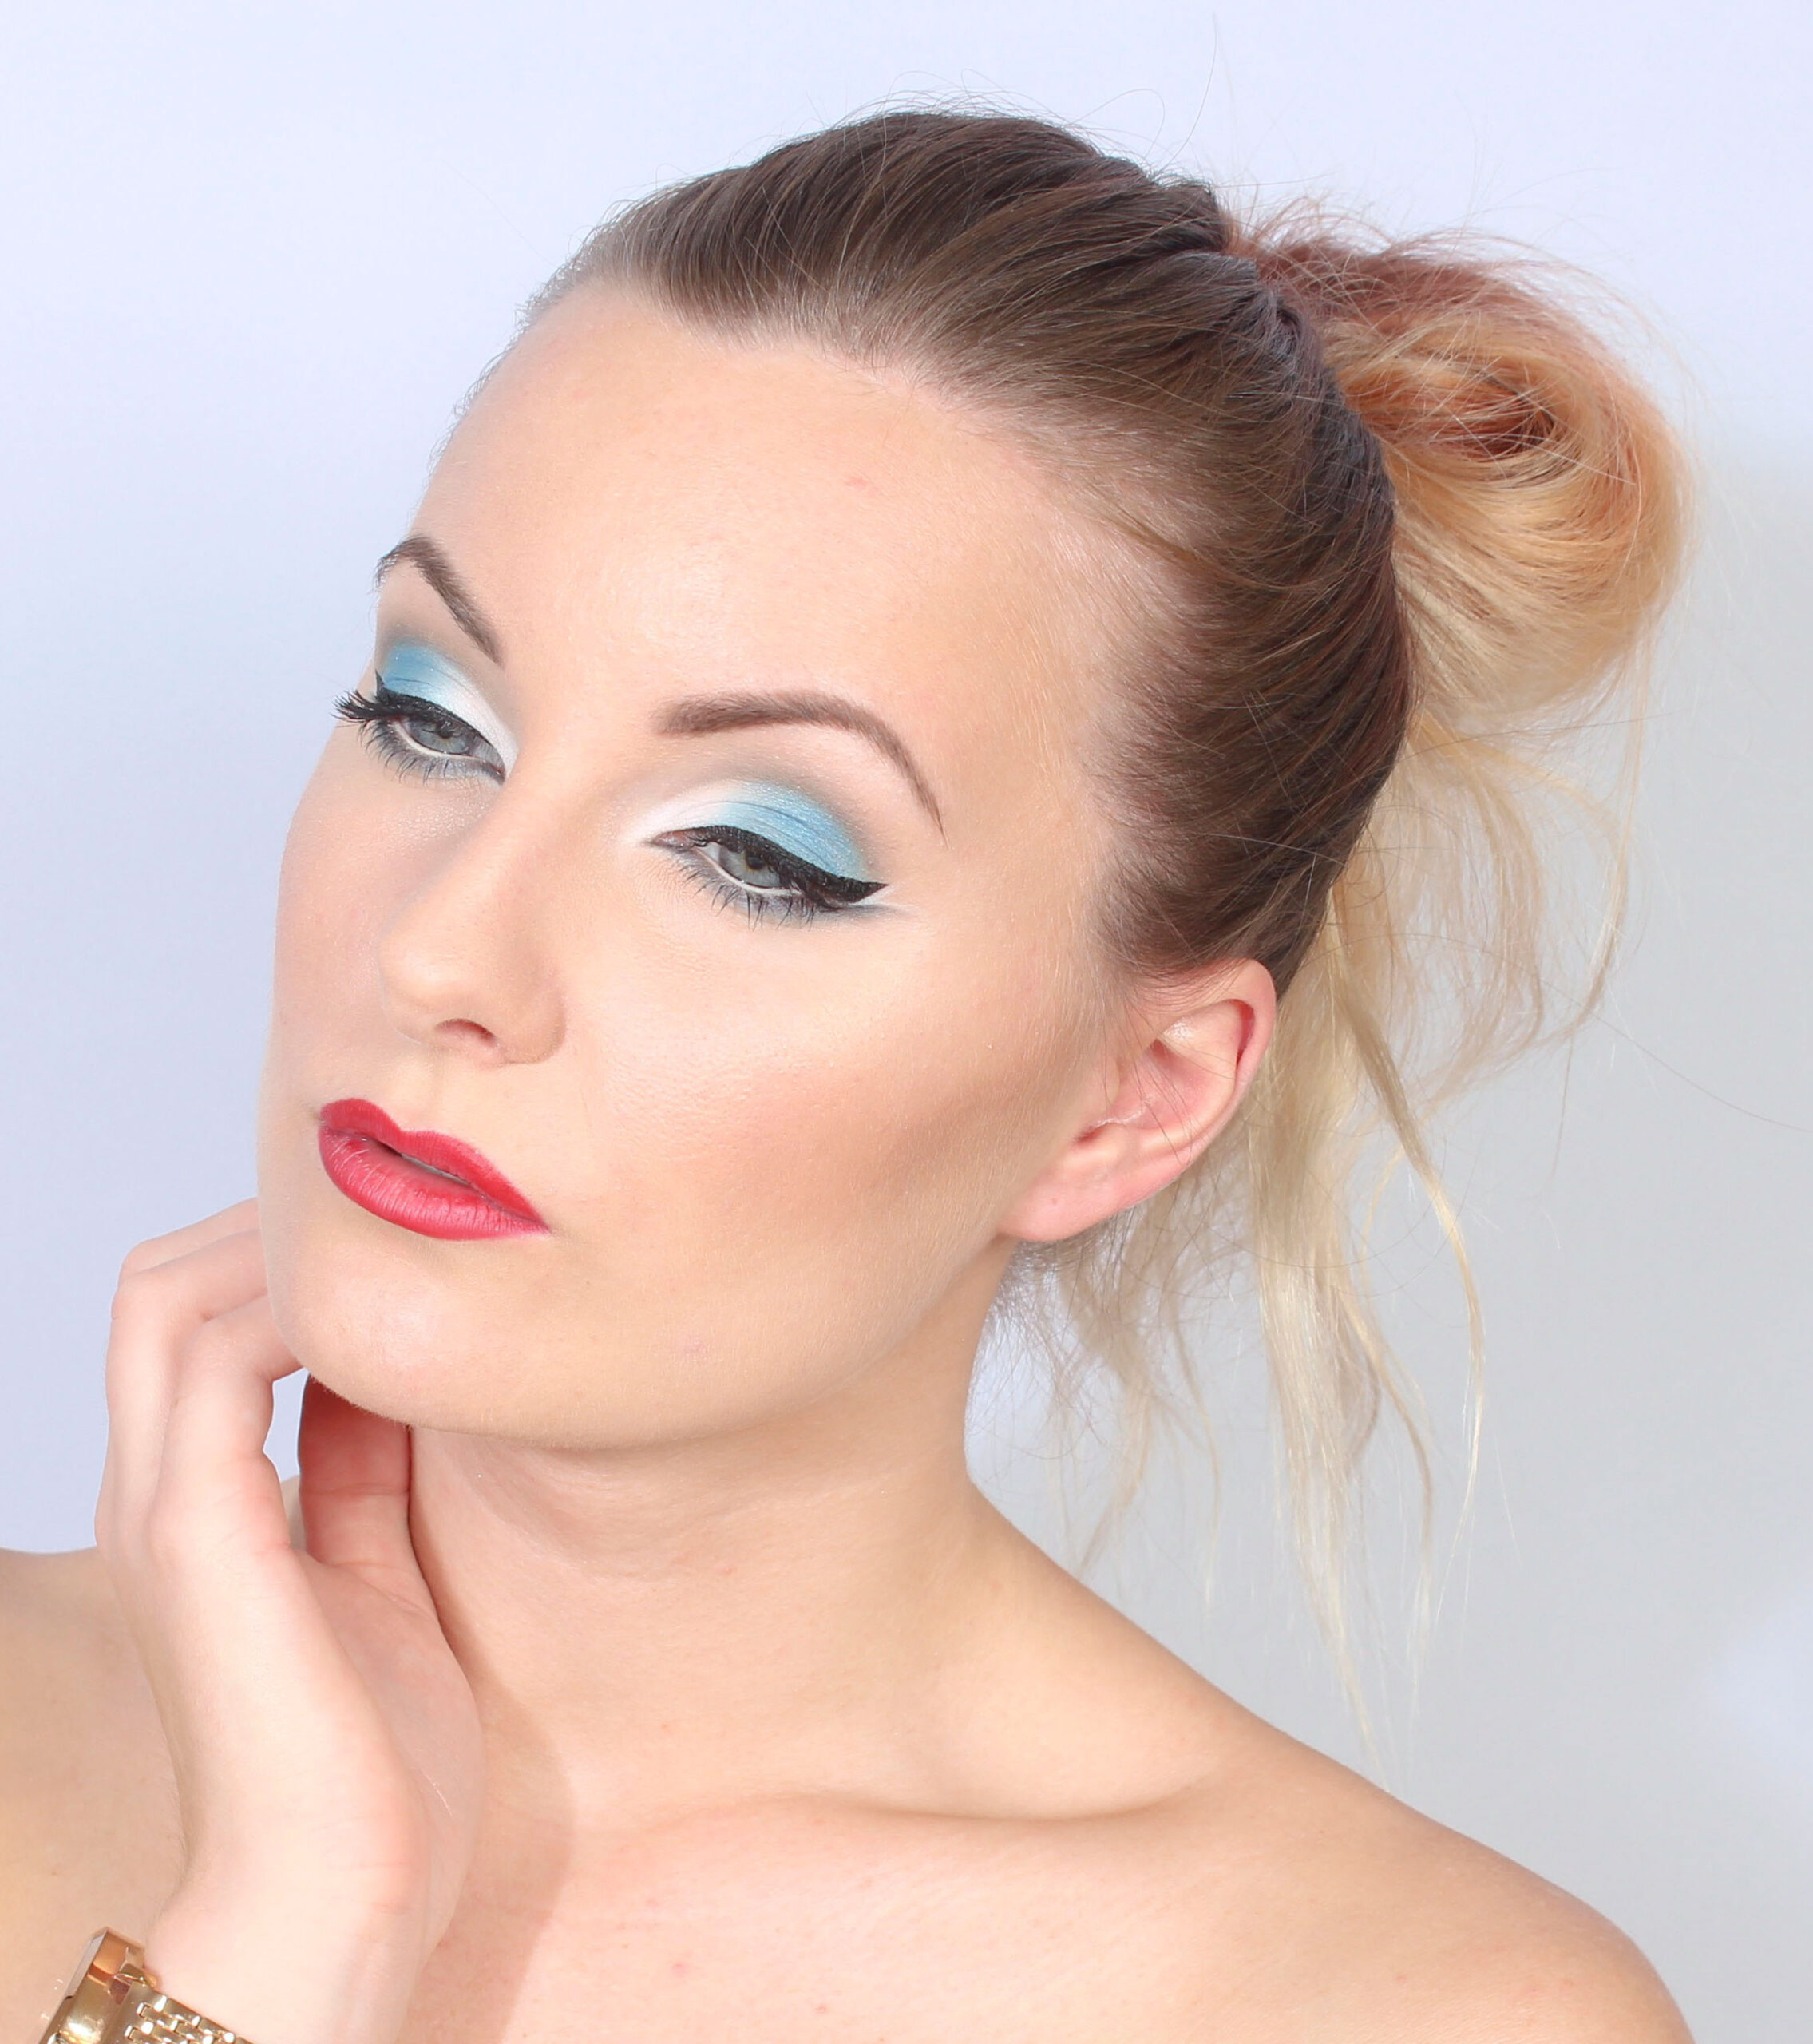
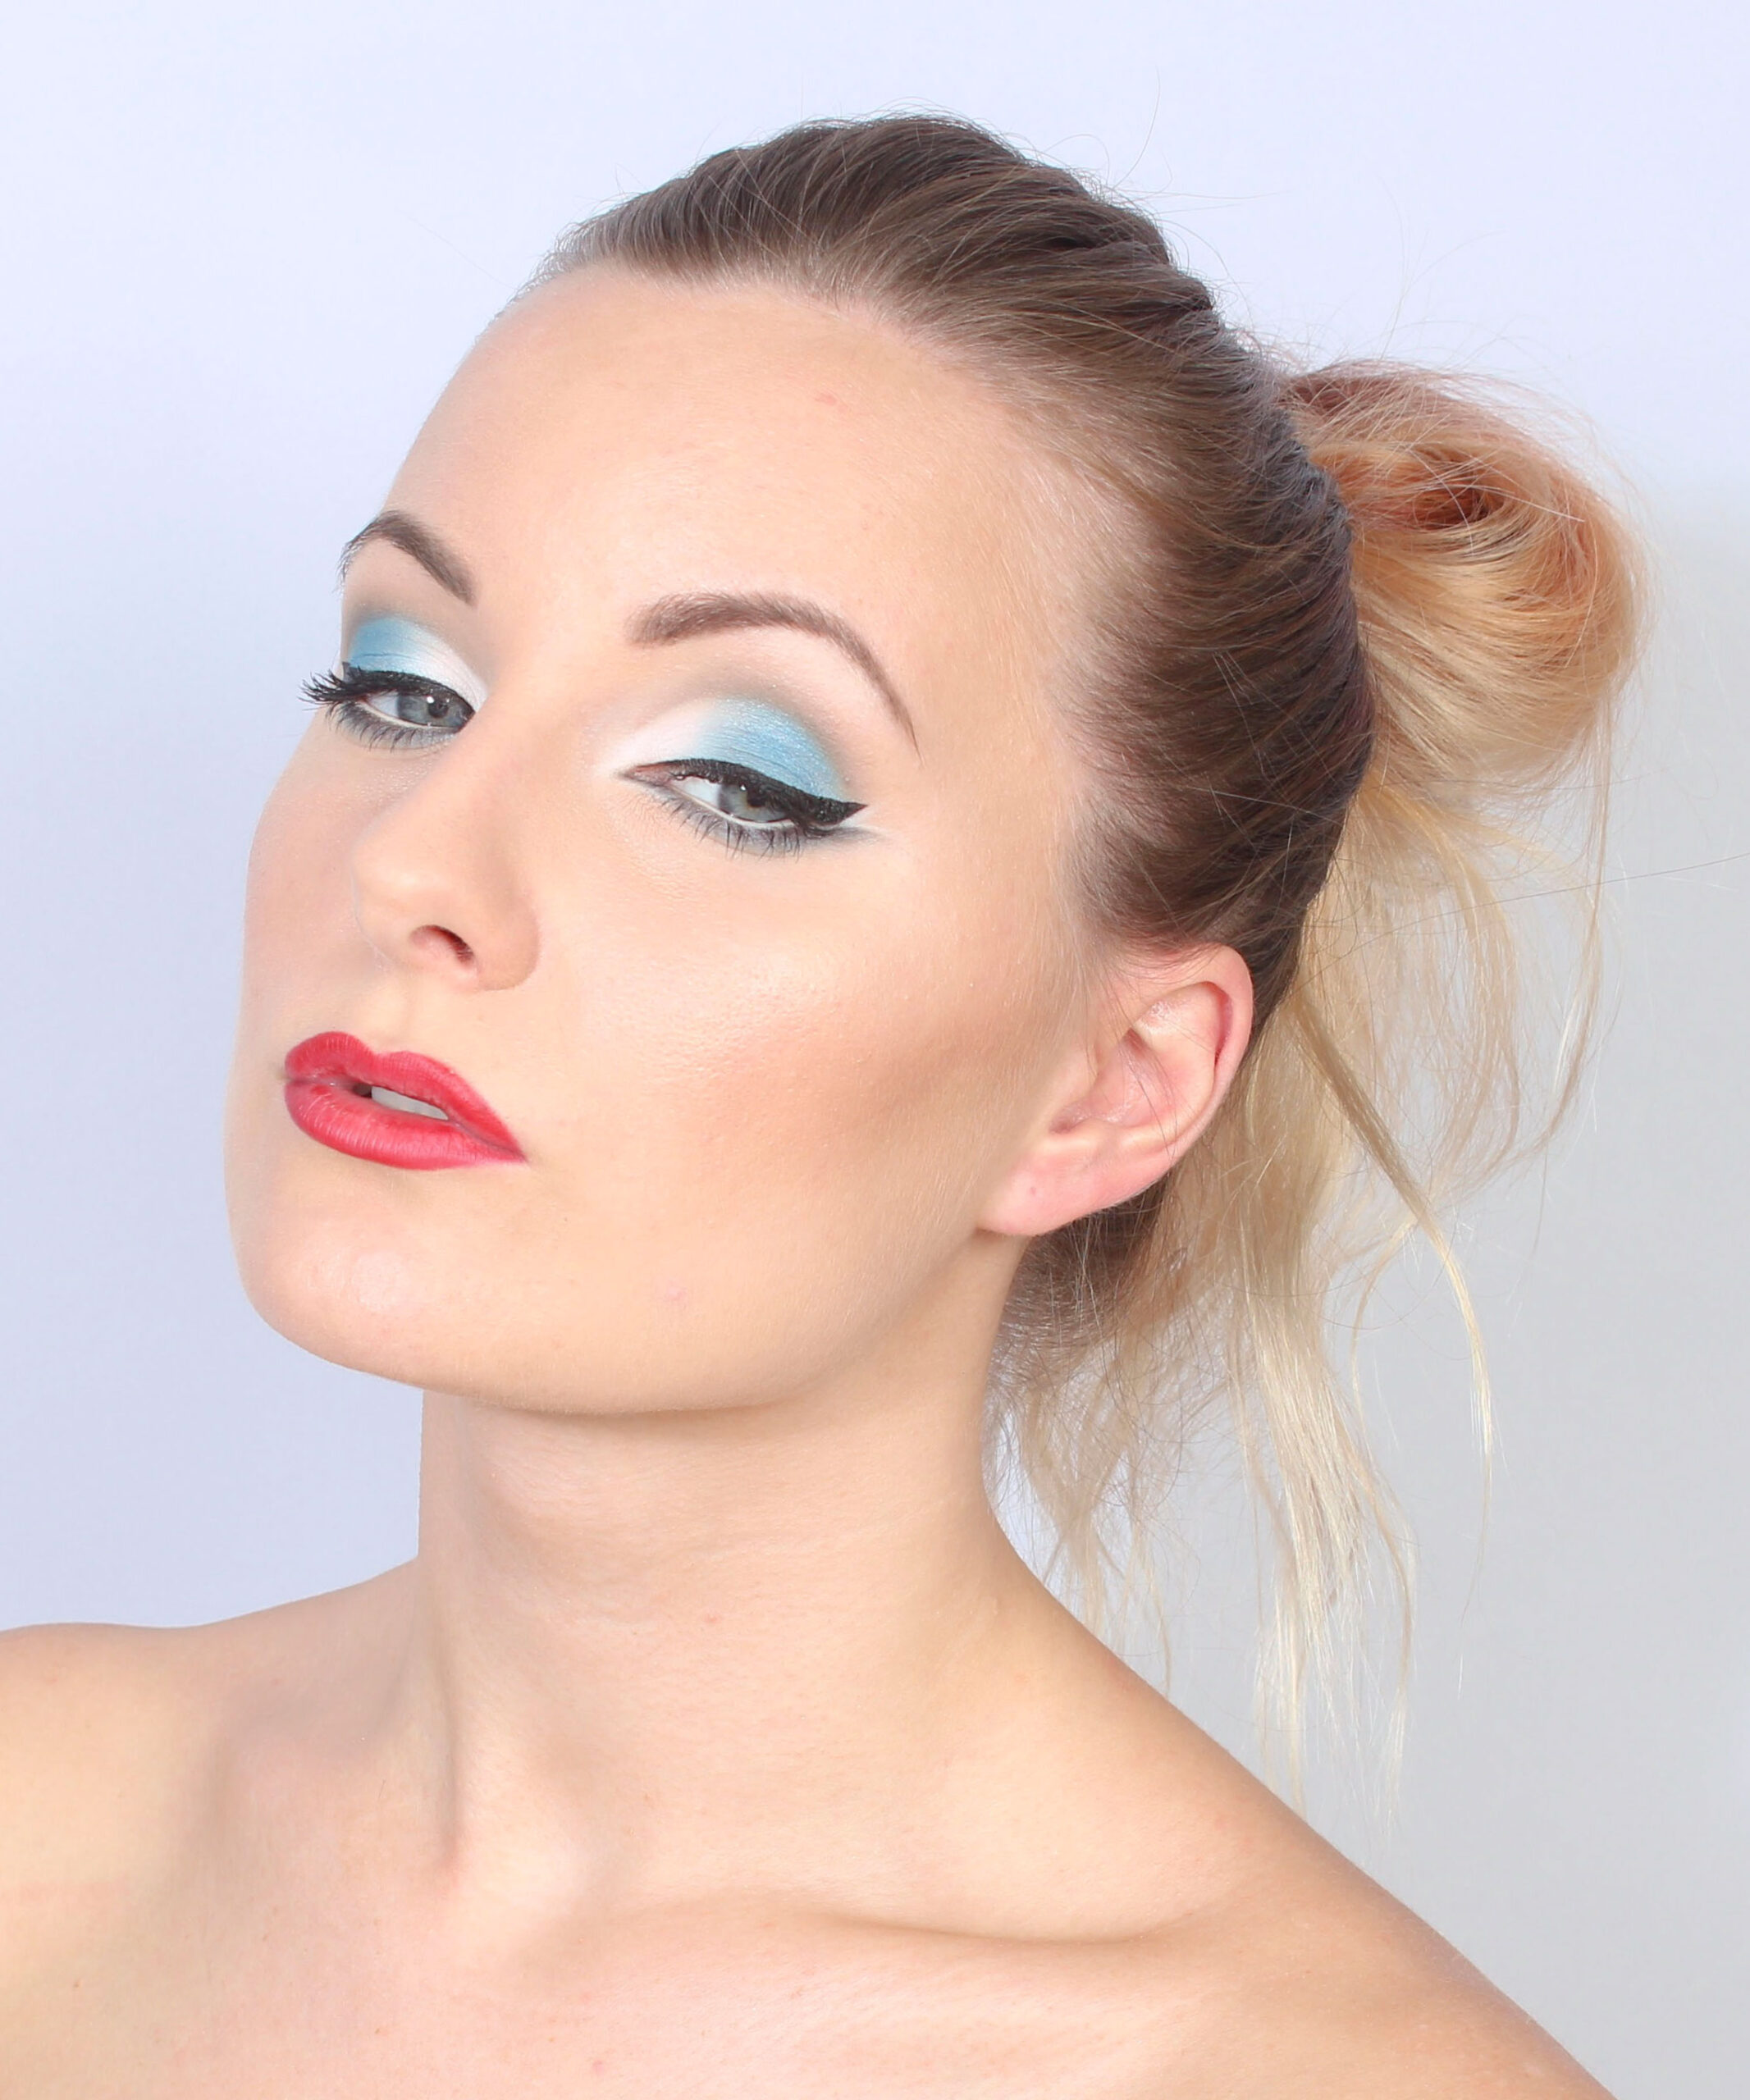
Natural result
I usually recommend not having a full-coverage foundation if you do not need a lot of coverage on the entire face. As you can see in the replica above, where I only have concealer under the eyes, on pimples and a little around the nose, the rest is completely unmade up, which makes the whole thing much more natural than if you have a full-coverage foundation that covers just everything in the whole face.

Then you can instead have a thin layer of mineral foundation or a semi-covering foundation, and get a natural complexion that is also flawless! :)

img_5227_111_111

Here you see the difference on the pimples a little better, I still have no foundation, just concealer right on the dots.

img_5267_111

Application
1. The most important thing is not to put any fingers in the jar due to hygiene reasons. I usually apply with Concealer & Angle Eco Brush from Eco Minerals, it is flat and really good for covering pimples / spots but above all under the eyes (shows this further down in the post).

2. Mix the shades to a good color for your skin tone, dab the concealer cream on the spots you want to cover.

3. Spread the concealer so that it fades into the skin tone.

Before or after foundation?
I usually apply the concealer after foundation if I have a liquid foundation. Partly to see how much only the foundation covers (otherwise it is easy to use an unnecessary amount of concealer, and forget that the foundation also actually covers some), but also because you can sometimes brush off the concealer during the foundation application so that you in in any case feel that you need more. And if the concealer is your own skin tone, it works brilliantly even after foundation :)

If you use mineral foundation which is a dry product, you should apply the concealer before foundation, and then you can "dab" on the foundation in areas with a lot of concealer so as not to remove the concealer, but instead fix it.

Pillows afterwards?
In areas with lines, e.g. under the eyes or around the nose, where I recommend powdering afterwards to fix, otherwise creamy concealers can easily fold, but a good concealer does not do that as long as you powder. I usually fix with powder all over my face to really be sure that it is there, because I also get oily in the skin after a while, but it still lasts well even if you do not powder, so it is a matter of taste.

img_5236_11_111

Here you see before and after a little closer!

Under the eyes
Under the eyes, I always apply with Concealer & Angle Eco Brush from Eco Minerals, as it is narrow if you angle it to the side or use the top, and is wide if you use the flat side, which is very flexible:

glominerals-under-eye concealer

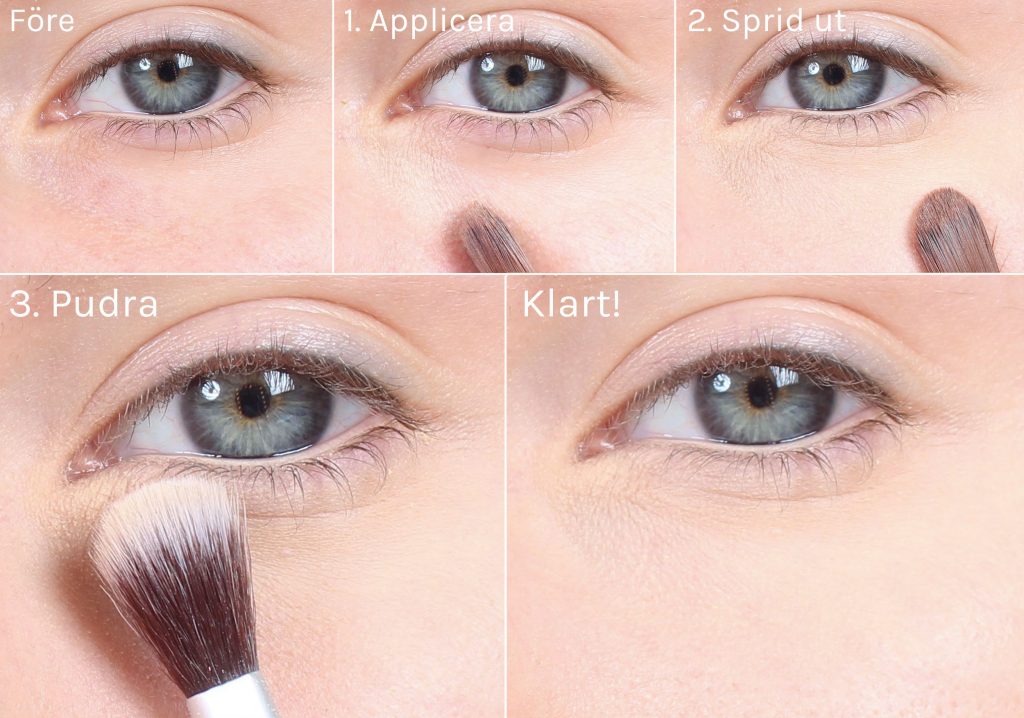
  1. Apply with the narrow side of the brush, and apply most concealer where it is a little "sunken" under the eye, this is where you have to lighten up to fill in the shadow.
  2. Spread with the flat side of the brush, so that you light up under the whole eye. Feel free to fade the concealer a little downwards so that it blends in with the skin tone properly, so you do not look super bright under the eyes compared to the rest of the face.
  3. Finish with a thin, transparent powder to fix.

Then it's ready! :)

img_5330_111

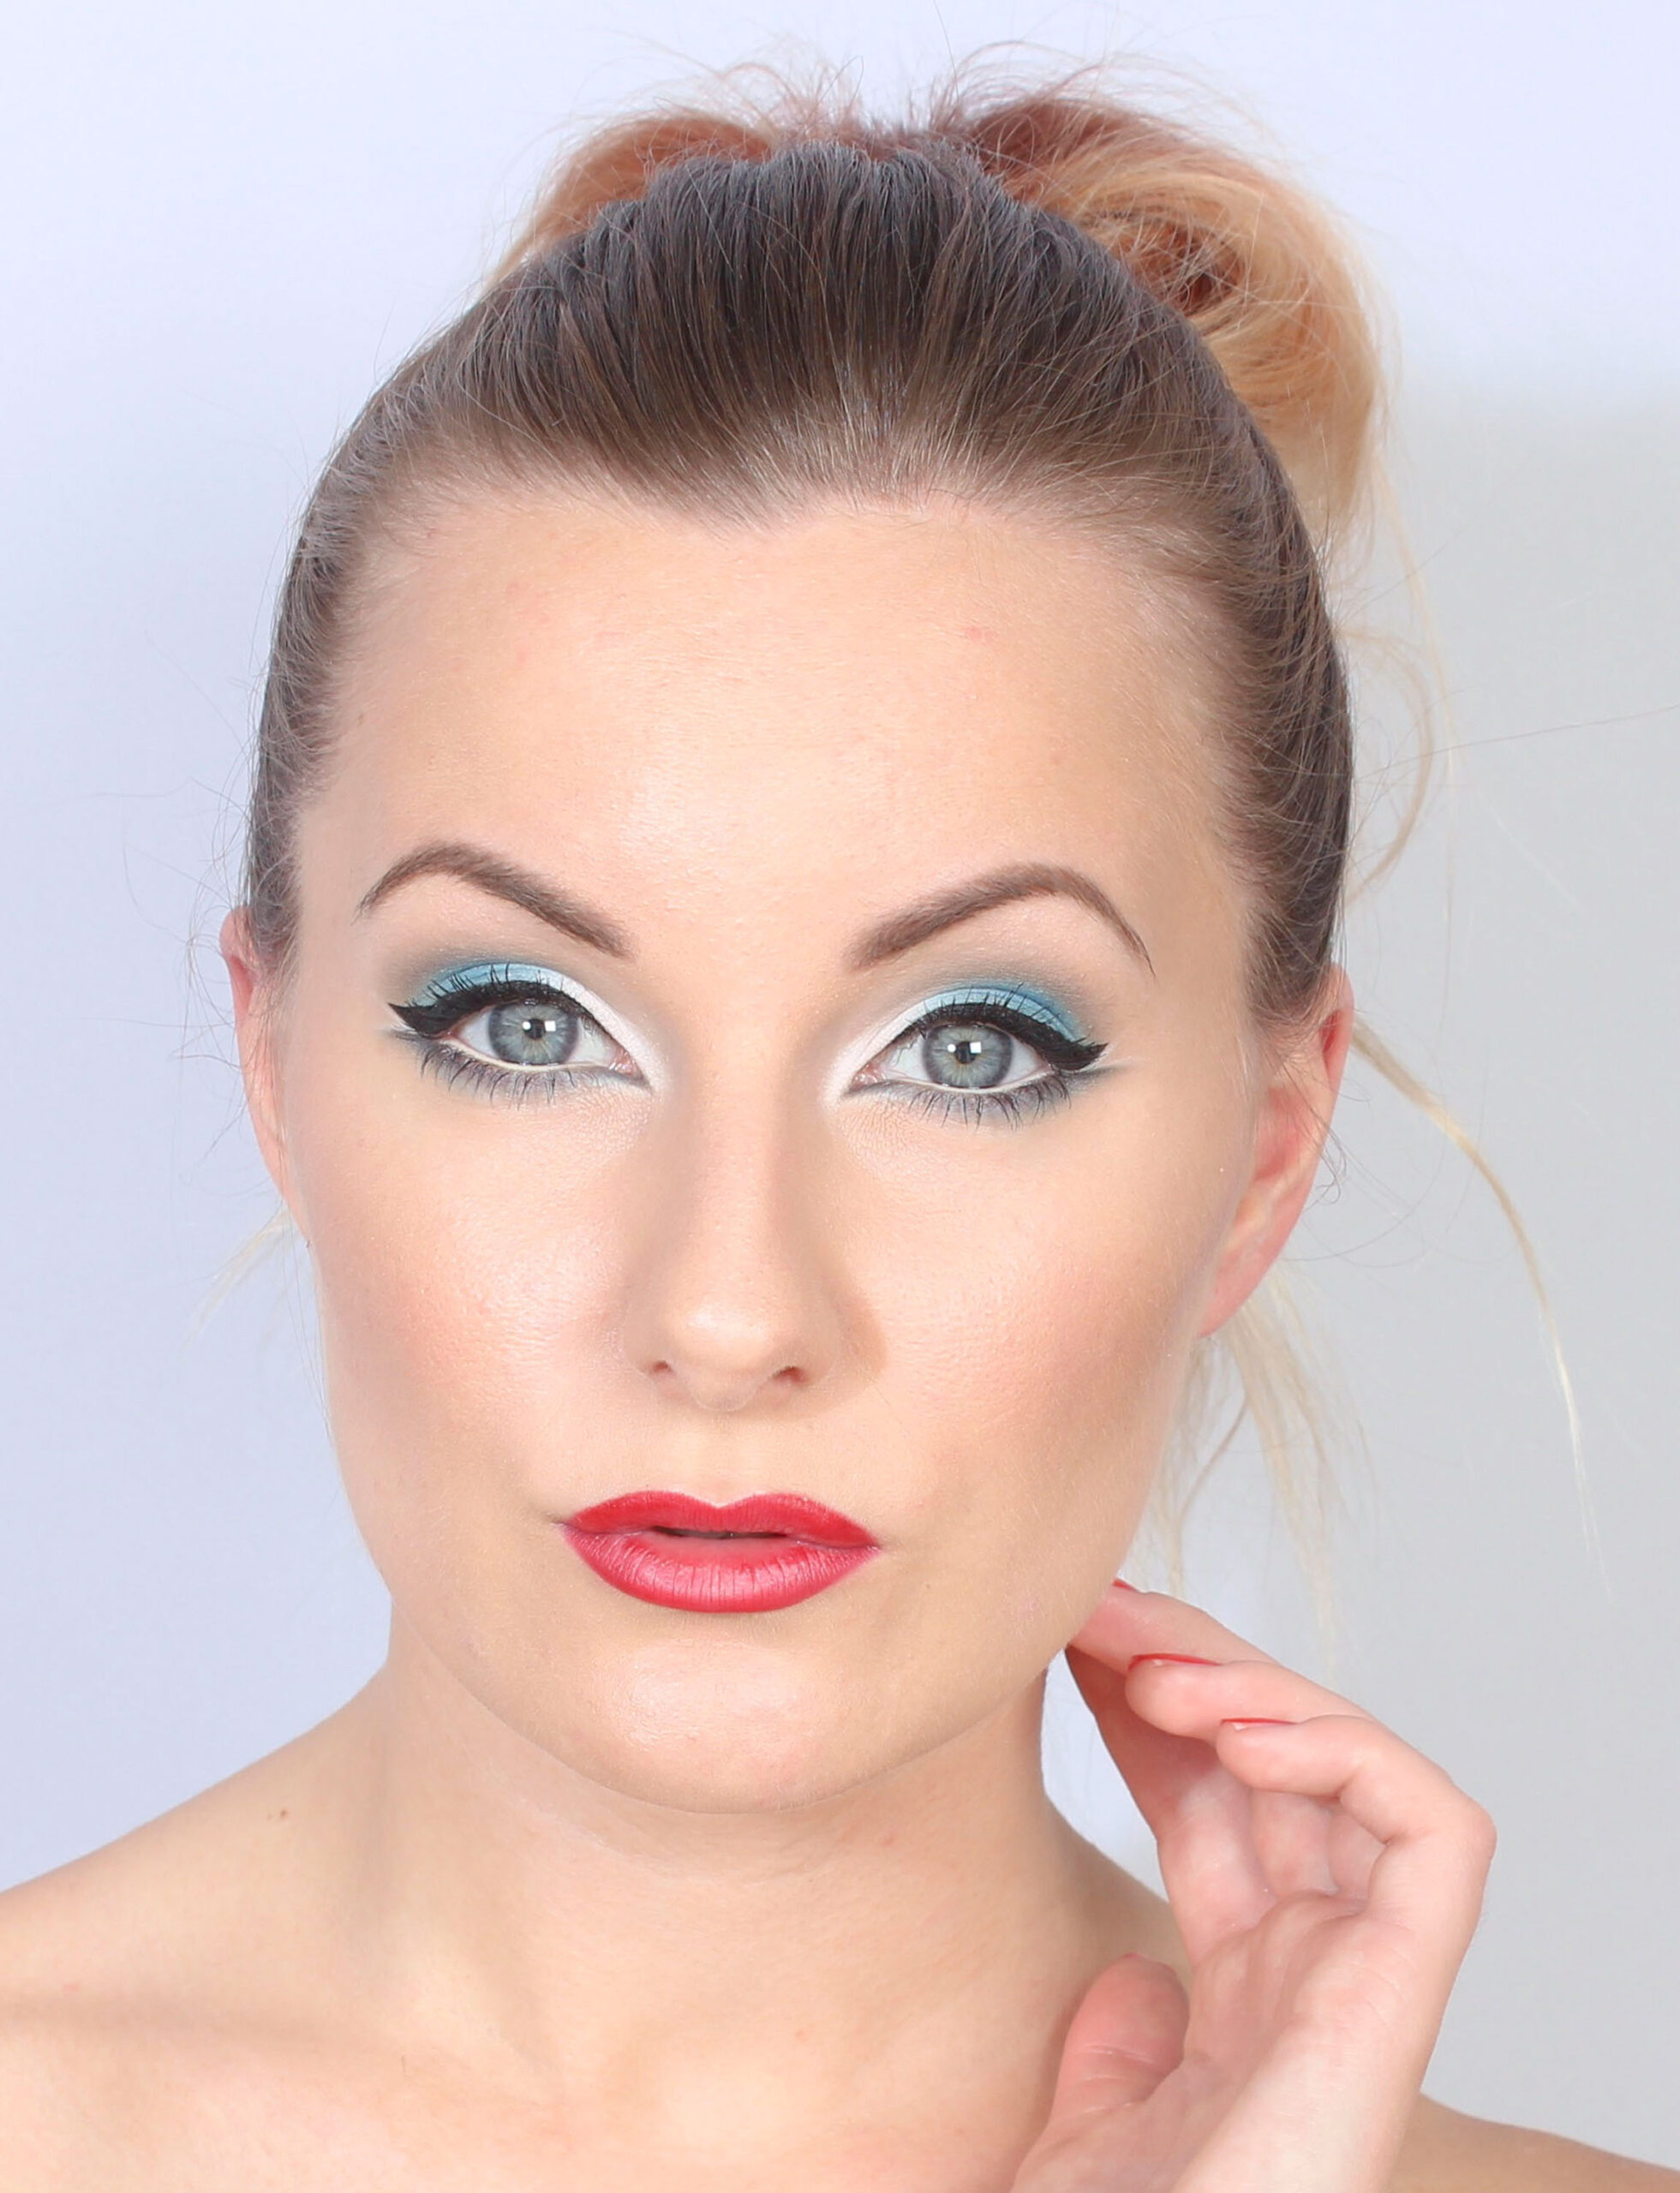
And this is what my skin looked like after the rest of the base make-up as well, surely you can not believe that I have so much visible stress during the make-up? ;)

Shout out if you have any thoughts! ♥


Jewelry in rose gold

2

I do not really say yes to press samples that have nothing to do with beauty products, but when I was asked by Happinessboutique.com I was so inspired by all the fine jewelry that I still said yes! :)

So this is not a paid post, just regular press samples as in regular reviews.

I have a craze for rose gold right now and use my rose gold watch from Triwa every day (which has also been a press test for a long time) and I have both become addicted to always see the time on my arm without looking at the phone, but have also come to the stage where I feel naked without a watch and think that the whole outfit looks empty without haha.

So it was fun to get two more accessories in the same shade to complement when you want to be extra spooky!

img_5007_111

On the website, they have a whole category that contains jewelry in just rose gold.

I have received a press sample of:

The ring Heartbeat which is shaped like heartbeat waves, so nice and also feels significant to me now. After all with my mother, I have become a little extra philosophical, nice!

And the bracelet Jewel Cuff Bracelet which is a design that fits super well with a watch. Have seen many inspirational pictures with what is circulating on social media and think it is so crazy nice :) The dropped rhinestone stone pretty quickly, however, so I have had to glue it back. In other words, the quality is not super good (if it was not just me who got a Monday copy or whatever you say) but it is super easy to glue and it feels like good quality in general.

img_5017_111

Nice to watch, huh? Love it!

img_5010_111

But the ring is probably my favorite!

img_4812_111

The jewelry is therefore from happinessboutique.com and if you enter the discount code "imakeyousmile" you get 10% discount! This is not something I get compensation for but only an offer for you readers :) The discount code is valid until 27 September.

Hope you all have a great start to the new week! ♥

name logo

Frost Bite

Red and light blue is such a crazy nice color combination I think!

You do not need to have super blue around the whole eyes either, but can have other shades around such as gray and brown which makes the eyes not feel as bright, if you want a more discreet eye makeup that is still blue.

My make-up today is not directly discreet though, but a little extra creative and enlarges the eyes incomparably much, but it also shows how nice light blue and red are together and also how you can tone down the blue by complementing with other more earthy tones :)

Hope you like the look!

img_4788_111

Bassmink:
Foundation - Pixi H2O Skintint (Nude) *
Powder that neutralizes red - gloMinerals Redness Relief Powder*
Contouring - Paese Bronzing Powder (1M) *
Highlighter - Pixi Book of beauty (Glow Getters) *
Rouge - Paese powder blush (35)*
Fixing Mist - Pixi Makeup Fixing Mist*

Eyebrows - Pixi natural brow duo (Natural Brown) *
Lips - Benecos Lip Liner (Red) * on the entire lips

paese-opal-trio-eyeshadow-ny

The incredibly beautiful blue eye shadow comes from Paese Opal Eyeshadow Trio* in the shade Frost Bite! All eyeshadows come from this palette unless otherwise stated.

tutorial25_111

  1. Eyeshadow primer, Pixi Eye Bright Primer*
    White eye shadow on the inside of the eyelid, Paese cashmere (601)*
  2. Blue eye shadow on the rest of the eyelid, and more white.
  3. Brown eye shadow along the globe line (same as the contouring)
  4. A little gray eye shadow in the globe line to darken.
  5. Black eyeliner with wing, Paese Liquid eyeliner
  6. Gray eye shadow along the lower lash line and outwards / downwards a little in the outer corner of the eye
    Black eye shadow a little in the corner of the eye, Paese cashmere (602)*
  7. Black at the outer edge of the lower lash line as well.
    White eye shadow under the eyeliner and over the gray eye shadow in the outer corner of the eye. And under the gray in the corner of the eye.
    Light eyeliner along the waterline, Benecos Natural White kajal
  8. Black mascara on all lashes, Magnetic lash mascara*

Clear!

img_4756_111 img_4762_111

Hope you were inspired :) Surely blue and red fit crazy well together?

Hugs are!min-webshop

Primer in powder form

When I was at a press dinner with Make Up Store at the beginning of the year, they showed the new Smoothing Primer, which is not like any smoothing face primer but is actually a primer in powder form.

It definitely piqued my curiosity, and now I have put this powder primer to the test and thought of reviewing it for you today :)

img_2444_111

What is Make Up Store Smoothing Primer?
A face primer in powder form that evens out pores and lines, and also mattifies the skin.

Skin types
Just because the primer is dull + pore-filling, it is a really good choice if you have an oily skin with a lot of pores. I experience a little that the primer can make the skin look dry in areas that are quite dry, but not much. So it is not a 100% optimal product if you have a lot of problems with dryness in the skin, but for normal and oily skin types it is perfect.

Use
I think it is best before foundation, but it can be used on top of the base make-up for a smoothing effect. I apply the powder with a flat foundation brush, and you do not have to work it into the skin, but it settles well immediately.

It also works well to use if you want to be unmade up otherwise, but want a smoother and more matte skin.

img_2677_111

Award
The price is around SEK 425, and it is a large jar and the powder is very good so it must be very affordable, I must say. Will last super long :) Available to buy online at, among other places Bubbleroom.se, not all retailers of Make Up Store seem to have it in the range yet.

Packaging
I think the jar is really super smart! Partly nice, but look what a good solution on loose powder strainer:

img_2685_111

Like a net, or a small trampoline :) Easy to get the powder up without having to shake the jar up and down, but still you do not have to dip the brush straight into a jar with powder but easily get it right away. Love it!

Results
The skin becomes much smoother, it really lives up to its promise at that point! I do not notice the soothing effect super much, however, but also need a soothing primer, so this + has a liquid face primer when I actually put on my make-up.

But as I said, two thumbs up to conjure up visible pores, look here:

make-up-store-smoothing-primer

You almost think that the after-picture is taken without focus, looks completely blurred! But it is as sharp as the pre-image :) Crazy good!

Summary - Two thumbs up by me! Smooth skin in 2 seconds. Not very degrading but very good, works well with other primers also if you e.g. want an even duller result. Highly recommend it to people with oily skin and visible pores. No wow primer if you do not have such problems or very dry skin I think, then you probably like a regular more, but for my skin it is great!

img_2432_111name logo

Behind the scenes - Competition and press event!

It is noticeable that autumn and all launches are starting to kick off, so much fun! Last week I was in Stockholm for three days, partly for the Make Up Store Beauty Show 2016, which I have already shown pictures from, but also a press event with L'Oréal Paris and then the Wella competition on Saturday.

And this afternoon I head to the capital again for a press dinner with Essie, full roll :)

I forgot the battery for my camera at the L'Oréal event (sigh) and at the Wella competition I did not have much time to take pictures, but I have some mobile photos + quick photos from the days I was going to bid on anyway!

IMG_4327_111

Here you see the make-up on the beautiful Emmy! Wide black eyeliner wing with brown, smoky eye shadow at the edges, and white details that lit up her eyes. I picked and colored the eyebrows at the salon the day before :)

When we saw how the hair came to be later, we changed our lips and made them more pink-purple.

IMG_4340_111

Here is Monica coloring the last loop! She had 3 hours on her for both color application, effect time on the color, hair styling as well as clothes and the final touch up on the make-up. And all the time the jury went around looking / asking questions. Pjuh! We just made it! :)

IMG_4345_111

Monica made less gray this coloring (compared to the shoot that took us to the final) plus mixed in a little violet in the gray color also to make it blend more. I loved the coloring on the shoot where it was so much gray too, but this coloring was more technically advanced and also incredibly nice! The shifts came to the fore more in reality.

D4A_8768

Picture borrowed from Hairmagazine.se.

Here you see the audience at Södra Teatern just before the show :) On the balcony in the autumn up I sit and have height anxiety anxiety deluxe haha. Higher fence please!

D4A_8701

Picture borrowed from Hairmagazine.se.

Surely the dress is absolutely wonderful? :) ♥ It's from Filippa K and is located at City Hall here in Uppsala.

As I said, we did not win but it was crazy fun from start to finish!

Here are also some pictures from the L'Oréal Paris event:

IMG_1014_111

One of the autumn launches is the growth spray Magic Retouch. L'Oréal has done a study on the reason why most people dye their hair, and realized how many people do it just to get rid of the growth. Both common outgrowth and gray outgrowth.

We got to see how it was applied (good with tips, will make a post about it soon) and this spray seems incredibly good really! Should be so fun to test.

IMG_1022_111

The other big launch is L'Oréal Paris Pure Clay Mask which you have probably seen advertising on already, it appears everywhere for me! :) Multimasking is the new trend (which I fell head over heels for, god what a great idea!) And L'Oréal launches 3 different clay masks (I who LOVE clay) for different skin types.

Use one all over your face or apply to different areas where you have different needs. For example, oiliness in the T-zone and moisture / luster on the cheeks. Smart!

IMG_1024_111

Wonderfully!

Now I will put on make-up and work on chords at the salon for a few hours before I run to the train to Stockholm.

Hope you have a great day! ♥

en_USEnglish