Colorful Cut Crease

This make-up was very fun to do, I love cut crease make-ups with several colors :)

Hope you like the look too!

Face primer - Pixi Flawless & Poreless Primer
Concealer - glo Under Eye Concealer (Golden)
Gelfoundation -
Pixi H2O Skintint (2 Nude)
Powder - Paese Bamboo Silk Powder
Powder that neutralizes redness - glo Redness relief powder
Contouring - Contouring Palette (2)
Rouge - Blush (35)
Highlighter - Pixi Glow-Y-Powder (London Luster)
Fixing Mist - Pixi Makeup Fixing Mist

Eyebrows - glo Micro Brow Pencil (Light brown and Raven)

Lips - The lipstick glo Suede Matte Crayon (Rumor) and lip gloss glo Lipgloss (Plumberry)

Love the color combination with yellow, orange and purple pink!

  1. Eyeshadow primer, Pixi Eye Bright Primer
    Orange eyeshadow on the inside of the eyelid, Paese Neo Eyeshadow (663)
  2. Purple pink eyeshadow at the end of the eyelid, Paese Neo Eyeshadow (650)
  3. White eye shadow along the globe line, Paese Kashmir Eyeshadow (601)
  4. Brown eyeshadow over the white, Paese Opal Trio (Colorado)
  5. Black eyeliner with wing, Paese Penliner
    black eye shadow at the end of the eyelid, Paese Kashmir Eyeshadow (602)
  6. Yellow eye shadow in the corner of the eye, at the bottom of the lower lash line and under the eyeliner, Paese Neo Eyeshadow (662)
  7. Orange eyeshadow in the middle of the lower lash line
  8. Purple-pink eye shadow next to the orange
    Brown eyeshadow at the end of the lower lash line
    Rosé brown eyeliner along the waterline, Pixi Endless Silky Eye Pen (RoseGlow)
  9. Black mascara on all lashes, Magnetic Lash Mascara

Hugs are! :)


PassionLight Makeup

Last week I showed in this makeup how to pimp your eyeliner with the liquid glitter shadow Pixi Liquid Fairy Lights in the shade Passion Light, and here is a make-up with a different way of using the same shade!

These glitter shadows are not full coverage, so I usually have the light ones alone with just the skin tone underneath just to get a little bling, but the darker shades with more pigment are super nice as a topping over other eye shadows.

In this make-up I have used a red eye shadow on the entire eyelid and then the copper-colored shade PassionLight on top. It turned out so heavenly beautiful !!

Face primer - Pixi Flawless & Poreless Primer
Concealer - glo Under Eye Concealer (Golden)
Gelfoundation -
Pixi H2O Skintint (2 Nude)
Powder - Paese Bamboo Silk Powder
Powder that neutralizes redness - glo Redness relief powder
Contouring - Contouring Palette (2)
Rouge - Blush (35)
Highlighter - Pixi Glow-Y-Powder (London Luster)
Fixing Mist - Pixi Makeup Fixing Mist

Eyebrows - glo Micro Brow Pencil (Light brown)

Lips - glo Lipstick (Love potion)

All products are in my web shop Creativemakeup.se!

If you use the glitter shadow as a "topping", it looks a little different depending on what color you have on the eye shadow below.

  1. Eyeshadow primer, Pixi Eye Bright Primer
    Red eye shadow on the entire eyelid, Paese Neo Eyeshadow (664)
  2. Copper-colored glitter shadow on the entire eyelid, Pixi Liquid Fairy Lights (PassionLight)
  3. Dark brown-red shadow at the end of the eyelid and along the globe line, glo Shadow Quad (Rebel Angel)
  4. Black shadow at the end of the eyelid, shaped like an eyeliner wing
    Dark brown-red shade at the end of the lower lash line and outwards
  5. White eye shadow in the corner of the eye and in the outer corner of the eye, Paese cashmere eyeshadow (601)
  6. Black eyeliner with wing, Paese Penliner
  7. Black mascara on all lashes, Magnetic lash mascara

Clear! All products are in my web shop Creativemakeup.se!


I felt really nice in this eye makeup! :)

Hugs are ♥

Basic makeup step by step

“Hey Helena! Love your blog and instagram! You have such heavenly fine skin, it looks like, but when you posted your post about your everyday make-up, there were 15 products and most of them were for the base. I wonder if you can set up step by step how to make your base? And what does your skin look like without make-up? Do you need so many products and why? ”

Need and need, in terms of coverage, I do not need it. Not like my skin is right now anyway, sometimes I have a lot of pimples but right now it is great according to my references :)

But it is the combination of oily skin and red / sensitive skin that makes it so. I need many products that work together on the debilitating effect while covering redness all over the face. For pimples and spots are not really a problem, I think it is easy to cover, the redness shines through easily!

So: If I only have foundation and powder, it can look good immediately afterwards, but after a few hours I am shiny like a mirror, the makeup drops and the redness shines through.

I can definitely show step by step and before and after pictures! :) All products are in my webshop creativemakeup.se.

Here you see before and after! As you can see, I currently have very few dots but am still quite red-flamed, which becomes much more intense when I talk, laugh, eat, etc. So when I touch my face simply :)

So the coverage is not really that high, I have a semi-covering foundation and then concealer on selected areas. What makes the skin tone so even is redness relief powder that removes redness.

1. Paese Makeup Base Matte
I start by applying a debilitating face primer for oily skin. The same primer is also available for dry skin and a corrective for red skin.

It is important to massage properly into the skin! I work it in with my fingertips.

There are 43 (!) Reviews of this primer in our web shop! :) Just to read!

2. Pixi H2O Skintint (shade 2.Nude)
This is a foundationgel which I never get tired of! It sinks into the skin, is oil-free and becomes very natural and fresh. The skin still looks like skin as well :)

You can apply with your fingers but a flat brush also works great, I use Nanshy Flat Foundation Brush. You do not have to work it into the skin (as I do with primer) because it sinks by itself because it is a gel.

See swatch pictures of the foundation shades in this post!

3. Pixi Pat Away Concealing Base (shade 1. Cream)
I commute between using this and glo Under Eye Concealer. Both are great, I just like variety :) I use a slightly lighter shade than the foundation because I like the illuminating effect.

I apply under the eyes, a little around the nose and sometimes around the lips, as well as on pimples.

Read more about the concealer in this post!

4. Two powders - one for dullness and one for redness
Many people get confused when I recommend two powders, can not you just choose one of them? Obvious can man but I usually do not see one as a powder but more as a cover product for redness.

Paese Bamboo Silk Powder - An extremely debilitating powder that is super good! There really is a difference between powder and powder! I apply it with a compact brush, not an ordinary powder brush. I use Nanshy Buffed Base Brush and dab / buffer the powder into the skin. If you buffer the powder into the skin, you get a larger amount without it looking dry / powdery, which is great for me with oily skin! The more powder, the longer the skin stays matte.

glo Redness Relief Powder - This is a yellow powder that neutralizes redness very effectively. I dab most of it just around the nose and then a little thinner layer around the mouth and cheeks. The powder changed packaging a while ago and is not in a regular jar anymore, but I usually pour it into an old powder jar and use it in the old honest way :) But you can also open the new packaging at the bottom and use it as a jar. I'm not happy with the packaging change but still do not want to stop selling the product because the content is too magically good!

IN this post you can see more before and after pictures and read more about the powder! And in this post can you see how effective the powder is on a scarlet pimple!

5. Color, shape, glow & fixing mist!
The face looks quite flat and dull after you have evened out all the irregularities, so then I get rid of contouring, blush, lustrous highlighter and finish with fixing mist for extra durability!

Contour Palette (shade no.2) - This palette contains a light shadow that I apply to the high parts of the face, and two dark ones that I apply in the deep parts of the face and in the crease line over the eyelid. You will find step by step on this in the webshop.

Paese Powder Blush (shade 35) - One of the few things I rarely vary, for some strange reason, have you thought that I basically always have the same blush? Blush in shade 35 is standard! Soft peach pink, it is absolutely perfect! I usually do not have much blush but can not live completely without either;)

Pixi Glow-Y-Powder - I never added extra glow to the face before because it does not look so nice when you get shiny during the day. But then I realized the tricks for how to apply highlighter when you have oily skin (read about it in this post) and since then I have glow almost every day. Read more about the highlighter and see swatch pictures of the shades in this post! I mostly use the shade London Luster, it is very light.

Pixi Makeup Fixing Mist - At this layer, I have applied very many different make-up layers and powders in all its forms, fixing the mist causes everything to melt together and becomes a protective layer for external stresses :) After I have sprayed on and it has dried, I sweep on a thin layer of bamboo powder over as well.

Filled eyebrows with glo Micro Brow Liner then the base is ready and then I look like this! It always looks a bit empty before you get eye makeup and lips I think :)

Read more about these narrow brow pencils in this post!

Redness Relief Powder and the contouring palette are probably the two most important basic products in my make-up bag! The redness is what bothers me most in the face, the dots can shine through a little, I do not mind. And as soon as I get a little smoothed in the face, I feel flat and need contouring haha. I would probably manage on just these two products I think :)

Hope you who asked the question feel that you got a good answer and that all of you others appreciate the post too! I've done some of these before but it's been a while now so I hope you do not think this was just annoying;)

Hugs are! ♥

Sunday post - Annika's birth

When you have run a company together for 3 years, it's time for the next step, move together and have children haha!

I always write about my work week on Sundays, but this week will be different because we have hardly worked at all - because on Tuesday at 10.02 Annika had a little daughter ♥

So since I only worked small this week, I thought I would write about childbirth instead? The work done is minimally interesting. I myself love birth stories and many customers have heard from me and asked how everything has gone!

Insemination in Denmark
Annika is single and has inseminated herself in Denmark. So me and Miska who now live in a cottage on her plot were present throughout the birth and the bb period! It is legal for single people to inseminate themselves in Sweden even now, but it still does not look exactly the same so Annika still chose Denmark over Sweden.

Maternity drink
Annika has had a great pregnancy and has felt good and trained all the time. Four days after the expected date, she swam in the swimming pool and felt so impatient that on the way home she bought ingredients for the famous "birth drink" that many use to start childbirth. And it worked!

For first-time mothers, it is common for it to take a very long time from the time you start to get "menstrual cramps" until the baby is out. So she drank the drink at 20 in the evening and thought that if it works, she can sleep in the beginning and then she is alert and rested when the pains start properly in the morning after.

That did not happen right;)

Here she is with the magic drink haha!

Hot tub and tanner
We watched a movie and 2 hours later she said "I'm starting to feel a little menstrual pain now actually!" and we went to bed. Miska fell asleep for a while but both Annika and I became too eager. I only had time to sleep 50 minutes and Annika nothing when we then at. 3 at night all three sat together in the hot tub and the pains were going really well!

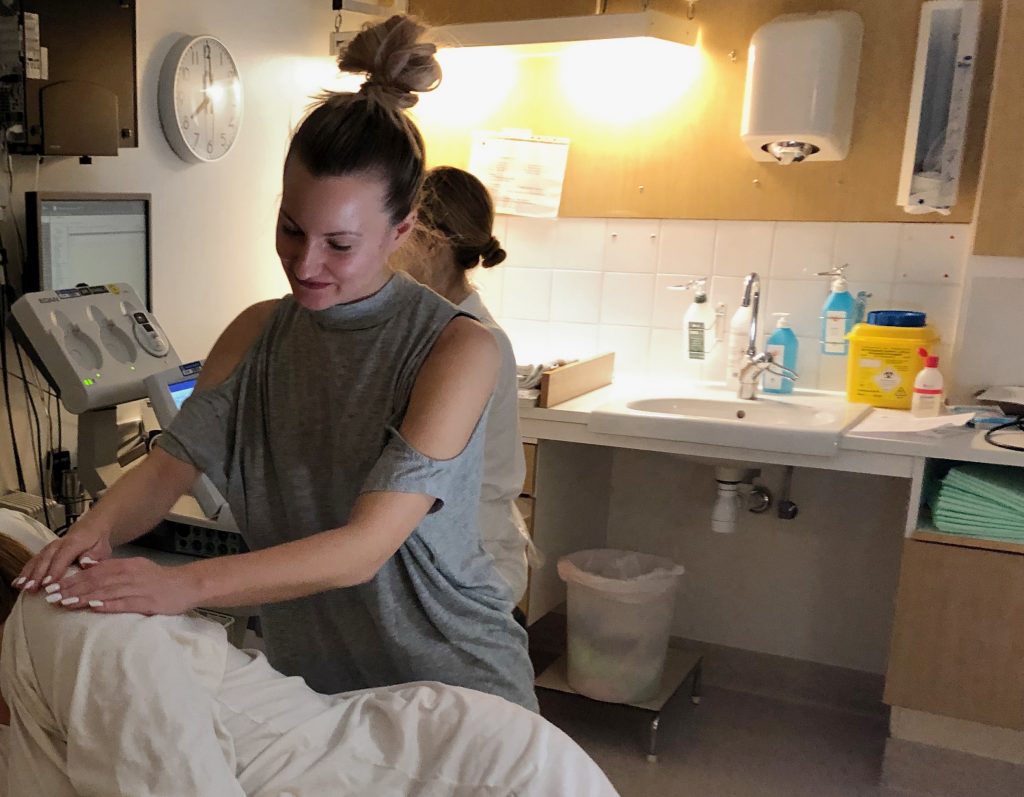
When the pains escalated further, we went in and used a tens device (which she says is worth GOLD!). Miska and I had learned massage techniques and such at the maternity course "Food without fear" and kept us busy. You often hear dads say that it's hard because you just stand next to them and feel helpless, but me and Miska were so involved in the pain and Annika herself said that what we did helped a lot, so I never felt that feeling which was nice.

Chest pain AT HOME and several miles to the hospital
At 6 o'clock Annika started to feel the classic ring of fire burning and said that it really pushes down now. It was no longer ordinary pain but aches and pains! She took the pain so well and we were prepared for us to be home for a long time, so it was lucky that she felt so clearly that it was on its way out because otherwise we would have stayed home for several more hours.

It felt completely surreal when I packed towels and rubbing alcohol in case there would be a car birth hahaha! The drive to the hospital is about 30 min.

The trip in went well anyway, she has practiced relaxing in the car every time we went to work, with hypnobirth meditation in headphones that she now put on as well. So she was calm and we did not have to use the towels;)

Natural childbirth without anesthesia
When we arrived, Annika was examined and was completely open (!) And rolled into the delivery room immediately. But even though she was completely open, the baby was not far enough down, so she was not allowed to shiver herself even though she had throbbing pains.

She tested different standing positions and we continued with our massage techniques.

Annika wanted as natural a birth as possible, no anesthesia (except tens), no nitrous oxide and no pain-stimulating drip or anything like that. Everything went as planned, except that we had to fuss a bit to avoid pain-stimulating drip when the head was on its way out, everything went so well and they always saw that the baby was well and then Annika did not want any excitement. The baby was almost out then. We had talked about this before so it was easy for me and Miska to take the talk so that Annika could focus entirely on her.

At 10.02, three hours after we entered the birth, the little miracle was born ♥ She had amniotic fluid in her lungs and did not scream so they roughed her a lot (brutally a lot in our untrained eyes haha) and then she lay and growled on Annika's stomach ♥

This picture was taken at 10.13 after I (!) Cut the umbilical cord and the baby could lie higher up :) Not because it is important to look good right then but you really see how awesome it is with permanent makeup!

Summary
With the results in hand, everything went in principle as Annika had wished!

We were not at all prepared for it to go so fast, but neither were we prepared for it to be so calm and undramatic once it was really underway. Despite the fact that we listened a lot to childbirth podcasts etc., you still have the "movie picture" in the head of a mother who screams hysterically and you have heard many birth stories that contained complications in different ways.

Annika was obviously in pain during the pain, but says that she never thought about asking for anesthesia. But she can really recommend tens device to everyone! She bought a worse device at home and never used the one they have at birth.

The only problem was that the midwife was a bit harsh and that Annika sometimes became unsure if she was doing the right thing because she received unclear instructions. But we were never alone in the room, had a super cute midwifery student and assistant nurse who pepped on and Annika gave 9 out of 10 in grades afterwards!

Two nights at bb
Due to the fact that breastfeeding was tough (which was probably due to the water in the lungs) and that the baby had low oxygenation in the blood and suspected wheezing in the heart, we stayed on bb until Thursday afternoon because they took samples regularly and so we had to see a doctor from time to time . But then all the samples had normalized and we had to go home!

I was also positively surprised at how taken care of we were on bb, they really put time on us and were incredibly careful and took the safe before the unsafe with exactly all the samples.

Can you be this cute? Here she is in my arms the first time we tested clothes! Just before we went home :)

She still does not have a definite name but we have written a list of suggestions and have some favorites.

Annika has printed our logo on baby clothes, so cute !!! Even on some cloth diapers haha!

Nestled in the car seat with the finest baby hat ♥

We did not sleep at all during the birth night and then we only had two beds + that the staff came in and took samples every two hours even during the nights, so now that we have been home Friday-Sunday we have had a lot of sleep to catch up.

The first pram walk in Annika's nice, white pram!

As you know, I often use make-up and make-up brushes for other uses, painting, nailing, etc. This make-up brush from Pür Cosmetics works gallantly as a baby hair brush;)

Looking for a new makeup artist
It was not long since I wrote that we are looking for a makeup artist for a Saturday job, in connection with that we found an interesting person who would be Lisa's replacement because in May it's her turn to become a mother!

But then there was nothing with that makeup artist, so this week we have posted a new ad that applies to at least 75% throughout the summer with a great opportunity for extension throughout Lisa's parental leave.

If you know a makeup artist around Uppsala who would suit us, feel free to suggest that the person email me at jobb@creativemakeup.se :)

What a corner week, a real adventure week! Now Miska and Annika and I will watch a movie with a baby in our arms and tomorrow Miska and I will return to routines again ♥

Hugs are!

Makeup with eyeliner - Passion Light

This Monday I showed you ”my everyday make-upAnd wrote that my craze right now is a classic eyeliner with wings. I do it every day I do not make up for the blog :)

The eyeliner in that post was pretty slim but I love wider eyeliners too! On the other hand, I do not like on my own eye shape to make a very wide all-black eyeliner, because when it takes up too much space on the eyelids, it looks a bit flabby (note my own opinion on my own eyes only, nothing I think of others).

But if any of you experience the same thing, that it is nice and effective with a really wide eyeliner but do not really like it - then here is a tip!

Make the top of the eyeliner in a different color, in this post I have used a liquid, copper colored glitter shadow. Then you get a very wide eyeliner but it is still not "just black" when you look straight ahead :)

Face primer - Pixi Flawless & Poreless Primer
Concealer - glo Under Eye Concealer (Golden)
Gelfoundation -
Pixi H2O Skintint (2 Nude)
Powder - Paese Bamboo Silk Powder
Powder that neutralizes redness - glo Redness relief powder
Contouring - Contouring Palette (2)
Rouge - Blush (35)
Highlighter - Pixi Glow-Y-Powder (London Luster)
Fixing Mist - Pixi Makeup Fixing Mist

Eyebrows - glo Micro Brow Pencil (Light brown)

Lips - glo Lipliner (Coral crush) on the whole lips and tiny Paese Silky Matte Liquid Lipstick (701) in the middle of the lips.

The glitter blends to great with every blink :)

  1. Eyeshadow primer + powder, Pixi Eye Bright Primer
    (important with primer for us with oily eyelids, fix with powder if you do not use eye shadow)
  2. Eyeliner on the entire lash line, Paese Penliner
  3. Paint eyelinervinge also
    Copper-colored, liquid glitter shadow over the entire eyeliner, Pixi Liquid Fairy Lights (PassionLight)
  4. Light glitter in the corner of the eye and around the eyeliner wing, Pixi Liquid Fairy Lights (Crystalline)
  5. Apply lightly with light shadow on the eyelid and brown along the globe line, Contouring Palette (2) (same as the contouring of the face)
  6. Black mascara on all lashes, Magnetic Lash Mascara

Clear! All products are in my web shop Creativemakeup.se!

Finally I have long nails again too !! Feeling like myself again;) I have had shorts for a while because I have not been able to care for them, but I live with Annika now and it was she who taught me to build nails myself so now she fixed me! Nail extension with tips, acrylic powder and nail glue. Good shit :)

Really nice with a "free nail therapist" who is very pregnant and bored at home at the kitchen table haha.

Have a nice day everyone!

Hug ♥


en_USEnglish