Eyeliner - Make up an eyeliner of eye shadow

Here you see how I have used an eyeshadow to make up an eyeliner.

I did this eyeliner make-up last week but have not been able to publish anything in the blog for a while when we changed server, which took longer than planned and I could not publish anything during the server move itself.

But now so! :)

eyeliner of eye shadow

BASE:

All products are in my web shop Creativemakeup.se!

Face primer - Paese Makeup Base (Mattifying)
Foundation - Pixi H2O Skintint (2 Nude)
Concealer - glo Skin Beauty Under Eye Concealer (Golden)
Powder that neutralizes redness - glo Skin Beauty Redness relief powder
Powder - Paese Bamboo Silk Powder
Contouring - Contouring Palette (2)
Rouge - Paese Powder Blush (57)
Fixing Mist - Pixi Makeup Fixing Mist
Freckles - Paese Kashmir Eyeshadow (604 and a little 609)

Brynpenna - Benecos Eyebrow Designer (Brown)
Bryngel (+ caring) - Refectocil Styling Gel

Lipstick - glo Skin Beauty Cream Glaze Crayon (Chiffon)

turquoise eyeliner

Glittered really became the icing on the cake in this eyeliner! I must also say that I think it is much easier to get a nice eyeliner wing when I use other colors than black.

eyeliner tutorial

EYES:

All products are in my web shop Creativemakeup.se.

  1. Properly apply eye primer at the bottom of the eyelid, Paese Beauty Record Eye Primer
  2. Turquoise eye shadow as eyeliner, Paese Neo Eyeshadow (687)
  3. Moisten the brush with fixing mist, sharpen the edges and paint the eyeliner wing with the same eye shadow
  4. Black eyeshadow at the bottom of the eyeliner, Paese Kashmir Eyeshadow (602)
  5. Brown shadow at the end of the eyelid and along the globe line, Paese Kashmir Eyeshadow (604)
  6. Light eye shadow in the corner of the eye and on the inside of the eyelid, Paese Kashmir Eyeshadow (667)
  7. Brown eye shadow under the eye as well
  8. Liquid glitter in the corner of the eye and in the innermost part of the eyelid, Pixi Liquid Fairy Lights (Crystalline)
    Black mascara on all lashes, Magnetic Lash Mascara

Clear!

My waterline is tattooed light. So for exactly the same eyes, you can supplement with glo Skin Beauty Eye Pencil (Peach) too.

eyeliner and noodle lipsnice eyeliner eyeliner and eye shadow

Hope you were inspired!

If you want to find more make-up with eyeliner, try it search here in the blog. :)

Hug, hug ♥

Werlabs Review - How Does It Work?

0

How does Werlabs work? Here I have summarized my Werlabs Review and how I experienced everything when I went and tested myself :) Have you tested Blodkollen or Werlabs?

Werlabs blood test XL fast

Everything with the sampling went well, but I would fast before and I'm hard stuck so I think it's a little uncomfortable. This is how I sit afterwards and eat a late breakfast and feel a little sorry for myself, haha! So it became a chocolate ball too ♥

Werlab's health checks, what can they check?

Werlabs has several health checks via blood tests and can check allergies, fertility & pregnancy, vitamins & minerals, body / organs & hormones.

You go to the health center and get tested if you suspect that something is not right, but if you just want to do it as a check then you can book a blood test via Werlabs! A doctor's comment afterwards is also included.

It was Annika who actually told me about this, who did it for fertility & pregnancy when she inseminated herself.

They also have different sizes of health checks where they test several things, so it is easy to choose the one that fits! I myself chose the health package XL which shows 33 different test results.

Read more about all the controls they have here (adlink)

Werlabs how long does it take to get an answer?

You usually get your results with doctor comments within 48 hours.

When Werlabs receives results from samples, they are sent out to you on an ongoing basis. The time varies depending on whether the sample must be sent on for analysis or can be done on site. However, you will have to wait for a final medical evaluation until all the results are ready. However, Werlabs does not release complete test results without a doctor's comment.

Click here to find answers to the most common questions (adlink)

My review - Health check XL

I did health check XL.

I mentioned that fasting is difficult but the test should be taken before 10 in the morning and fasting is only for 10 hours. So really, it's just a late breakfast. It gets a little mental just that I get hungry because I know I can not eat, haha.

It was very easy to order the sample. You just shopped online and booked an appointment. I took the sample at the doctor's house in Uppsala and everything went smoothly and well! No weirdness.

I received a text message when the test results started to arrive, so it was filled up all the time. But it took two days until everything was ready and I had also received the doctor's comment.

There were two samples that were too high, but thanks to the doctor's comment, I was told that it was not bad. It was a little too high with red blood cells and a little too high with vitamin D (I had just been on a sun holiday). But as long as it is just a little above the reference value, it is great that these levels are high!

Something I could not read myself (because all samples were good, but it depends a bit on how they are related to each other as well) was that my cholesterol / blood fats were not great if you look at it in the long run. It is good now, but it is well reached that indicates that improvements should be made if it is to continue to be good. It was worth gold to find out in time !! I've really thought about it, eating more healthy fats and so on :)

Werlabs Corona & Covid 19 test

Werlabs also offers an antibody test to test if you have had a Covid-19 or a PCR test to test if you have an active infection.

The PRC test also includes a travel certificate, as many countries have begun to request a negative test result 24-72 hours before their trip.

Read more about Coronatest (adlink) hos Werlabs.

Give away a gift card at a health check!

You can also buy gift cards at Werlabs to give as a Christmas present or a gift to someone you like! The gift card can be loaded with a specific amount and redeemed on the website when ordering a test.

A perfect Christmas present in these times, above all fun and interesting to get an insight into how your body feels and if there is something you need to get to grips with to improve your health!

Click here to buy gift cards (adlink)

Werlabs Review - How Does It Work?

Click on the image to see how your body feels ⤴

There are also other companies that do sampling, e.g. Blood clot. Then I do not know if Blodkollen or Werlabs is the best, because I only tested Werlabs. But if you have tested yourself with any of these, feel free to leave a comment below about how you thought it worked for you! :)

This is my Werlab's review and I hope you liked this post and my review, if any questions arise please leave a comment.

Also read my posts about vitamins:

Black eyeliner for an intense look

One black eyeliner along the waterline, why do I not use it more often? It's so heavenly nice!

My best tip here is to not only draw the pen as a line along the waterline and then stay there, but I also usually lay down a little towards the lower lash line and fade out. It makes the eye look much bigger than just drawing a line.

My second tip is to not only put a layer with the pen on the waterline, you get so much better durability if you draw a line, apply mascara or something in between (so that the eyeliner has time to dry) and then add another layer. Then it's spotless!

Tips, tips :)

Here is the result:

black eyeliner

Black eyeliner from Pixi Endless Silky Eye Pen in the carbon black shade Black Noir. You will not find a blacker eyeliner! It is also waterproof and super nice to work with as the texture is so creamy before it dries. LOVE!

BASE:

Face primer - Paese Makeup Base (Mattifying)
Foundation - Pixi H2O Skintint (2 Nude)
Concealer - glo Skin Beauty Under Eye Concealer (Golden)
Powder that neutralizes redness - glo Skin Beauty Redness relief powder
Powder - Paese Bamboo Silk Powder
Contouring - Contouring Palette (2)
Rouge - Paese Powder Blush (57)
Fixing Mist - Pixi Makeup Fixing Mist
Freckles - Paese Kashmir Eyeshadow (604 and a little 609)

Brynpenna - Benecos Eyebrow Designer (Brown)
Bryngel (+ caring) - Refectocil Styling Gel

Lipstick - glo Skin Beauty Lipstick (Bella)

intense look with black eyeliner

I have finally done the brow lift again after a short break and I feel life in me !!

There is no reason why I had a break with brow lift, more than that I kind of postponed it and then forgot how amazing it is, you get used to it so quickly with your neutrals, so I have not prioritized it. But then, I will never stop again! It makes such a big difference to my eyebrows :)

makeup tutorial black eyeliner

EYES:

  1. Black eyeliner along the waterline, Pixi Endless Silky Eye Pen (Black noir)
  2. Add a little in the French edge as well
  3. And fade out, the brush is Nanshy pencil brush
  4. Paint the eyeliner along the upper lash line as well
  5. And fade out.
  6. Brown eyeshadow on the eyelid and under the eye, a little more along the globe line, Paese Kashmir Eyeshadow (609)
  7. Light shimmer shadow in the corner of the eye and under the brow, Paese Glam Eyeshadow (201)
  8. Black mascara on all lashes, Magnetic Lash Mascara

Clear!

carbon black kajal carbon black eyeliner intense eyes

Think how much you can achieve with a black eyeliner. :)

Lipstick in the shade Bella is one of our best sellers at the salon and the most common shade when we do bridal makeup in fact :) A pink color that is very neutral in tone, pink without feeling the least bitchy, you could say. So fine!

Hugs are ♥


Build the campervan - We bought a van!

6

SO funny news - we have bought a van that we will build the campervan from !!!

It was bought completely empty and Miska and I will rebuild it like a camper !! :)

We have already started and I have posted some on Instagram Stories that are saved in my highlights @HelenaAmiley, you can look it in right now!

But I will also make more detailed step-by-step posts here in the blog for those of you who want to know more, perhaps before building your own? However, I will change the blog design a bit first, so that the categories are easier to understand. Thinking type beauty /vanlife/ entrepreneurship, what do you think about it? :)

Here comes the first post about building the campervan and our plans around it!
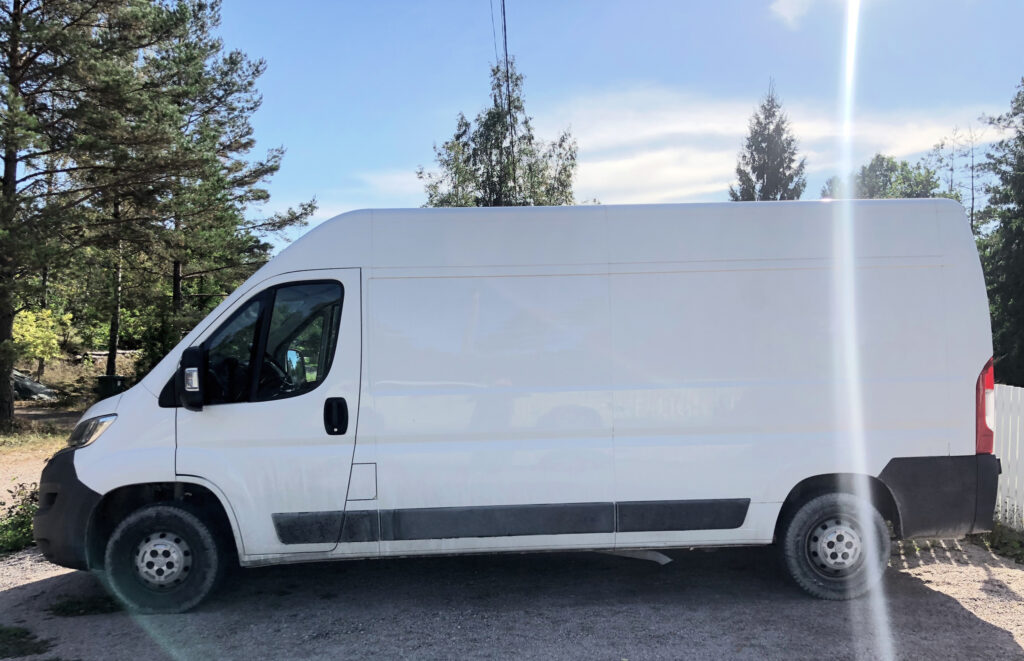
Our van, Hector! ♥

Frequently asked question - how and why?

Are you going to live full-time vanlife as a small mini house? Are you traveling abroad or in Sweden?

The answer is that we are open to everything! We build it fully equipped for both hot and cold climates, but the basic idea is to be able to go on longer trips in Europe and work remotely at the same time.

Long journeys are otherwise not optimal for us because we have a cat. Then we also have a rather unclear housing situation, we have been living in Annika's (our business partner and friend) guesthouse for almost 2 years. But she will move next year and we do not want to buy anything in Sweden before we can afford our dream - a mountain house in Spain;) So we also see this van a bit as a security, no matter what happens we will not be homeless haha.

Should I guess, I think we will stay partly with Annika even after the move, either in the parking lot with the van or if she buys a house that also has a guest section. As well as partly on the road with the habit.

We simply like freedom! ♥ Lite ”vanlife entrepreneur”You could say, but possibly only part-time.

Then we think that we still have the habit even when we have achieved the dream of a house in Spain! Our dream is a house in the mountains, but to have a van that we can go to the coast with (we love Tarifa!) You get the perfect mix! :)

But as soon as we are done, we will start slowly to get used to my cat. She's calm as long as she's cozy and that I'm with her, but we will not drive a long trip the first thing we do. Then it will probably be Gotland and Finland as first trips!

I insulate the doors with rock wool. I thought it was just fiberglass insulation that itches and sticks, but had to learn the hard way that you need proper gloves and full-coverage clothes even for rock wool;)

The plan: From an empty van to finished construction!

So we have bought a completely empty van (Citroen Jumper L3H2) and will build everything ourselves. We have done a lot of research!

Details our van will have:

  • Solar panels
  • Electrical outlet with 230 volts and 12 volts.
  • Spotlights in the ceiling, with dimmer
  • Diesel heater
  • A large sunroof over the bed that can be opened. With mosquito nets and blackout.
  • A sunroof with fan in the front. For cold air and ventilation.
  • Water tank of 150 liters
  • Bathroom with shower and toilet. I have looked into a spa shower which is very water-saving but still perfect pressure / spread. Taking a lovely shower is quite important for my well-being so I think we will put some extra money here.
  • The toilet will probably be a self-built toilet toilet :) This is how we save some money!
  • Kitchen area with deep sink, gas stove and refrigerator with freezer compartment
  • Fixed bed (not how you convert to a sitting area)
  • Seating for 2 people.

The bed at the back and the seats at the front, so you can open up the back doors or the side door and sit and chill with a wonderful view when you are at inspiring places :)

Then we have lots of ideas for smart solutions in terms of storage and other flexible, we hope to get it! :)

Miska builds most things but I help a lot too! He does rough work and I do fine grinding and small pills, you could say. We have good teamwork also when it comes to decisions and ideas, not just the execution, so I feel very involved even though I can neither screw, saw or carry heavy;)

We have done this so far!

As I said, I will make step-by-step posts later, but we have already come a little way so I thought I would show a little quickly what we have done so far!

And note: Everything is probably not quite according to the rule book. We are not carpenters :)

Step 1: Away with everything, so it's just a tin shell! Only the cleaning was a project, it has been a work car before so exactly everything was gravelly and dusty + dog hair. I felt that it was very important to get it completely fresh before we started building, even though most of it will be built in, it's more mental as well.

Sound attenuation :) It is important to reduce noise as much as possible, both for us but also for my cat Viktoria who will be in the closet while we drive.

There is a lot to think about when building the campervan!

Here you see a blissful mixture of all the parts that we use for the whole habit, this very corner is our future bathroom :) Will be type 80 × 60 cm is the plan, so at least!

The black on the floor is armaflex insulation. Like a soft carpet type.
Then the blue discs are xps insulation.
The white foam between the blue panels on the wall is foam insulation.

We have insulated very carefully in other words :)

In the picture you can also see our drain in the shower and the pipes with power cord that we built into the beams before we insulated.

And finally: plywood!

Miska is so good at building the campervan!

The walls get the black armaflex carpet as the last layer and then panel over. Here Miska is working on the side door. Rent good ??? ♥

We will paint everything later, but other than that, all the doors are now completely finished! Nice huh? :) I'm so happy!

And so far we have come in building the campervan at the time of writing! Where there is a panel, a kitchen counter will be, and the deeper part next to it (with plywood board) is where the bed will be.

We will sleep across the car so we have insulated less right there to get a few cm longer bed. I think it's 188 cm in total and I'm 160 and Miska 180, so it's going to be perfect :) And type 120-130 wide is the plan.

Live small & work remotely - how will it go?

Had I moved directly from the large villa we lived in before to a van then I would probably have been more worried. But now we live in a small attefallshus of 15 sqm (I think) so we are very used to living a little already.

We will need to scale down even more, absolutely. But at the same time, this is super-planned down to the smallest detail with storage built into every single thing, so sometimes it feels like we will get more storage than we have now haha.

Things we are already used to:

  • Small refrigerator with freezer compartment. It's just a little bigger than what we'll get used to.
  • Only two hotplates. We currently also have a portable hob that we bring out when we use it.
  • Small bathroom. Just so you can just "step in".
  • No hall. Kitchen, living room and bedroom in the same room.
  • No oven
  • If you compare with ordinary households, we do not have many kitchen machines. Kettle, blender, toast, waffle iron and everything you have :)
  • Very few kitchen utensils. For example, only two small pots, no colander, etc. :)
  • No washing machine / tumble dryer. This point depends a bit on where with the habit we are somewhere. If we are in Annika's car park or in a country with a laundry company here and there, it's just like today - we take the laundry to Annika. But if we are in the middle of the forest, there is of course a big difference!

Things we need to get used to without:

  • Micro
  • Coffee maker
  • Fewer clothes, shoes, etc. I do not have much of that in any case, but will still need to reduce. So I have some cleansing in front of me!
  • The hardest part: My make-up corner with photo studio !!! Must solve this with just small ring lights and toiletry type.
  • Cat door for my cat Viktoria who is used to running in and out.

This is sooo fun! Both building the campervan, dreaming and curiosity - how will it be? :)

The next step will be sunroofs and electricity, I think (batteries, solar panels, lamps, sockets, etc.) so that we can make the roof later. The bit I think sounds the most difficult and can not help almost anything, otherwise we have incredibly good teamwork actually!

I post regularly on my Instagram @HelenaAmiley and there you also see videos which gives an even clearer picture, so come on in and take a look! :)

Search here to find more posts about building the campervan.

Hugs are !! ♥

Make-up for passport / driver's license / ID / black and white

Hey wonderful you !! : D

Since we have changed last name, Miska and I fixed a new passport last week.

Then I realized that mine posts I wrote in 2014 (haha a long time ago now) if "makeup for pass / leg / driver's license" is still one of the posts that has the most views in the entire blog thanks to so many googling on just this, I thought it would be fun to do a remake !

So here are my best tips that you can keep in mind when you put on make-up for all types of black and white images, but above all make-up for passports, driving licenses or other ID documents.

Hope the tips are helpful! :)

make-up for passports / driving licenses

Here you have my make-up handy!

The passport picture turned out pretty good actually. Much better than mine before anyway! For the driver's license, you can send in your own picture and then I sent in this particular picture and it was approved. So exactly like this I actually look at my driver's license! :)

BASE & LIPS:

neutralize redness

1. Neutralize redness

The degree of coverage and the brows (which are already made in the picture) I do as usual - but what I think extra about is to neutralize redness and blemishes a little extra. Red is often darker than your own skin tone, which can look like a stain on black and white images.

I use glo Skin Beauty Redness Relief Powder (adlink) and apply it with a small and soft brush for more precision (Nanshy Eye Crease Brush) because I only apply the powder on selected areas, not the whole face. I am mostly red around the nose and on blemishes.

bronzer

2. Bronzer

Before the contouring, I sweep on a little discreet bronzer, almost all over the face but mostly on the sides (not the middle of the nose, the highest point on the cheekbones and chin).

This is not a step for everyone, the reason for me is that I am so heavenly pale pale so the bronzer becomes like a little extra "soft contouring" before the real contouring then.

A little premium maybe, but a bronzer is a little warmer in tone than my contouring shadow, so I prefer to apply a little bronzer first in larger parts of the face and then the contouring shadow with more precision.

One of my favorite bronzers is Indy Beauty Bring on the sun! Bronzing Sculpting Powder (adlink).

glada mungipor

3. Gladare mungipor

Another premium step and a bit quirky (?) Step maybe as I do just because I'm a makeup nerd and think it's fun :) it's to put a little contouring shadow in the mouth pores!

You have to be relaxed on the passport picture and then I look so heavenly sour. I probably do that anyway because you do not want to make the worst joker smile either haha. But a little difference, I imagine it does anyway! :)

lips passport photo / driver's license

4. Sharp lip contour & ombre effect

Regardless of whether you want neutral lips in the same light / dark position as your skin tone, or if you want a little darker, I like to mark the contours with a pencil! Marked lips in a black and white picture are so heavenly nice, I think. Everything that provides a little contrast!

A strong color on the lips can be a bit unnecessary, it is difficult to judge how dark it will be in black and white and it will still only be gray. A dark red lipstick can look almost black on passport photos. I therefore chose a neutral mlbb color (my lips but better).

In addition, I made an ombre effect with a darker lip pencil, because it's so nice in black and white when the lips get a little lighter in the middle!

Lip pencil: glo Skin Beauty Lip Liner (adlink) in the shade Vino.
Lipstick: glo Skin Beauty Suede Matte Crayon (adlink) in the shade Monogram.

bass makeup before passport photo

5. Contouring

Then contouring with light and dark shadows!

A favorite both of me and the rest of the world;) is Anastasia Beverly Hills Contour Kit (adlink).

The brush in the picture is Nanshy Contouring Brush. I think a skewed is easiest, but it's a matter of taste!

Skip red?

I usually put the blush in the middle of the cheekbones, but in black and white pictures it becomes a shadow which can make the cheeks look a bit depressed. Rather lay a little further down or skip the blush completely! By further down I mean the lower part of the cheekbone, not so far down that it is down on the jawbones :)

EYES:

make up for a passport photo

Step by step the eyes come further down, but first some tips to keep in mind!

Eye shadow

I like to open my eyes a little with a darker color above the globe line (high enough to be seen when looking straight ahead) and otherwise keep the eyeshadow makeup soft and most of the eyelid bright.

Feel free to choose eye shadows in neutral tones such as beige, brown, white, black, gray. Namely, it can be difficult to predict e.g. how dark a green eye shadow becomes in black and white.

Examples of a superb and useful palette are Pixi Eye Effect Shadow Palette (adlink) in the shade Hazelnut Haze. So nice!

Once I went spontaneously and fixed workouts (so did not have this in mind when I put on makeup that morning) and had a bright blue eye shadow on the entire eyelid. In black and white, it suddenly looked like a really uneven smokey eye! And not in such a nice Kate Moss way, but rather criminal with blue eyes on both eyes. That mistake is not repeated! :)

Marked gaze

The eyes can easily disappear a bit on black and white pictures, so I frame them with eyeliner without skimping! Feel free to place a light eyeliner along the waterline as well.

Really good products that I like:

I applied mascara normally / sparingly but it's nice to apply a little extra mascara and maybe even false eyelashes too! :)

Examples of make-up for workouts:

step by step makeup passport photo

Gradually:

  1. Eye primer on the eyelid
    Light eye shadow on the inside of the eyelid and in the corner of the eye.
  2. Light brown eye shadow in the middle of the eyelid
  3. Brown eyeshadow at the end of the eyelid and along the globe line
  4. Black eyeliner with wing
  5. Brown eye shadow under the eye as well
    Black mascara on all lashes

Clear!

Here is my entire make-up fit:

make-up passport photo / driving license eyeliner for passport photo eyeliner makeup passport photo / driver's license make up to fitmake-up for passport black and white

The model is with only foundation and eyebrows, then you see the difference with all the shadows and details in the model :)

Note this is how I made me up for my black and white passport photo, there are lots of more make-ups that of course also fit!

Hugs are! ♥

Also read: 12 simple make-up tips for beginners + Make-up (step by step)

en_USEnglish