Ida Warg Shampoo & Conditioner - Review (Repair + Silver)

A long awaited review of Ida Warg Shampoo & Conditioner & body products! I have tested both the Repair series and the Silver series for a long time + the hair wraps :) Also three of Ida Warg Vitalizing products for the body; Shower Mousse, Shower Oil and Enzyme Body Peel!

Do not miss my post where I review brown without sun products in the post "Ida Warg Brown Without Sun (BUS)”Which also contains general bus tips and tricks for application, even results, long durability etc.

Now to this review! First out is "Ida Warg Shampoo & Conditioner Repair".

Ida Warg Shampoo & Conditioner + Shower Products

ida warg shampoo, ida warg review, products, body care, hair care, repair, vitalizing, affordable, tips, makeup tips

Ida Warg is a vegan beauty brand with good products for a nice price tag! The products in this post cost (at the time of writing) between 99-179 kronor.

Incredibly nice in the bathroom, the products are too!

My hair type:

Since hair products work differently on different people, I want to start by describing my hair type. I basically have good quality hair, many but thin hairs. Very straight hair. It is bleached and I have my hair up a lot, it is absolutely a bit worn;) My scalp is oily and relatively insensitive. The color is a mixture of my natural hair color (dark blonde / light brown) but turns slightly yellow-green in tone if I do not keep up with color-adjusting products when I wash my hair.

Ida Warg Shampoo & Conditioner & Hair Mask Repair Review

Product description: "Strengthening products that contain algae extract for dry and damaged hair. Repairs and rebuilds the hair deeply with long-term protection while restoring the hair's natural strength and vitality.

ida warg shampoo, ida warg review, products, body care, hair care, repair, vitalizing, affordable, tips, makeup tips

The series includes shampoo, conditioner and hair wrap. I have used the products many washes now, the packaging is basically completely finished.

Fragrance: The scent is fresh, a little "perfumed" I would describe it. So not a scent that I can put words to such as floral, sweet or the like - but a clear perfume scent simply. But the correct description is "A floral, vibrant scent with Arabic jasmine, patchouli and freesia".

Packaging: The shampoo and conditioner come with a cork that you press up. Nice to avoid flip-cork because they easily break, I think. But it is also difficult that the bottles do not stand firmly upside down when they start to run out. Judgment can stand up and down but I have such a rickety bathroom shelf so it works like this :)

Also available in larger sizes and these have a pump! I would choose that next time :)

The hair wrap is in a jar, which I usually do not prefer, but when it comes to hair wrap, my opinions are divided. You should not put your fingers in the jar! But who can have a spatula in the shower? In practical terms, however, I like cans when it comes to hair wrapping, nice to pick up a big dollop of a little cream and the hands feel pretty clean in the shower anyway, haha.

ida warg shampoo, ida warg review, products, body care, hair care, repair, vitalizing, affordable, tips, makeup tips

Ida Warg Repair Shampoo Review:

Ida Warg Repair Shampoo (adlink)

Thin but creamy and foams a lot! I who have very oily hair may with some shampoos need to use a lot for it to be so frothy and clean, but this shampoo I would say is very good. The hair feels really clean afterwards, two thumbs up!

Ida Warg Repair Conditioner Review:

Ida Warg Repair Conditioner (adlink)

Very light formula, slides easily through the hair and is not difficult to distribute evenly. If you use it after the hair wrap (since the hair is already very straightened), a very small amount is needed. Very nice!

Recommend to buy The DUO kit (adlink) for a cheaper package price!

ida warg repair hair mask, hair wrap, review

Ida Warg Repair Hair Mask Review:

Ida Warg Repair Hair Mask (adlink)

A thick and quite thick hair wrap! Feels really great to apply in the hair. When it is to be rinsed out, the feeling is a little more "fluffy", however, which I am not sure if I like or not. It does not feel as "rich" then anymore. But it does not have to be negative!

The feeling afterwards is very good, not as super-smooth as many hair wraps can be, but when you finish with conditioner and then dry the hair, it is very smooth and nice!

Summary Ida Warg Repair products: Whether the hair is repaired or not is difficult to answer, it is not a wow factor on the quality but not bad in any way but the hair feels really good after each hair wash :) I am super happy!

Ida Warg Shampoo & Conditioner & Hair Mask Silver Review

Product description: A gentle series of violet pigments that neutralize yellow and warm tones. Contains wheat proteins that help to moisturize, strengthen and build up damaged and worn hair. ”

ida warg shampoo, ida warg review, products, body care, hair care, repair, vitalizing, silver, affordable, tips, makeup tips

The series includes shampoo, conditioner and hair wrap. I have used the products many washes now, the packaging is basically completely finished.

Fragrance: The scent is sweet and the first thought is "candy!". The correct description is "summer watermelon".

Packaging: Same as the Repair series. The shampoo and conditioner come in bottles with lids that are pushed up, but are also available in larger packages and these have a pump. While the hair wrap comes in a large jar.

silver, ida warg review, products, body care, hair care, repair, vitalizing, affordable, tips, makeup tips

Ida Warg Shampoo Silver Review:

Ida Warg Shampoo Silver (adlink)

Very pigmented silver shampoo! Gives effect even when used without the other silver products. Foams a lot and the hair feels clean and fresh! Many silver shampoos can feel a little rough, but this one is mild in my opinion.

Ida Warg Silver Conditioner Review:

Ida Warg Silver Conditioner (adlink)

A thin and smooth conditioner with milder pigment than shampoo. I have not tried to use only the conditioner without the shampoo, but my impression is that it gives a mild effect. If you have a lot of yellow pigments, you probably need the whole series and not just this conditioner. Easy to distribute in the hair and feels very nice!

These are also available to buy as duo-kit (adlink) with a cheaper package price! :)

ida warg silver hair mask, hair wrap, review, silver wrap

Ida Warg Silver Hair Mask Review:

Ida Warg Silver Hair Mask (adlink)

Very good and nice hair wrap! Very reminiscent of the Repair series in addition to the violet pigments. It becomes a little more "fluffy" when you rinse it out, but during application it feels very creamy and overweight. I like it! Experiences this as more effective / pigmented than the conditioner

Summary Ida Warg Silver products: I actually prefer silver products that attract a little more to pink purple than blue, because I also easily get very green tones in my hair. I need some red-pink pigment to turn out the green. Ida Warg shampoo in the silver series is quite blue, while the wrap draws a little more to pink, but the effect of all products is that my hair gets a slightly dull tone.

BUT two thumbs up because they give a completely even and nice cold color - no part of the hair absorbs more pigment and the whole series together than very effective! :) Highly recommended!

My hair color after several uses of the Silver series, Both Ida Warg Shampoo Silver, conditioner and the hair wrap!

Ida Warg Body Care - Vitalizing

Product description: Vitalizing is a perfect series of skin care products for those who feel that the skin is tired and a little dull. Has revitalizing crowberry extract as a common thread through all the products that protect the skin in an uplifting way. ”

body care, ida warg, review, shower oil, vitalizing, enzyme body peel, shower mousse

The Vitalizing series comes in shower mousse, enzyme peeling, shower oil and hand cream. I have not tried the hand cream though!

Fragrance: I LOVE the scent of these! Fruity fresh I would say, sweet but not "gooey" but just fresh :) The correct description of the scent is "exotic notes of pineapple and peach in combination with soft hints of almond and vanilla". MUMS!

Packaging: The mousse comes in a classic mousse bottle that is shaken before use. Works very well! The peeling comes in a tube, which I like, practical and easy to get out the last :) The flip-top lid is easy to open even with wet hands in the shower. And the shower oil comes in a pump bottle, very good!

body care, review, vitalizing shower mousse

Ida Warg Vitalizing Shower Mousse Review:

Ida Warg Vitalizing Shower Mousse (adlink)

How nice at any time! Creamy foam that cleanses the skin and smells super good! Love!

body care, ida warg, review, shower oil, vitalizing enzyme body peel,

Ida Warg Vitalizing Enzyme Body Peel Review:

Ida Warg Vitalizing Enzyme Body Peel (adlink)

Exfoliates both mechanically with silica scrub grains and chemically with AHA, PHA and enzymes from pomegranate. So this one is SO good! My new favorite product! The skin feels really clean afterwards, you can clearly feel on the skin that very dead skin cells have disappeared. Still, it's not strong or irritating either (on my skin at least).

As you can see in the picture, I have also tested it in the sauna, it worked brilliantly! Highly recommend !!

body care, review, vitalizing enzyme body peel,

This is what the formula looks like, I just scrub a little mechanically but let it work for about 2 minutes.

body care, review, vitalizing shower oil,

Ida Warg Vitalizing Shower Oil Review:

Ida Warg Vitalizing Shower Oil (adlink)

Both me and my boyfriend Miska like shower oils. Miska has very sensitive skin for perfumed products, but he thinks that this one from Ida Warg works very well and feels gentle and comfortable!

I also like it a lot! Smells super good and the skin feels clean and fresh, but at the same time moisturized. Very good!

ida warg shampoo, ida warg review, products, body care, hair care, repair, vitalizing, affordable, tips, makeup tips

That was it! :)

Hope my review of Ida Warg shampoo, conditioner, hair wrap and body care was helpful! Just shout out if you have any questions! :)

Hug!

Also read:

How to get a Glow Up? - (9 tips for inner & outer glow!)

What is it & how do you get a glow up? The concept itself has been around for quite some time but has recently become more popular. Therefore, I thought I would now go through what it means and how you yourself can do a glow up fast!

How to get a Glow Up

You will find this glow up make-up here (link).

What does Glow Up mean?

Making a glow up is a significant transformation of oneself towards the positive. A glow up can be applied to positive changes in both appearance, health, success & self-confidence. The term Glow Up is most often applied to a person's self - confidence.

In other words, a change that seems but is not necessarily clear. Inte ”vad fine you are in your new hair color"But rather"WOW you radiate, what have you done !?” :)

A glow up can be planned or unplanned, fast or slow and temporary or permanent. If you are looking for a planned glow up, read on for my best tips! :)

Source: Urban Dictionary

How to get a Glow Up?

It can be difficult to know where to start. But the best thing is to start with the small steps! We all have different conditions and taking on unknown land can therefore be scary. 

One oneself and society have certain expectations of one and if one changes these one can be questioned. It can be anything from weight, hair color, the way you talk to how you do things. That is why it is difficult to bring about a change because you think you will meet resistance.

Everyone can live the way they want to live as long as they feel good about it! An important step for that is to stop judging each other and instead show appreciation! :) ♥

My tips for getting a real glow up of course also work for guys & men! So if you are a guy and also looking for a glow up then read on!

Here are my top tips on how to get a glow up:

Make a list!

I sometimes make an inspiring list of what I would like to change to be happier, prettier and feel better. Wow how silly it sounded (?) Haha but when I feel the need for it it makes a big difference.

So it is not about big goals in life, but several small things that directly or indirectly affect my "inner and outer glow". It's always good to write things down!

Such as doing IPL hair removal at home to be able to sit tailor and move freely on the beach without thinking about straight dots :) Or clean the closet and dare to be more "my own style" every single day, it will be very basic days otherwise which is not really "I" .. And be myself more myself overall - I have sometimes been "silenced" a bit in my upbringing as I have a very loud voice, of course you should think about other people's ears;) but when I am my usual loud me who just laughs straight out without thinking about it - then I feel the best!

In other words, something like no other really looks, but it makes a big difference to how I feel and feel in everyday life - which in turn is visible to the outside because if you feel good and feel comfortable, you also have charisma! :)

The sun also makes me feel good! Will put "move to Spain" on my next glow up list haha;)

2. Le mera & peppa yourself!

Joy and laughter are probably the best medicine to both see well-being and good looking!

Perhaps the easiest way to get a direct glow up is to smile at yourself in the mirror and everyone you meet! … Then I'm not talking about that "fake smile" that you sometimes get when you meet someone out for a walk, you know that which looks so convoluted? Without a wonderful smile coming from within :)

It may take a little practice if you do not usually smile so much, but a person who looks genuinely happy immediately gets 90% more charisma!

How to get a Glow Up

It is also easy to blame yourself and see what you are bad at instead of focusing on all the good you achieve and all the challenges you have managed!

I draw angel cards sometimes (is not medial, but find it fun and rewarding). The last two times I have received the same card! The card "gratitude" which means that if you are grateful for what you have, you will get more of it! And vice versa, negativity breeds negativity. Worth to be reminded! I am a very positive person but even I need from time to time a reminder not to focus on the bad :)

Give yourself a pat on the back over all the good you achieve every day! As you would do for your child or your best friend! It can be anything from a successful meeting, to finally cleaning the attic (as I myself did here a week) or something as simple as washing dishes right after the meal. We deserve pepper and if no one else can give it to us, we can at least give it to ourselves!

3. Simple makeup tips for Glow Up:

You do not have to do a whole make-up to get a glow up! Even small changes are enough to boost self-confidence. Beauty is wellness!

color eyelashes, color eyebrows, eyebrow color, eyelash color, depend, refectocil

For example, color your eyelashes and eyebrows! Then you get color and framing of the face even when you are unmade up :) In the post Color Eyebrows & Eyelashes at Home (5 Steps) so I clearly show how I do and share with me a lot of tips!

make-up eyes bigger, globe line, eyes, make-up, stylish eye makeup, make-up inspiration, make-up course online distance for private individuals

In the post "Make up the eyes bigger & step by step”You get lots of tips for making up a more open and lively look!

makeup makeup tips for beginners, simple, fast, natural, discreet, How to get a Glow Up

Another post with super many simple makeup tips is this: 12 simple make-up tips for beginners + Make-up (step by step). It is usually the smallest details that make the biggest difference!

If, on the other hand, you want to do a bang make-up for a quick glow up, I recommend you read mine Ariana Grande Makeup posts!

Or (!) Haha now I get started properly :) I also hold make-up courses online that are perfect for beginners. Gaining new knowledge and trying new ways can be a huge inspiration! Makeup should be fun! :)

You buy a web training that you go at your own pace, but can also choose the variant that includes personal feedback and advice. Read more at Helena Amiley Academy of Makeup.

4. Get your beauty sleep!

Many people think that they can manage with a little sleep, and it may work for a while. But it will be felt and seen on you if you do not get enough sleep. We can only go a few days with insufficient sleep until it starts to feel on the body & the moon!

So prioritize sleep over being up for a long time and wasting time surfing!

5. Eat more natural foods:

We all feel better by eating less processed foods and instead eating more naturally. A quick way to get a glow up! Test that e.g. have a "natural week". It can be difficult at first but you learn a lot from it!

Many times the challenge is to learn to eat new things or in a new way. Breaking habits.

Miska and I have been eating mostly naturally since February this year and it's actually not hard at all I think. Just feels fresh! It's like not a diet or a period, but a healthy lifestyle. Health is the most important thing we have - and is an area where you can actually influence a lot yourself :)

How to get a Glow Up natural diet, healthy lifestyle, fried parsnips, good healthy food

6. Move daily:

The body is made for movement and activates both the lymphatic system and causes the blood to pump better through the body. There are great benefits to be gained in daily exercise for both the body and the brain!

If we are active and strong, it shines through in our minds. You get a lot more energy!

7. Straighten your back!

Attitude is much more important than many people think! Walking with forward-leaning shoulders and bent back makes us less confident and gives pain over time.

So straighten your back and get a glow up! Leaning shoulders is often a consequence of office work / work in front of the computer. This causes the back muscles to stretch and the pectoral muscle to tighten, which causes the shoulders to bend forward.

It can be sorted out by training the back muscles and stretching the chest muscles.

8. Brown without sun:

You can quickly get more color and brighten up with tan without sun! For a quick glow up on your skin, tan without sun is the salvation.

Can tip about my post about Ida Warg brown without sun, I can highly recommend it!

ida warg brown without sun, step by step, tutorial, tips, application, mittens

9. Drink properly!

Get plenty of fluids to keep your body & skin hydrated, and by that I do not mean energy drink in all its forms but plain water!

Water is the essence of our lives, without water we can not manage and if you are in the habit of drinking too little during the day, this can make a big difference!

drink water, liquid, water bottle

Summary

Glow up is not really something you get but rather something you do for yourself for your own well-being but as a bonus shines through to everyone around you!

It is also possible to get a glow up by changing your appearance in many different ways, but I have chosen to include the ways you actually feel good about and something you can easily influence! :)

Hope all of you who read get to experience moments of Glow Up! They make you feel good and move on in life! Do you have your own experiences or tips on how to get Glow Up fast, so feel free to share in the comments below! :)


Color Eyebrows & Eyelashes at Home (5 Steps)

It does not have to be that difficult to dye eyelashes or dye eyebrows at home! Here is a step by step guide on how to color my lashes and eyebrows myself with eyebrow color / eyelash color.

Coloring eyelashes on yourself may otherwise sound like an impossibility, but after many mistakes, I have found a way to apply eyelash color that works for at least my eyelashes. It will be as good a result as at a salon!

The most common brands to color eyebrows / eyelashes at home are Depend and Refectocil. I use Refectocil eyebrow color and think it is the best eyebrow color, but Depend also works! :)

I used Depend eyebrow color before but do not remember so detailed, however, I have many customers who say that the biggest difference is that Refectocil lasts longer.

Table of Contents:
Color EyebrowsColor EyelashesChoosing the Right Color – Questions and answersProducts

dye eyebrows, dye eyelashes, dye eyebrows at home, eyelash dye, eyebrow dye, dye the eyelashes on themselves,

Everything you need to color eyelashes / color eyebrows at home: Eyebrow color, eyelash color, hydrogen peroxide, Vaseline and tools! I link everything you need in the step-by-step description + a summary list at the bottom of the post! :)

This guide also works for guys & men! So if you are thinking about how to color eyebrows or eyelashes as a guy / man, read on! The method is the same regardless of gender!

Color Eyebrows at home step by step:

Coloring eyebrows at home is easy technically, just apply the color and wait a while. BUT there are lots of little tips and tricks that will help you get such eye-catching eyebrows as at a salon!

So preferably do not just look at the pictures but read my tips for each picture :)

Refectocil light brown light brown, hydrogen peroxide, oxidation cream, depend eyebrow color

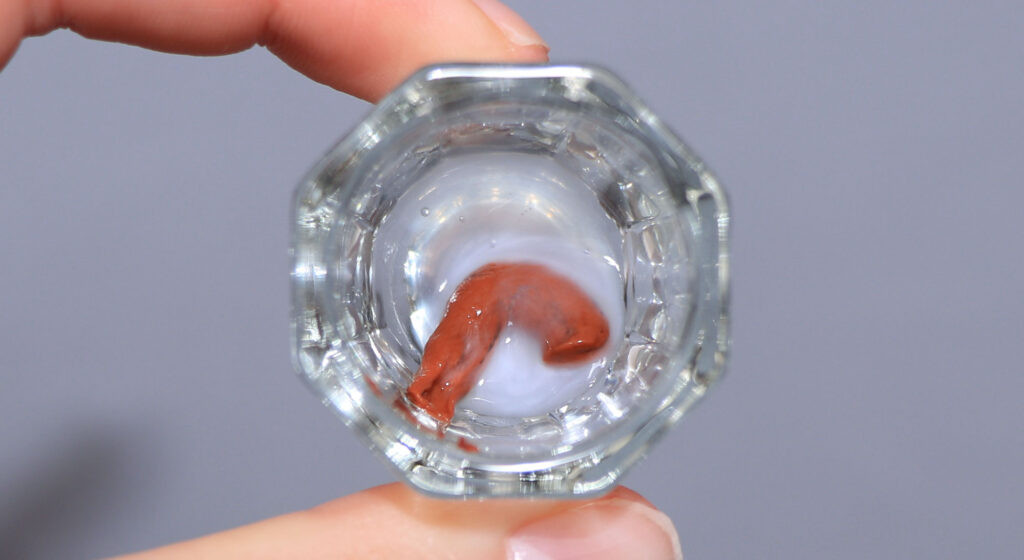
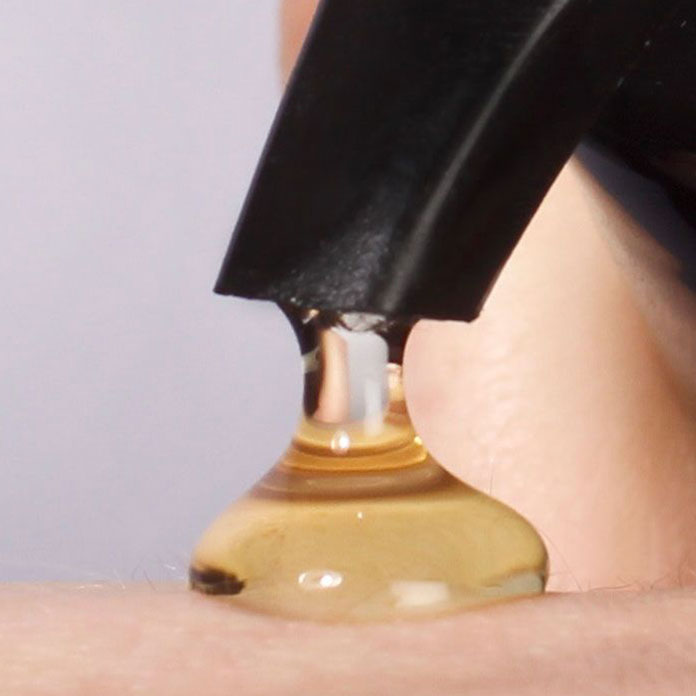
1. Mix eyebrow color

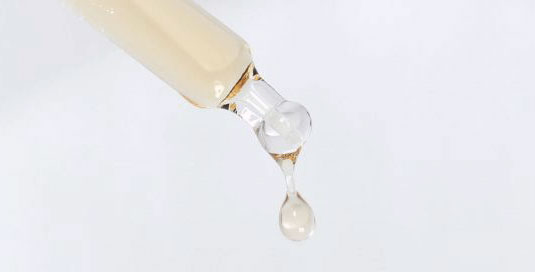
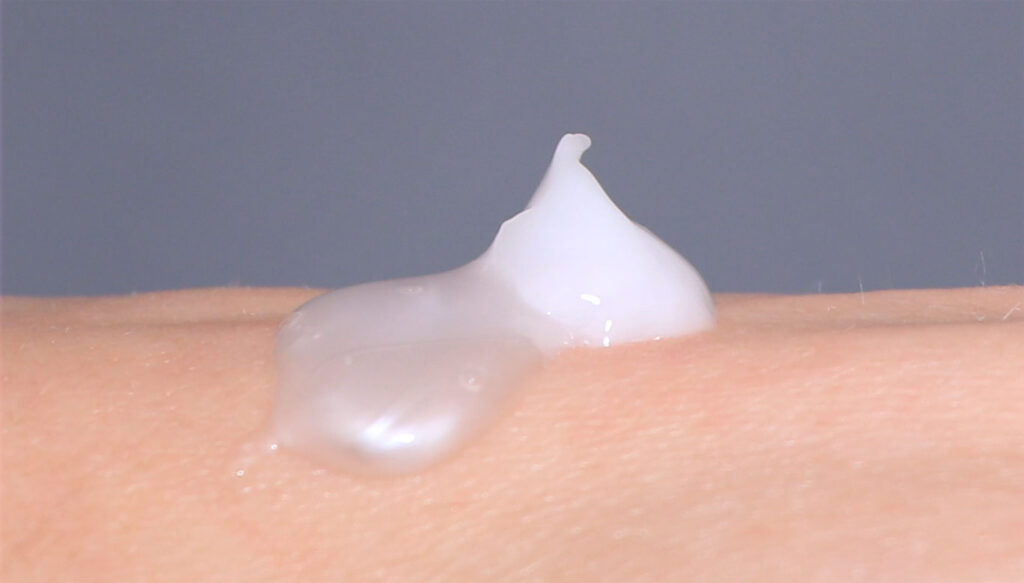
Mix eyebrow color with hydrogen peroxide cream about 50/50 in amount. This picture is for you to see the amount, but I mixed with my brush afterwards so that it becomes an even cream!

I use the color Refectocil Eyebrow Color (adlink) in the shade Light Brown. I write more about choosing eyebrow color / eyelash color further down in the post!

And the hydrogen peroxide Oxidant 3% Creme (adlink). Available in a more liquid form as well, but I prefer to work with the cream. You must activate eyebrow color with hydrogen peroxide, otherwise nothing happens.

I have a perfect dip bowl that is for coloring eyebrows, but you can use a regular glass as well :)
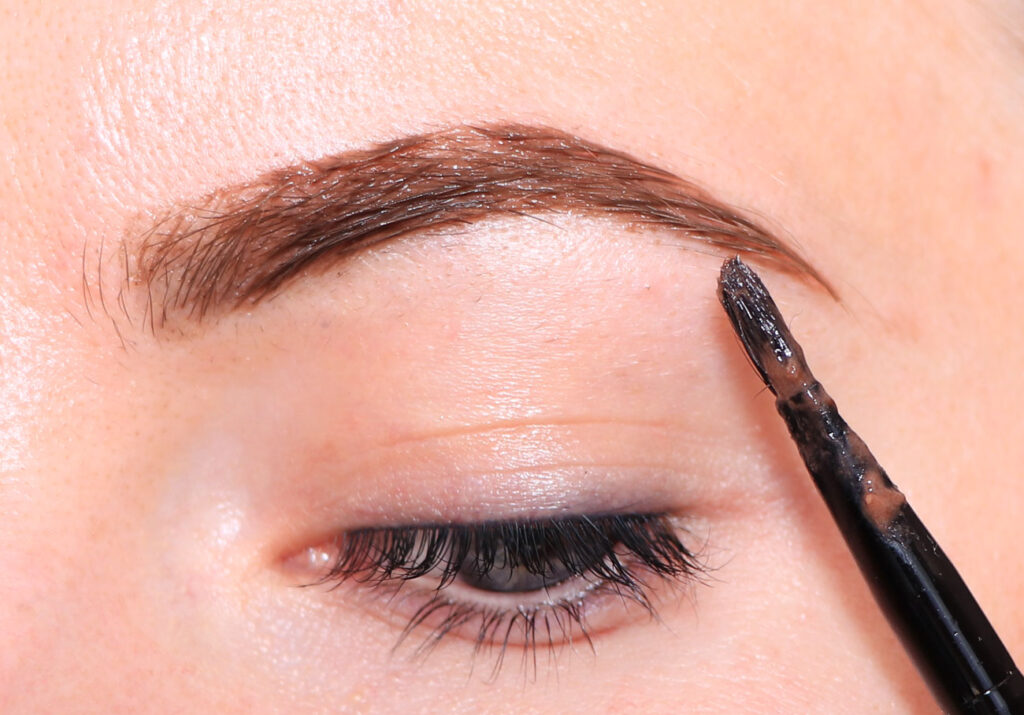
fefectocil light brown light brown

2. Color eyebrows

Start applying eyebrow color to the areas you have the lightest / sparsest with straws.

For me, this is the top and highest point, which is very common. There, it is often sparser with straws, which means that it is perceived as lighter (if you have darker straws than skin).

With it can vary! Some have sparser edges or a sparser spot somewhere.

Longer duration of action = darker results. To a certain extent, of course. The result is a more even color if you color the more sparse areas a little longer.

If you have even eyebrows without sparser areas, it does not matter much how you apply the color. Some people want darker outer edges and lighter inner ones, then you can put in the outer edges first!

refectocil light brown, brow, shape, tops, cotton swab

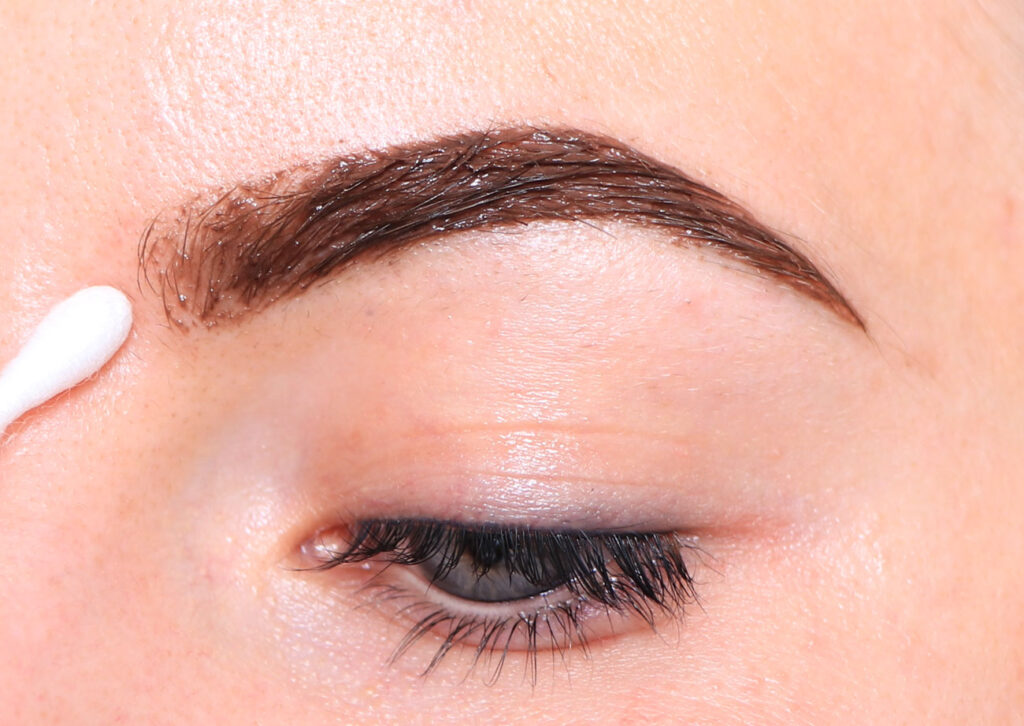
3. Clean the edges with tops / cotton swab

Draw with a top along the edges so that the color lies nicely in the shape you want it.

You can color eyebrows by applying a thick mass on the entire brow only, but then you should preferably protect the area around the eyebrows with Vaseline, because the color can discolour a little on the skin immediately afterwards.

If the skin becomes colored and you put on a nice shape, it does not do much, the eyebrows just look nicely made up. But if you put the color like a bluff, you will have a bluff stain around the brows later, which is not so fun :)

eyes, lashes, eyebrows, brush, makeup brush, synthetic brush, skin, eye,

Do each step on both brows at the same time. So in my case; the top of both brows, then I put on the bottom of both brows.

So I do not usually finish the paint on one brow and then start on the other, but I do everything calmly and slowly on both brows at the same time.

Effect times I thus do not know here, but when I put on the top of the second brow and cleaned with tops, it is time to continue with the bottom of the first brow.

refectocil light brown natural brown light brown natural brown

… And all the way to the edge!

dye eyebrows, dye eyelashes, dye eyebrows at home, eyebrow color, dye eyelashes on oneself,

In the inner edge I usually put a little less thick with paint + dab a little with tops so that the edge is not completely straight.

This is because the color can stick a little on the skin immediately afterwards, then it is fine if it is not sharp and dark in the inner edge.

dye eyebrows, dye eyelashes, dye eyebrows at home, eyebrow color, dye eyelashes on oneself,

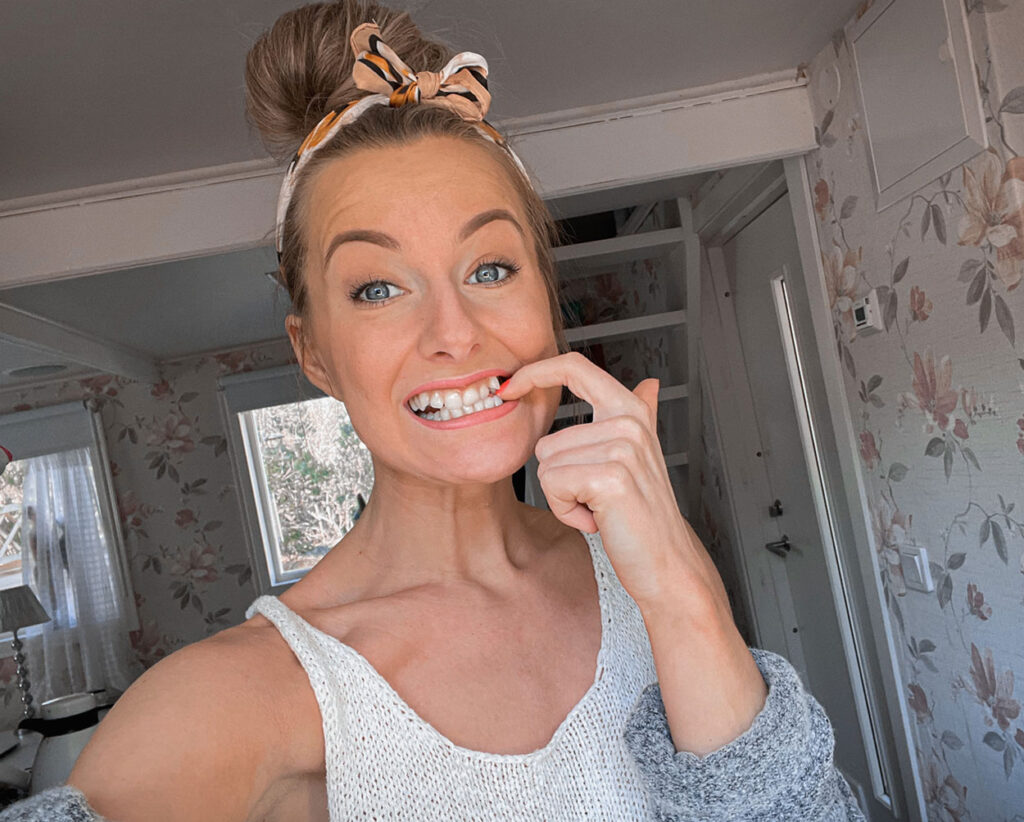
In the middle of the process of coloring eyebrows at home, it's hard not to take a selfie, haha! Do not be afraid of how dark it looks, the color looks dark even though it is light brown!

4. Effect time eyebrow color

How long the effect time is when you are going to color eyebrows depends on what result you are looking for. The longer the duration of action, the darker the result.

To get long durability, you should not let the paint work for a short time, but 3 minutes as a minimum usually works well for most eyebrows.

When I have finished applying, I usually wait for about 3 minutes, then the paint has worked for maybe 7-8 minutes on my sparse areas that I applied on first.

cotton pad, wipe, eyes

5. Wipe off all eyebrow color

Wipe off the brow color with a damp cotton swab. Keep in mind that the color is darker when the straws are wet, so feel free to wipe with a dry cotton swab or piece of paper before judging the color.

(6. If necessary) - Apply more eyebrow color on selected areas

Very often there is still some area on the brow that is a little brighter. Then you can apply color once more in just that area!

On some customers with very uneven eyebrows, in this step I can even make the assessment to add a darker color in these areas. For example. mix in natural brown in the light brown color.

In other words, it is not the straws that are lighter in color, but the brow is perceived to be lighter in areas that are sparser. So even though you make certain straws darker, the whole is experienced to be more even.

makeup tips, hints, eyebrows, shape, sparse, bright

I put on a little more on the top of my eyebrows, where I have a little sparse with straws.

Here you see my colored eyebrows before & after:

before after coloring eyebrows, coloring eyelashes, coloring eyebrows at home, eyebrow color, coloring the eyelashes on oneself,

I also have an eyebrow tattoo, so even though I have fairly light hair in the middle of the eyebrows, I still have an even shape even before lash color. It's nice to color eyebrows at home even though you have a tattoo, it highlights the straws extra!

Color Eyelashes at home step by step:

Eyebrow color and eyelash color are the same thing, the difference is that you often choose black when you want to color eyelashes and brown tones for the eyebrows. Some color the eyelashes with brown eyebrow color, it also works well!

Can you dye eyelashes on yourself? Do you have to close your eyes? How do you not get eyelash color in the eyes?

The most important thing to get "salon results" when you are going to dye eyelashes at home is to 1. have good products that give a carbon black and durable result. And 2. cover the lashes thoroughly with a lot of eyelash color, from root to top on every single eyelash.

The latter is not quite simple, because if you get eyelash color in the eyes, it hurts a lot! Coloring eyelashes on oneself is very different from doing on a customer, but I have found a way that at least works perfectly for me without getting eyelash color in the eyes - but still get as good results as at a salon!

refectocil blue black blue black, black, pure black, eyelash color

1. Mix eyelash color

You mix eyelash color in the same way as when coloring eyebrows! Mix eyebrow color with hydrogen peroxide cream about 50/50 in amount.

I use eyelash dye Refectocil Eyebrow Color (adlink) in the shade Black Blue. I write more about choosing eyebrow color / eyelash color long down in the post!

As well as hydrogen peroxide Oxidant 3% Creme (adlink). Available in a more liquid form as well, but I prefer to work with the cream. You must activate the paint with hydrogen peroxide, otherwise nothing happens.

I have a perfect dipping bowl for this that is specifically for coloring eyebrows, but you can use a regular glass as well :)

Vaseline, liquid Vaseline, eye, eyes, brush, tips, lower lashes

2. Protect the skin around the eyes

On customers I use both Vaseline and Silicone Pads (adlink). On myself, I only use Vaseline, a thick layer under and over the eye. I have such sensitive eyes so silicone pads are just annoying when I look and move, it works great when you close your eyes and sit still in a salon though :)

But only Vaseline also works well, then eyebrow color does not stick to the skin even if you happen to smudge. But beware of eyelashes! If you get Vaseline on the lashes, do not take the eyebrow color there.

Tip! Take Vaseline only on one side of the brush, so that the top of the brush is still completely clean. Then you can gently place the Vaseline under your lower lashes without smearing them.

However, I personally prefer not to dye the entire lower lashes actually. My own fix idea that I feel nicer when it is dark at the bottom of the lower fringe as a mark only. That's why I deliberately put Vaseline on about half of my lower lashes! So only on the tops :)

dye eyebrows, dye eyelashes, eyelash dye, dye eyebrows at home, eyebrow color, dye eyelashes on oneself,

Color the lashes at home / on yourself

My own method of coloring eyelashes on myself is to put the color on the most important areas first; so if it should shit and start to sting on the road, it is at least okay-good results haha.

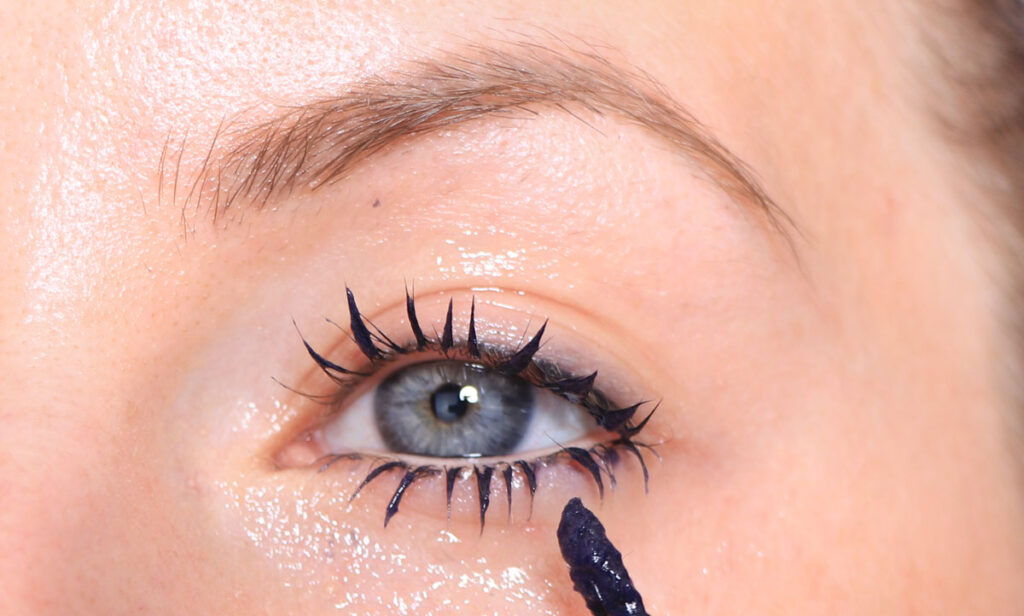
I therefore start to apply a thick layer on the upper lashes, but not all the way to the root. But almost. Then there is almost no risk at all that something will come in your eyes. In the worst case, I have at least carbon black upper lashes, even if they are not carbon black only towards the lash root!

I let this color work for about 5 minutes. The entire effect time is at least 10 minutes on eyelashes but my lashes are light-colored and become very black already in 5 minutes. Besides, the plan is that I will not have to wash it off until I am completely done;)

color lower lashes

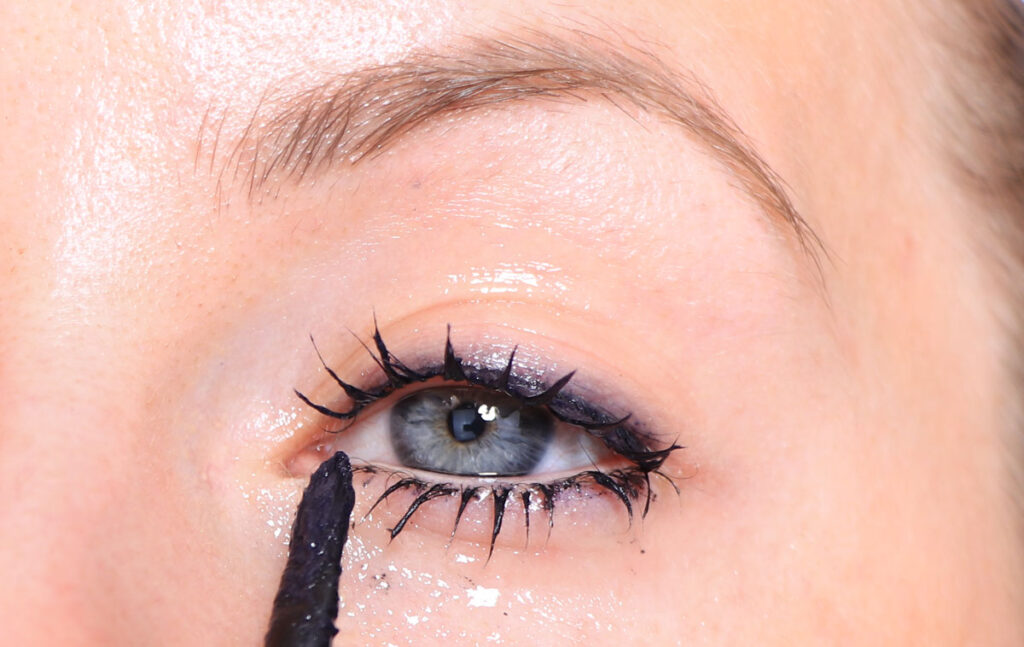
Then I put on the lower lashes! If you happen to put on the waterline / mucous membrane, remove with tops immediately!

dye eyebrows, dye eyelashes, dye eyebrows at home, eyelash dye, eyebrow dye, dye the eyelashes on themselves,

Then I put in towards the root! Still a little careful inside the corner of the eye though.

Now the first lash color has "solidified" a bit, it is more runny immediately when applied. Which makes it easier to apply to the root now without getting it in the eyes. If you happen to get on the upper waterline / mucous membrane, remove with tops immediately, otherwise it will soon start to sting.

Lets work for a few minutes. Should you need to wash off after this step, you still have a nice lash color. So take the safe before the unsafe and wait a while before continuing. But it can get even better!

lash root, lash scalp, lash line

Then I lay along the entire lash root from the top as well! Here it is still uncolored because so far I have only brushed from the underside of the eyelashes.

Not too thick layer, brush on gently. Keep in mind that it is liquid, it should not run into the eyes :)

Let it work for a while.

corner of the eye, access, eyelash color

Last but not least - if you have come this far, you can put more carefully in the corner of the eye also to dye every single straw even there!

color eyebrows, eyelash color, color eyelashes, color eyebrows at home, eyebrow color, color the lashes on yourself,

4. Effect time eyelash color

I made it! My eyelashes are now completely covered in eyebrow color and it does not hurt. I can of course blink during the whole process but I am careful, I do not blink hard and turn my whole head when I look in different directions instead of moving my eyes. There are usually no problems at all, but it was not quite easy to pick up my big system camera and take close-ups of every single step this time;)

The effect time when coloring eyelashes with eyebrow color is at least 10 minutes. But it does not hurt if it works anymore! When you are going to color eyebrows, the effect time determines the result, but with lash color, you usually want it as dark as possible.

Since I do this step by step, the total duration of action for the tips of the eyelashes (which I applied first) is 20-25 minutes. While the corner of the eye and the top of the eyebrows were given 10 minutes of action time. Bleaching may not work for too long, but there is no danger with regular eyebrow color.

dye eyebrows, dye eyelashes, dye eyebrows at home, eyebrow color, dye eyelashes on oneself,

5. Wash off eyelash color

If you start rinsing directly under the tap, you can get eyelash color in your eyes, because you have so much eyelash color so close to the eye. I therefore usually start by wiping the lower lashes with a damp cotton pad.

Then I wipe off basically all the eyelash color from the upper lashes as well. By pulling upwards first and removing everything superfluous, before I close my eyes and dry. I get rid of all color with just moistened cotton pads, but you can rinse off the last of the lukewarm water if you want!

The same applies when coloring eyebrows, it is enough to remove with a cotton swab but it is also possible to rinse in water!

Before and after eyelash color at home

Here you see my colored eyelashes before & after:

color eyebrows, eyelash color, color eyelashes, color eyebrows at home, eyebrow color, color the lashes on yourself,

Carbon black really! Best eyelash color !!

I have tattooed lashliner (thin eyeliner / lash marking) along the lash root as well. Then it's extra nice with lash color for my tattoo makes the whole lash line so intensely black! :)

dye eyebrows, dye eyelashes, dye eyebrows at home, eyebrow color, dye eyelashes on oneself,

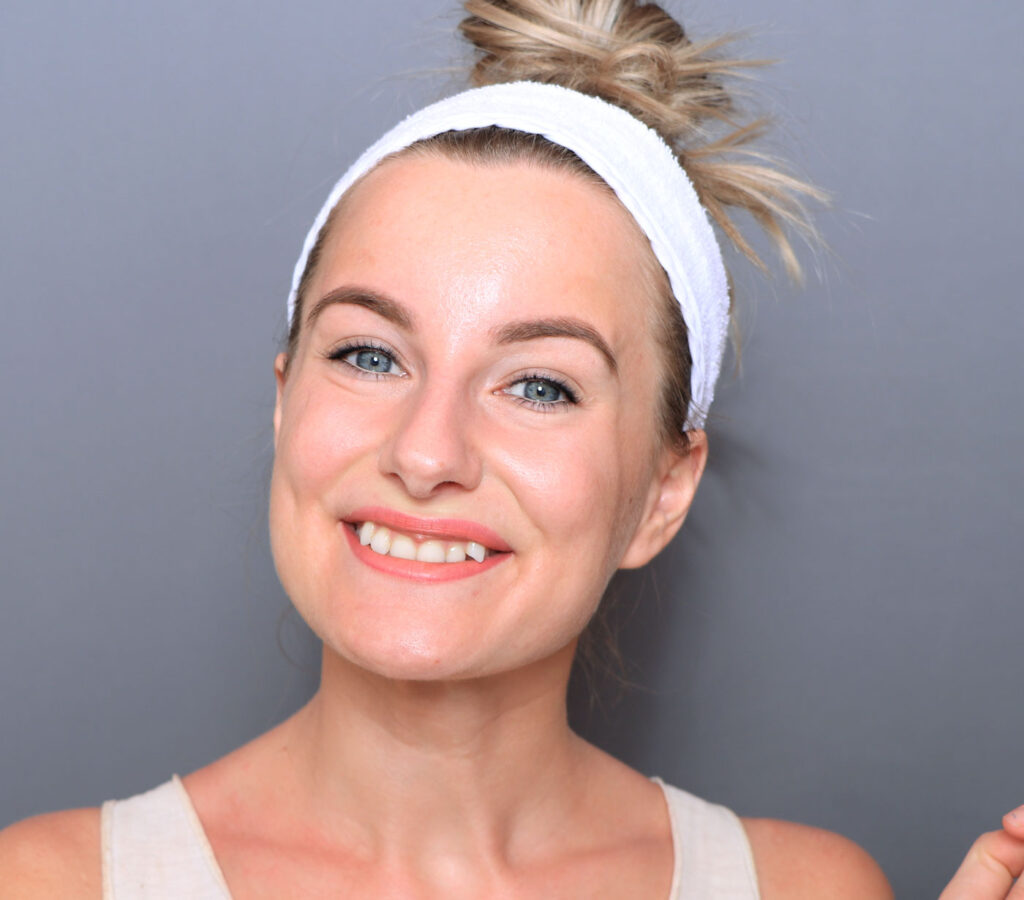
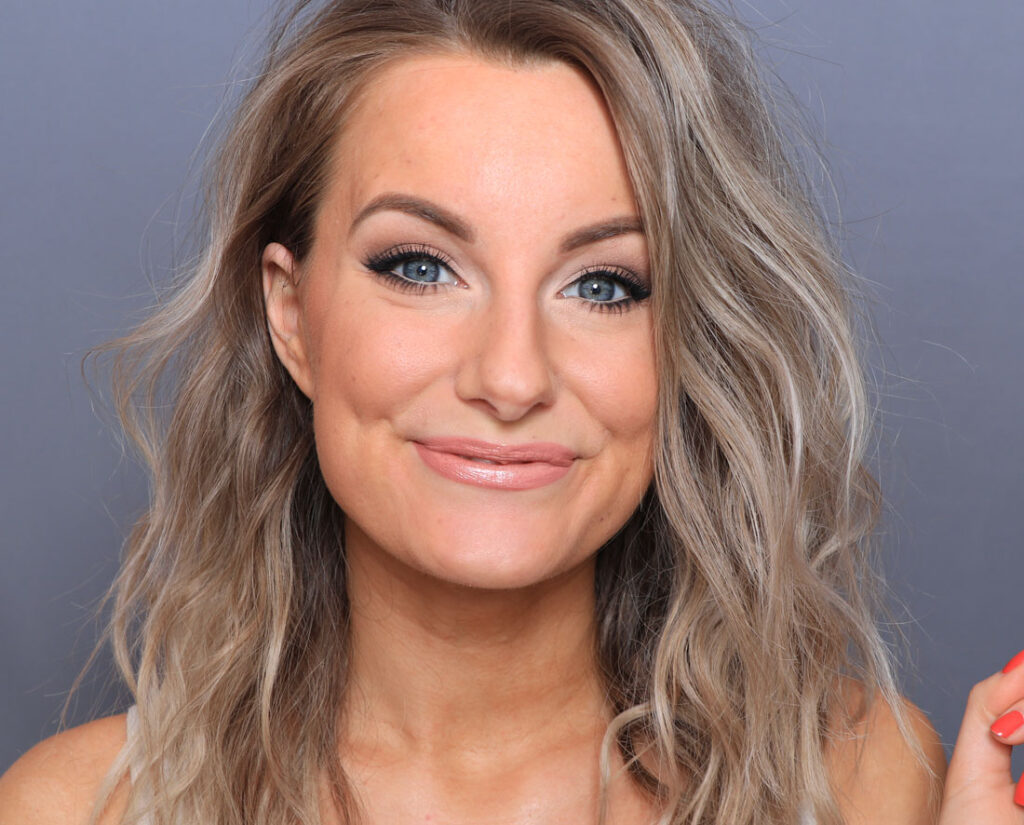
Color eyebrows and eyelashes at home, on yourself - CHECK! Tadaa!

Completely unmade up, except for a little powder that removes redness around the nose where I am always quite red :) The lips, eyeliner and the light liner (along the waterline) are tattooed!

Choose the right eyebrow color for eyebrows

"What eyebrow color suits me?" is a common question when coloring eyebrows at home! I can only speak based on Refectocil's colors that I have worked with on customers, as I do not have as much experience with other brands.

Refectocil Eyebrow Color - 3.1 Light Brown

How light this color becomes depends mostly on your natural brow color. On me, the result is quite cold and a few steps darker, because I naturally have sand-colored eyebrows. But on very light eyebrows and with a short duration of action, the result is much lighter and even warmer.

On a blonde person with warm colors, you can use this alone.

If you are very light but want a cooler result, I recommend mixing with Natural Brown or a tiny click of Graphite which is gray.

blonde eyebrows, bright eyebrows, pick, shape, color, refectocil light brown light brown, depend eyebrow color

The result of coloring eyebrows with 50/50 Light Brown and Natural Brown, on a blonde customer.

Refectocil Eyebrow Color - 3 Natural Brown

The most common color when I color eyebrows! Cold dark brown, can become very dark with a long action time, but you can color lighter eyebrows with a short action time as well.

In principle, always use this on anyone who is darker than blonde, even on black-haired people because you often want a little warmth in the eyebrows anyway. Black color on the brows can sometimes be perceived as a bit greyish.

On medium blonde I use it sometimes with a short duration of action and sometimes together with light brown.

brown eyebrows, refectocil natural brown, natural brown, results, depend eyebrow color, pick, color, eyebrow plucking

The result of coloring eyebrows with Natural Brown on a customer who was very satisfied!

Refectocil Eyebrow Color - 1 Pure Black

I rarely use this alone on the eyebrows, it can be a little greyish tone on the face. But mixing Natural Brown and Black will be great if you want darker than dark brown!

Great for eyelashes if you want black but not intense carbon black. Have several customers who choose this as an eyelash color.

Refectocil Eyebrow Color - 2 Blue Black / Blue Black

The most common eyelash color! Carbon black, great! Have never used this to color eyebrows.

dye eyebrows, dye eyelashes, dye eyebrows at home, eyebrow color, dye the eyelashes on themselves, dementia eyebrow color, refectocil eyebrow color, color

In today's pictures, as I said, I use Blue Black / Blue Black!

Refectocil Eyebrow Color - Graphite

Have never used this alone to color eyebrows, but great for cooling down the other colors. One small click is enough! Type 80/20 where the smallest part is Graphite.

Refectocil Eyebrow Color - 4 Chestnut

Have only used this once to color eyebrows, and experienced it as a cool purple-red tone. Nothing in demand.

Refectocil Eyebrow Color - 4.1 Red

Have never tried coloring eyebrows with this one, must admit! Most people with red hair want brown or light brown eyebrows anyway. We have it at the salon but none of my customers have ever asked for red.

Refectocil Eyebrow Color - 0. Blonde / Bleaching

Bleaches eyebrows, becomes great! Easy to work with.

dye eyebrows, dye eyelashes, dye eyebrows at home, eyebrow color, dye eyelashes on oneself,

In the middle of the process of coloring eyebrows at home, then a lot of selfies are taken! ;)

Questions & Answers about lash color & brow color:

How long do colored eyebrows last?

If you use good products, the color lasts as long as at the salon, even if you choose to color eyebrows at home!

According to Refectocil, eyebrow color lasts for 6 weeks, but it also depends on how dark you color and how long you let your eyebrow color work. If you use a dark brown color and let it work for 10 minutes, it will last longer than a light brown color that works for 5 minutes.

Most people who usually dye their eyebrows regularly do so every 4 weeks. Then the color does not usually have dropped completely, but that it is time for a refill.

It can also be very different depending on how often you wash and if you scrub a lot in the area but. As well as the quality of the eyebrows, on some it holds better and others worse.

They also fade faster if you are in the sun a lot, the durability is longer in the winter.

- How long do colored eyelashes last?

According to Refectocil, lash color lasts for 6 weeks, but from experience I know that it can differ a lot depending on how often you wash but also the quality of the lashes. Most people who dye regularly do so every 4-5 weeks.

Customers with very light lashes usually improve because the fringe grows out and not because the color drops. I have had a regular customer who had a clear light outgrowth on their eyelashes after 4 weeks - light roots but still quite black in the tops :) The eyelash cycle is about 2 months.

They also fade faster if you are in the sun a lot, the durability is longer in the winter.

dye eyebrows, dye eyelashes, dye eyebrows at home, eyebrow color, dye eyelashes on oneself,

- Can you dye a beard with eyebrow color?

Yes, you can even color beards with eyebrow color! The principle is the same as when coloring eyebrows. It is possible that when coloring beards you use a larger brush and mix a larger amount of paint.

- How often do you dye your eyebrows & eyelashes?

Most people who color continuously usually color eyebrows after approx. 3-4 weeks and the eyelashes after 4-5 weeks. My clients who do lashes and eyebrows at the same time come every 4 weeks.

unmade-up eyes, makeup summer tips, curved eyelashes, eyelash color, long eyelashes, eyelash curlers, fine without makeup

After eyelash curler and a little bass makeup, the eyes looked like this!

In the summer, I usually dye my eyelashes more often to have them this carbon black. Then I bend the lashes with an eyelash curler and skip the mascara completely. I rarely dye eyebrows, however, because I have a tattoo underneath, I always have well-shaped eyebrows anyway :)

- How to remove eyebrow color from the skin?

On my customers I use Refectocil Tint Remover (adlink) and rub gently with a tops on the skin. On customers where the color adheres a lot to the skin (usually if you are dry) it usually does not disappear to 100%, but enough to look nice :)

You can also do it with makeup remover or micellar water, but it is not quite as effective as the Tint Remover.

- Is it dangerous or bad to color eyelashes / eyebrows and are there any risks / side effects?

It is relatively risk-free and it is extremely uncommon to get side effects Refectocil if applied correctly. If you are above, however, it can get in the eyes when you color eyelashes and will then sting a little.

If you get any type of reaction, it is always good to wash off the paint so as not to risk aggravating it. If you are unsure whether you can tolerate the eyebrow color or not, you can try putting a little color on the forearm for a few minutes and see if you get a reaction.

If you are sensitive to any ingredient, it is always good to look at the table of contents!

- Can you whiten eyebrows?

Yes, it is possible to whiten eyebrows / color eyebrows lighter! Then you use Refectocil - Blonde Brow (adlink). If this is the first time you have bleached eyebrows, it is good to be a little careful and rather take less time than longer! :) Let it work for a few minutes, remove a piece with tops and see what it looks like, add more if necessary.

NOTE! If you have done a brow lift before bleaching, the treatment time can be shortened by a few minutes.

It is best to get the bleaching nice immediately, but if you want to bleach first and then dye afterwards, rather use light brown and leave on for between 30 seconds - 1 min before you remove and check what it looks like. The color becomes extra effective after bleaching and is absorbed into the straws immediately!

pale eyebrows, blonde eyebrows, lighten up eyebrows, remove eyebrow color, eyebrow whitening, refectocil eyebrow color blonde

This eyebrow whitening my colleague has done on a customer!

- What can you do if you get too dark eyebrows after coloring?

If you have too dark eyebrows for eyebrow color and want to get them lighter immediately, you need to bleach your eyebrows. But keep in mind that they are often darker 2-3 days after the color and will soften in tone quickly! So it is usually better to persevere :)

It is common to feel dark right after eyebrow color, because you are above. But next time, the person wants to color eyebrows with the same eyebrow color again, because it was just right after a few days. If you do the result right away, you will more quickly feel that you want to color again, as the color disappears over and over again.

You can speed up this process by washing your eyebrows extra carefully morning and evening, sitting in the sun (if it is that time of year) and exfoliating your eyebrows.

- Can you color eyebrows / eyelashes if you are pregnant?

Yes, it should not be a problem to color eyebrows or eyelashes if you are pregnant or breastfeeding.

Because fringe & brow colors are used for such a short time and so rarely, it is rather more important to make sure what you eat, drink and do every day. This is what has the great impact on yourself and the child.

color eyebrows, eyelash color, color eyelashes, color eyebrows at home, eyebrow color, color the lashes on yourself,

Products for coloring Eyebrows / Eyelashes:

I use the same products to dye eyelashes myself as I have to dye eyebrows, but other colors. I usually use blue lashes for lashes, while when I color my eyebrows I use natural brown / brown. The colors can also be mixed to get the shade you are looking for.

- List of products I use:

All links are adlinks:

There's also Silicone Pads to protect the skin from color, these I can recommend if you are a beginner / above with coloring the lashes on yourself.

Refectocil is available in the colors: Graphite (Gray), Brown (Brown / Natural Brown), Black (Black), Blue Black (Blue Black), Chestnut (Red Brown), Blonde (Bleaching), Light Brown (Light Brown), Red (Red).

summer makeup tips tattoo eyeliner, eyelash color

This is how I looked after eyelash curlers, a little powder that neutralizes redness, bronzer, blush and lipstick! :) Such a simple everyday look - nice to not have to fill in the brows and paint mascara!

Hope my post about coloring eyelashes & coloring eyebrows at home has been helpful! If there are any questions about coloring lashes & coloring eyebrows, just leave a comment below! :)

If someone has tested several brands for coloring eyebrows or lashes, feel free to share which one you think has the best eyebrow color!

Also read:

Eco-friendly clothes & bags from Globe Hope!

0

I am so happy and so PROUD of this collaboration with the brand Globe Hope which manufactures environmentally friendly clothes, bags and accessories from recycled materials! :)

To not only be able to recommend really nice bags (which I will show you now!) But also contribute to more sustainable consumption while helping an important company to grow - it feels good in the soul!

stylish backpack, modern backpack, zipper, green bag, turquoise bag, handbag online, bag online, eco-friendly, consumption, stylish handbag, recycled fabrics, jewelry, cotton, polyester, eco-friendly bag, consume sustainable, sustainable fashion, global hope, Finnish design , Finnish fashion, Finnish style, luxury handbags, quality, quality, recycled cotton, sails, seat belts, seat belts, recycling,

How to consume more sustainably?

Many people feel kind to the environment when shopping second hand. Often, however, it is not just that simple;) Second hand is of course better than always buying new production, but there are three other aspects that in my opinion are much more important:

Buy things with high quality! Example: A person uses a sweater five times, donates it to a second hand, you buy it and after 5 more uses it breaks. You then throw it away with a clear conscience, but a sweater that is produced and transported far to be used so few times is not durable!

Making stuff instead of throwing it away is also good :)

2. Think about it if you really need and like what you are going to buy. I get a lot of clothes when others clean their closets and there are OFTEN price tags left. Shopping for the sake of shopping is not a good idea.

Shop environmentally friendly clothing (and other) in recycled materials.

4. Shop locally produced, to minimize long transports.

The Finnish brand Globe Hope circle all these points at once! 1. My first thought when I got the bags home was "they feel really solid and quality!". 2. I will use them a lot because they are so heavenly beautiful! 3. They are made of recycled material. Globe Hope uses new metal parts, zippers and wire, but 90% of the product is recycled material. And 4. a large part of their production is located in Finland and the Baltic countries.

Globe Hope makes environmentally friendly clothing & accessories using high-quality recycled materials (eg seat belts, army clothing and sails) as well as surplus materials such as waste pieces that cannot be used in other productions.

Do you know what they also offer? Repair service! Once the accident has occurred, you do not need to throw away the product but can send it to their tailor and then get it back as new again! This is free within 12 months of purchase.

Eco-friendly handbag made from recycled seat belts!

Do you know how I feel about this bag? I'm PROUD! Globe Hope Loska Laptop Bag is stylish, practical and a really good conversation starter in addition haha!

smart handbag, laptop bag, computer bag, recycled materials, recycled clothing, eco-friendly clothing, handbag online, bag online, eco-friendly, consumption, stylish handbag, recycled fabrics, jewelry, cotton, polyester, eco-friendly bag, consume sustainable, sustainable fashion, global hope , Finnish design, Finnish fashion, Finnish style, luxury handbags, quality, quality, recycled cotton, sails, seat belts, seat belts, recycling,

You do not think at first glance that it is made of seat belts, but once you hear it, it is super clear! Which I think is very funny :)

It is a computer bag and I almost always have my computer with me, but regardless of whether I have it or not, I use this as a regular handbag!

smart handbag, laptop bag, computer bag, recycled materials, recycled clothing, eco-friendly clothing, handbag online, bag online, eco-friendly, consumption, stylish handbag, recycled fabrics, jewelry, cotton, polyester, eco-friendly bag, consume sustainable, sustainable fashion, global hope , Finnish design, Finnish fashion, Finnish style, luxury handbags, quality, quality, recycled cotton, sails, seat belts, seat belts, recycling,

Shoulder straps have it too! Which can be adjusted in length. Can also be removed completely.

The seat belts are cleaned and sorted in Finland and the entire handbag is sewn in Finland.

smart handbag, laptop bag, computer bag, recycled materials, recycled clothing, eco-friendly clothing, handbag online, bag online, eco-friendly, consumption, stylish handbag, recycled fabrics, jewelry, cotton, polyester, eco-friendly bag, consume sustainable, sustainable fashion, global hope , Finnish design, Finnish fashion, Finnish style, luxury handbags, quality, quality, recycled cotton, sails, seat belts, seat belts, recycling,

On the inside there are compartments for the computer and a smaller compartment for other things. Just right in my opinion!

My previous handbag has as many compartments as possible, and yes, it looks very tidy when I look down, but I never know in which compartment anything is! I always feel with my hand in five compartments before I find the right one haha. Totally opposite effect :) But this one is perfect!

Handbag made of surplus fabrics

Viima Backpack is a spacious and flexible backpack in strong material. The material is cotton and the fabric is surplus fabric that has not been used in other production.

The material is washed and sorted in Finland and the bag is sewn in Estonia.

SO nice too! I have not had a backpack since I went to school but this is not a silly backpack as 14-year-old Helena had said;) Jokes aside but this is more like a really nice handbag that you can also have on your back! Love it!

recycled clothing, eco-friendly clothing, recycled materials, stylish backpack, modern backpack, zipper, green bag, turquoise bag, handbag online, bag online, eco-friendly, consumption, stylish handbag, recycled fabrics, jewelry, cotton, polyester, eco-friendly bag, consume , sustainable fashion, global hope, Finnish design, Finnish fashion, Finnish style, luxury handbags, quality, quality, recycled cotton, sails, seat belts, seat belts, recycling,

Wow what this will be used this summer! When we pack felt and buns and row out with the boat for example. Then you will not look like a rookie will not;)

stylish backpack, modern backpack, zipper, green bag, turquoise bag, handbag online, bag online, eco-friendly, consumption, stylish handbag, recycled fabrics, jewelry, cotton, polyester, eco-friendly bag, consume sustainable, sustainable fashion, global hope, Finnish design , Finnish fashion, Finnish style, luxury handbags, quality, quality, recycled cotton, sails, seat belts, seat belts, recycling,

I have the incredibly beautiful color Forest Green! Also available in black and in a smaller version, I have the big one :)

stylish backpack, modern backpack, zipper, green bag, turquoise bag, handbag online, bag online, eco-friendly, consumption, stylish handbag, recycled fabrics, jewelry, cotton, polyester, eco-friendly bag, consume sustainable, sustainable fashion, global hope, Finnish design , Finnish fashion, Finnish style, luxury handbags, quality, quality, recycled cotton, sails, seat belts, seat belts, recycling,

The bag has two outer compartments where you can put things that you want to easily access. The inside is divided into two so there you can also separate different gadgets in a smooth way. You open the zipper and it's like a bag!

Small handbag made of surplus material

Ilma Pouch is a small handbag perfect to hang over the shoulder when you only need to bring the most important things; mobile and debit card I think :)

The material is fake clothes and ropes that have been left over in other productions. The material is washed and sorted in Finland and the bag is sewn in Estonia.

recycled clothing, recycled materials, eco-friendly clothing, stylish backpack, modern backpack, zipper, green bag, turquoise bag, handbag online, bag online, eco-friendly, consumption, stylish handbag, recycled fabrics, jewelry, cotton, polyester, eco-friendly bag, consume , sustainable fashion, global hope, Finnish design, Finnish fashion, Finnish style, luxury handbags, quality, quality, recycled cotton, sails, seat belts, seat belts, recycling, small bag, beige bag

I have the color Sand but it is also available in light lavender, gold and old pink.

Tips from coach Helena - A tip that is not about environmentally friendly clothes and bags, but just purely practical in everyday life: If Miska and I are on the go, I always have a small handbag in my big handbag. You often need to bring a lot of things with you, but if you are going to go shopping somewhere, you do not want to drag everything. Then I just take out the little bag and leave the rest in the car!

By the way, speaking of environmentally friendly clothing. I often get clothes when my siblings and friends clean their closets. Both sweaters in this picture are made in good quality because I have used them and used them a lot myself! :)

fake leather, recycled clothing, recycled materials, eco-friendly clothing, stylish backpack, modern backpack, zipper, green bag, turquoise bag, handbag online, bag online, eco-friendly, consumption, stylish handbag, recycled fabrics, jewelry, cotton, polyester, eco-friendly, eco-friendly consume sustainable, sustainable fashion, global hope, Finnish design, Finnish fashion, Finnish style, luxury handbags, quality, quality, recycled cotton, sails, seat belts, seat belts, recycling, small bag, beige bag

It also has a zipper, flexible!

Last but not least, I have to tell you that Globe Hope has more handbags made from seat belts! Different colors, sizes and even a backpack variant! The smaller version made of seat belts is called Halla and is available in black, RED and lime green! Oh what I want the red and the green too! How coola ?! Will wish me a birthday present;)

But Globe Hope does not only have handbags! They also have environmentally friendly clothes (also for men) in e.g. recycled polyester. As well as jewelry and fabric face masks in various patterns.

I have not tested anything other than these bags, but guess that the rest of the range is of the same high standard. They are very open on the website as well, printing out where each product is made and all the details about the materials on that particular product. Incredibly good I think! :)

Links to the bags in the post:

  • You will find the black computer bag here!
  • You will find the turquoise backpack bag here!
  • You will find the small beige bag here!

Also read my previous post: Fendi Sunglasses & Try Glasses Online

Nails - 14 tips for ribbed, brittle & striped nails (Nail care)

4

My best tips for brittle, ribbed, striped or brittle nails! The tips also help if you have cracked or damaged nails after gel nails / built nails (been there done that). These tips will strengthen your nails and give you long, healthy & strong nails!

My nails have the potential to be great, but as soon as I mistreat them, they become a total disaster. So I know what works (at least for me) so they are both long and strong! And how bad they can get really fast - and why :)

Questions and answersBest tipsNail diseasesGood products

Ribbed nails, striped nails, brittle nails, slices, splits, strong nails, long nails, grow, faster

Ribbed, brittle or striped nails?

Having brittle, ribbed, brittle or striped nails that break can have several causes, it can be anything from vitamin & mineral brushes, wear and tear on the nails of work & chemicals, drying of the nails & cuticles, nail fungus & other diseases or side effects of medications or hard livers. It's not fun to have bad nails or split nails, but there are many tips that actually help!

You can also get worn nails from nail products, e.g. I had a period when I made gel polish at home and was not so careful when I removed it. They looked so worn after the first use:

remove nail polish damaged ribbed, brittle, striped nails

Read on to take part in my best tips for caring for your nails and avoiding brittle, striped & bad nails.

Why do you get white spots on your nails?

White spots on the nails are usually leukonychia, it is the medical name for white spots or streaks on the nails and has many different causes.

The most common cause of white spots on the nails is physical damage to the nail or cuticle, ie. that you pinched your nail or hit yourself somewhere. However, it can also have many other causes such as vitamin or mineral deficiency (specifically zinc deficiency), liver damage, kidney damage, nail biting, side effects of medications and drugs, etc.

If you are worried about your white spots on the nails or if they do not disappear if you follow my tips and instead get more, then it may be smart to see a doctor for a health check.

What do nails consist of & how fast do nails grow?

The nails consist of keratin and are an outgrowth of dead cells, we have them to protect the otherwise soft fingertip. The nails grow approx. 3-4 mm per month, it differs from person to person and living.

If you want to make your nails grow faster, you can follow my simple advice! :)

How to get strong nails?

To get strong nails, there are many different things to keep in mind, this question does not only have "one" answer. Below you have my best tips for taking care of weak nails so that you too can get long, healthy & strong nails!

These tips make the nails grow faster, grow stronger and tips on how to care for the nail that has already grown out.

nail bed, healthy nails, healthy nails, model nails, optimal nails, perfect nails, natural nails, Ribbed nails, striped nails, fragile nails, slices, splits, strong nails, long nails, grow, faster

What do healthy nails look like then? A good yardstick is that the nail bed is as far out as the finger (see the dotted marking). The nail bed is thus the part of the nail that is stuck in the skin. Often the nail releases from the skin earlier, e.g. because you use your nails as a tool or poke with sharp objects under the nails. Then the "bright tip" begins further into the nail.

14 tips for brittle, striped nails

1. Lubricate the nails & cuticles with different oils

My nail therapist told me sharply to start with nail oil a few years ago, oh what a difference it made! So not only well-groomed and fine cuticles, but when you have used it for a longer period, the nails became so much better quality - healthy cuticles form stronger nails.

To strengthen nails & cuticles, I recommend that you lubricate dry nails and cuticles with an oil with small molecules, so that the oil can effectively penetrate the nail and strengthen the nails on all layers.

You have to be patient, it takes quite a long time for the nails to grow out so you notice the difference. Have the nail oil next to the bed or somewhere so that you remember to apply, at least once a day but preferably 2-3 times.

Some oils are better than others and also depend a lot on how they are produced and processed. Examples of oils that you can try are avocado oil, coconut oil, almond oil, sesame oil and jojoba oil. An oil that I really like is Loelle 100% Argan Oil (adlink) which is thus pure argan oil. Very good! I actually reviewed this here in the blog back in 2014! Can be used for hair, face and body as well.

There are also specific nail oils to buy that are really good. The best thing about nail oils that are developed for the cuticles in particular is that they often have a flexible applicator, e.g. a brush or udd. This tip is extra good if you have ribbed, striped and brittle nails, then it is important to boost your nail health in the beginning so that you get healthy nails quickly.

A good tip is to start the day with a good layer of nail oil. It helps to give you strong nails! :)

nail oil, review, cuticle, cuticle oil, smear in, dry, cracked

2. Stop biting your nails to give them time to heal

Biting the nails is of course very bad for nails but can also be directly dangerous to health. When you bite on the nails, the risk is great that you tear up small wounds around the nail that risk becoming infected and doing great damage to the nail, finger or health.

I have an acquaintance who bit a small wound around the nail which then developed into blood poisoning (!), Which without treatment would have been directly life-threatening.

Tips for stopping biting your nails and avoiding broken nails is to always make sure that you cut your nails in time, that way there are no nails to bite on. :)

I have actually made a whole post about this, read it here: How can you stop biting your nails? (10 smart tips). As a former lip-biter without its equal, I know how difficult it can be!

bite on, tips, how to stop

Use a cuticle cream to strengthen the nails

Massage your nails & cuticles with a cuticle cream, these are usually packed with caring substances that work wonders for your nails and cuticles!

You can e.g. apply a cuticle cream in the evening and a nail oil in the morning, or vice versa. Preferably daily but otherwise a good supplement when you need extra nail care.

I can highly recommend Trind Cuticle Balm (adlink). Extremely well!

If you have brittle, ribbed, striped or brittle nails, I recommend that you lubricate your nails and cuticles abundantly every day before bedtime. Trind Nail Care Keratin Nail Restorer (adlink) which may operate during the night. It is applied not only to the cuticles but to the entire nail as well.

I have tested more products from Trind for several years and can certify that the products really make a noticeable difference! A very good brand that I highly recommend :)

trind, trind cuticle conditioner, nail restorer, keratin, knurled nails, striped nails, brittle nails, slices, splits, strong nails, long nails, grow, faster

This is also a perfect "on the go" product that easily fits in the handbag and can be used when you feel that the cuticles are bursting.

In this picture you can see that I also have striped nails, some have more or less but having completely smooth is not very common. A little ribbed nails are completely natural!

4. Feel good & eat healthier to get the right vitamins & minerals

"Feel good" is a strange tip perhaps, but the fact is that the nails grow faster and become stronger when we feel good. My nail therapist clearly notices that many clients' nails grow faster in the summer, but that is not necessarily due to the sun and the heat but that we feel better. Less stress and more berries and vegetables :)

When you eat poorly and have a vitamin brush or mineral deficiency, it is clearly noticeable on hair, skin and nails. It is important to get a varied diet with lots of nuts, fruits, berries & vegetables.

Important vitamins & minerals for the nails include vitamin A (beta carotene), biotin (Vitamin B7), keratin, selenium, zinc and iron.

A daily intake of nuts, fruits, berries & vegetables in their diet will make both the body and the nails much stronger and more resistant to disease. So if you want strong nails, it is important to eat good food! :)

Miska and I have had a period for two months when we ate unusually healthy and now it is starting to show on both his and my nails! I have received such a "thick" tip as well, they can otherwise be quite thin.

well-being, hair, skin, food, diet, vitamins, vitamin c, supplements, tips

5. Avoid acetone-based & strong nail polish removers

Using gentle and gentle products on skin and nails is A&O, it goes without saying that if you use strong agents, nails and skin will dry out or risk damaging the natural balance.

I recommend using a mild nail polish remover instead. A gentle nail polish remover to remove old nail polish is Depend Dip-in Nail Polish Remover (adlink). It is acetone free and effective to be acetone free I must say.

I think dip-in nail polish removers are so incredibly flexible! I like this one because it does not smell strong and is effective (those with acetone are a little faster anyway but this one goes fast too). You get a little wet on the fingers afterwards though, so have some paper next to it or wash your hands immediately so you don't have to mess around. But other than that, it gets good grades from me! Would buy again :)

dip in nail polish remover, acetone-free removal, gentle, review, best in test, depend

You just put your finger in the jar and move around. It's like a sponge inside a jar soaked in nail polish remover. Very easy to avoid cotton and strong smell!

6. Increase your vitamin & mineral intake with a daily multivitamin supplement

If you do not get everything from the diet, it can be good to try to take a daily multivitamin supplement. These usually contain a small amount of what you need to get in the vitamin & mineral route.

Over-consuming supplements to save broken or fragile nails is also not good, so it is enough to take the daily recommended dose and eat better food! :)

Also read my other posts about Vitamin C & Vitamin D.

Vitamin C, Zinc, Immune System, Dietary Supplements, Diet, Health Tips

Here is a picture of my daily vitamin drink with vitamin C and Zinc. Because my multivitamin tablets have just run out (should buy new ones!) So could not take pictures of them hehe.

7. Do not overuse hand disinfection & moisturize nails immediately after

It is easy in these times of corona that people become completely manic with hand disinfection, which ends up damaging the balance of the skin and nails. This in turn means that you get dry cuticles that crack and brittle and brittle nails, such as corona nails?

Remember to lubricate the nails and cuticles immediately afterwards with e.g. Loelle 100% Argan Oil (adlink). Consume oil as much as you consume hand alcohol, almost;)

There are also better / worse hand disinfections to choose from. I have not tested this myself but have heard a lot Skintology Stockholm The Basics Hand Sanitiser (adlink) which received great reviews! It contains 70% alcohol (which is a good amount) and also moisturizing ingredients.

moisturizing hand sanitizer, hand disinfectant, hand sanitizer, gentle, mild 70%, tips review

8. Use a gentle & gentle hand soap when washing your hands

Many hand soaps risk drying out your hands and also your nails and cuticles. Therefore, use a gentle and mild hand soap when washing your hands. This is especially important now that the corona has arrived and everyone is washing their hands more often and longer.

I recommend Urtekram - Hand Soap (adlink), I use it myself at home. It smells wonderful of lemongrass! :)

mild and gentle hand soap for brittle & striped nails and cuticles

9. Do not use nail polish daily but let the nails rest

Although it can be nice with nail polish, the process itself can damage the nails and give you brittle, striped and brittle nails. Not only the nail polish but rather the whole process of tearing off old nail polish and the use of strong means to get rid of the nail polish and then repaint. The risk is greater that you get damaged nails after built nails such as gel nails & gel polish.

Let the nails rest between the laps so that you can lubricate them with oils or creams to get healthy and strong nails. If you have nail polish on all the time, you can not lubricate the nails as you have a layer between the nail and the oil, which in turn increases the risk of brittle and brittle nails.

nail polish remover for ribbed, brittle & striped nails

However, would like to emphasize that built nails can on right way actually protect your nails and make them stronger! But then it is important that you go to a skilled nail technologist who both builds nails of good quality and removes the old in a gentle way.

When I did my nails at the salon, I had very good quality all the time. When I do it on myself, it wears out quite a lot :)

10. Make sure that you are not dehydrated & that you get the right amount of fluid

Being dehydrated for a long time will adversely affect the skin, hair and nails. Most people do not have problems with this, but you should still remember to drink plenty of water. Especially if you know that you often stress during the day and feel dehydrated on the skin, lips or nails.

A tip might be to carry a water bottle with you to remind yourself to drink some water throughout the day.

drink water, amount, how much, water bottle, liquid, dry, dryness

Here I am posing with a water bottle, but I do not live as I teach when it comes to this tip actually haha. Is incredibly bad at drinking water!

11. Wear gloves when cleaning, washing dishes or gardening & do not use nails as tools

I have listed 14 tips in this post, but in short I would say that the three most important tips are 1. lubricate the cuticles with oil / cream. 2. feel good and 3. do not use your nails as a tool!

When I have bad nail periods, it is always one of these three that I mistreat.

Using their nails as a tool is probably the most common problem, they are flexible when you have to open things and fiddle with things and such;) You must have really strong nails basically if they are to withstand a lot of wear and tear!

If you wash the dishes by hand, the nails are exposed to water and detergent that dries out and risks damaging the nails and cuticles. Even when cleaning when e.g. dust off or scrub so the nails can be exposed to water possibly. chemicals or when you do garden chores or the like, you risk tearing your nails.

Then a simple tip is to use gloves to protect your nails and hands to be exposed to unnecessary stress.

Gloves are also good for avoiding having to poke with sharp objects under the nails - which makes you shorten the nail bed (as I showed at the beginning of the post). If you do not get soil under your nails, for example, you do not need to poke so much either.

gloves, pot, greenhouse, garden, protect, plant, counter

12. Clean with a nail brush - no sharp objects!

You want long nails, but scares easily accumulate underneath. Important to clean the nails!

As I said, you should not poke with sharp objects to clean under the nails, even if you happened to dip your hands in soil or the like;)

Always have a nail brush on the side of the sink, so you can clean under the nails daily in a gentle way. Do not brush too hard!

nail bed, well-being, healthy, smile, correct, optimal, perfect model

Now I publish this picture on the nail bed again. Not using the nails as a tool and not poking with sharp objects underneath will help you get a long nail bed. The longer the nail bed, the easier it is to clean under the nails as well, because it only ends up on the part of the nail that protrudes from the fingertip - nothing between the nail and the skin that needs to be brushed off :)

13. File nails correctly - How to file your nails?

Filing your nails the wrong way can be harmful to your nails and make them more fragile than they need to be. It is good to file the nails from time to time to prevent weak and chipped nails.

How to file your nails correctly? Avoid filing back and forth in the same move. Use fast, short strokes in the same direction. File as little as possible on the surface of the nail, so avoid keeping the file angled so that you file on the top of the nail and not on the edge. Feel free to start on the outside and file in towards the middle.

I think multi-files are good! Which has different strengths, both plain file and polishing. Even if I do not polish so that the nail becomes thin, it is nice to pull a little with the finest side for a glossy surface. I use the milder ones to soften the edges. For example. is LYKO 6-Way Buffer (adlink) one such!

how to file your nails? brittle & striped nails

Like this! :)

Should you use a polishing file as well? In other words, such a nail file that you use on the top of the nail for a more glossy result. The answer to that question is that it depends a bit on.

I do not recommend polishing file to get rid of ribbed / striped nails. Especially not if you have thin and / or brittle nails.

If, on the other hand, you have worn irregularities, eg that the nail has sliced and formed an ugly edge. Then you can polish gently to even out and smooth.

Alternatively, use only the finest side of the file, which gives shine but does not grind down so that the nail becomes thin.

file, polish, the right way, how to do, tips, review, good or bad

Some irregularities can occur that are nice to file away, but if you have very knurled nails, I would avoid filing them away.

14. Use nail polish for knurled nails, instead of filing with a polishing file

Ribbed nails are like longitudinal hard fibers in the nail, which form long bumps which give striped nails. If you file away these hard stripes, the nail will be thin and in many cases very fragile. It is not something you notice until the part you fillet thin grows out and becomes the "tip" on the fingertip later.

There is an easier way to get rid of knurled nails, nail polish! Ordinary nail polish also fills in well, but there are specific nail polishes to get a more even nail bed. Perfect as an undercoat! Or completely alone, just for a smoother surface.

IsaDora Rock Base Nail hardener & Ridge filler (adlink) I think is great!

isadora rock base, nail hardener, ridge filler, Ribbed nails, striped nails, brittle nails, slices, splits, strong nails, long nails, grow, faster

Look how smooth my nails were here :) But of course I also have some striped nails. This is an old image from a previous review of this product.

I can not always have such a good nail period, I can say. These tips really make a difference! But you have to continue to follow them as well, which I do in periods;) At the time of writing, I have e.g. renovated the hen house (with gloves but still stressful) and neglected with nail oil.

Summary grooved & fragile nails

If you follow these tips, you should get pli on your ribbed & brittle nails! If not, you should check if there is a disease behind it or if it may be nail fungus. Then it is good to put in the right treatment to get your brittle and fragile nails in order.

The absolute best tip that helps against damaged or brittle nails is to use good products and eat a good & varied diet!

As I wrote earlier: 1. Lubricate 2. feel good and eat well and 3. avoid tearing your nails.

The rest of the tips are protective and preventative. And like I said, I really recommend Trinds products (adlink) for brittle or striped nails :)

natural nails, french manicure, at home, on himself, fine, long, grow

Here I have done French manicure on my natural nails :)

Common nail diseases & symptoms

Blue nail:

Blue nail is common when you squeeze the nail or hit it hard. It can even in some cases come from wearing too tight shoes. There is a risk of losing your nail if you get a blue nail, then the nail comes loose from the skin after a couple of weeks. The healing time varies depending on the severity of the injury. If you do not lose your blue nail, it will grow away with time.

You can also get blue nails from cooling, but these disappear as soon as you get heated again.

Leukonyki:

As explained at the beginning of the post, Leukonyki is when you get white spots on the nails. It has many different causes and can come from physical damage to the nails, mineral or vitamin deficiency, liver & kidney damage, by biting the nails, side effects of drugs & medicines, etc. The stains grow away with time.

Map nail:

Map nail is a claw-like heavily thickened nail that usually appears on the big toe but can also appear on other nails. Causes of maple nail include pressure, stroke or inflammation or nail fungus, it can also have hereditary factors. Kartnagel is usually permanent but can be treated in different ways, seek out a skilled podiatrist for advice.

Nail fungus:

Nail fungus is a common fungal infection that can affect both the toenails and fingernails, nail fungus is harmless and can be treated. Toenails have a greater risk of nail fungus! This is because they grow more slowly, and are a better environment for fungal growth if you often wear tight shoes and socks.

Helping tips to get rid of nail fungus is to air your feet more! There are also various over-the-counter fungicides at the pharmacy that you can try. A home remedy that helps against nail fungus is to try lubricating the nails with garlic. Garlic is said to have fungicidal effects.

Nail tightness:

Nail tightness is usually caused by incorrectly cut nails or too tight shoes. If you got a nail tightness, the edge of the nail has cut into the skin and caused a wound. Bacteria or fungi can then penetrate the wound and cause cuticle infection. It is possible to relieve yourself by making sure that the area is properly cleaned, and to cut the nail correctly so that it does not rub against the skin.

striped nails, ribbed nails, prosperous nails, nail bed

My healthy nails a good period! Although a little short nail bed on some here;) In this picture it is clear that I naturally have a little knurled nails. As I said, it is completely natural, there are few who have completely smooth nails.

Good products against ribbed, striped & fragile nails

I use these products myself and recommend for you who have dry, brittle or striped nails. Below you have my list of good products to take care of their fragile nails and strengthen the nails and cuticles.

All links are adlinks (ad links):

products, reviews, tips, keratin, treatment, tonic, protective, moisturizing, nourishing, caring

I hope that you have used my tips against damaged & fragile nails and I hope that with the help of these tips you will avoid broken & striped nails. It's never fun when your nails crack or have stinging cuticles.

If you have any tips of your own that work well for you when you have ribbed, brittle & dry nails, feel free to leave a comment below! You are very welcome to recommend good products if you have fragile nails or if you have tips on how to get strong nails! :)

Also read my other posts about acrylic nails and long and healthy nails:

Hug, hug ♥

en_USEnglish