Peach Melba Makeup

Hi Helena! I loved the bright spring make-up you put out here the other day, perfect with inspiration for quick, bright and discreet make-up that still feels springy! Would like more of these :) Hugs ”

Glad you feel that way! :) Here comes another light spring make-up with discreet colors that I hope you all will like!

IMG_8702_111

Bassmink:
Face primer - Paese Makeup Base (Matte)
Foundation - Pixi H2O Skintint (Cream)
Powder that neutralizes red - gloMinerals Redness Relief Powder
Contouring - Pixi Book Of Beauty Contour Creator
Rouge - gloMinerals Powder blush (Papaya)
Dehydrating powders - Paese Bamboo Silk Powder
Fixing Mist - Pixi Makeup Fixing Mist

Eyebrows - Beneco's eyebrow designer (brown)
Lipstick - Pixi Shea Butter Lip Balm (Ripe Raspberry)

oogisar_1111

All eye shadows are from Paese Opal Eyeshadow in the shade Peach Melba

  1. Eyeshadow primer, Pixi Eye Bright Primer
    Light eye shadow on the inside of the eyelid.
  2. Light pink eye shadow in the middle of the eyelid
  3. Light brown eye shadow at the end of the eyelid and along the entire globe line.
  4. Black eyeliner, Paese Penliner. The same light brown shade also along the lower lash line
  5. Black mascara on the upper lashes, Magnetic Lash Mascara

All products are from Byher.se.

IMG_8720_111IMG_8724_111

Fast, bright, simple, discreet, but at the same time an incredibly nice and invigorating look!

Hugs are ♥

Rescue Failed Eyelash Permanent (Lash Lift)

Today Jeanette had an eyelash client that I could not help but take before and after pictures of. Partly to show you that it is possible to save a failed eyelash permanent if you should happen to it somewhere (hopefully not), but also so that you can see that it matters a lot whether you go to a salon with control or not. It is very important to go to a salon that you can trust!

This customer has long and rather coarse lashes, and had them permanently at another salon in Uppsala. And since they are quite rough, the person at that salon had decided to let the liquid work for 30 minutes. I do not know how long the exact liquid they use should work but I understood that it was quite far over the effect time, we let our liquid work for 6 minutes.

The result was a permanent eyelash that was crazy too much! They were almost glued to the eyelid, rubbed in the globe line (!) So that the skin on the eyes was irritated. It had been even worse the days after, she said, but it was far from nice now either.

Here you see a close-up of what the lashes on the worst eye looked like when she came here:

Rescue Failed Eyelash Permanent (Lash Lift)

The lashes were almost glued to the eyelid!

Here is the result after a new permanent:

Rescue Failed Eyelash Permanent (Lash Lift)

Jeanette started by permanently replacing them, and placing them on a very thick coil so that they "came out" a little from the eyelids.

Then she actually had to sit with Hårologi Intensive Cure which is a hair wrap with amino acids that repairs the hair by adding proteins and repairing the sulfur bonds in the hair. Almost like an olaplex treatment. I did not see the lashes before the wrap but both the customer and Jeanette said that they actually got even better after the wrap!

Permanent eyelash does not wear on the lashes, as it is done once and then lasts until it grows away (which takes about 2 months). Not like when you permanent the hair and then that hair should sit for maybe 8 years after. But it is a bit dehydrating for the lashes if you do it several times, and after a 30 minute treatment just a few weeks earlier, it is probably absolutely noticeable on the quality of the lashes after you have run another round.

She brought a small jar of packaging home too, and so she bought it with her Refectocil Long Lash Gel which is like a caring wrap (and transparent mascara) that she can wear all day.

Rescue Failed Eyelash Permanent (Lash Lift)

Really difference right? :) It would of course have been an even better result if she had come to us with completely impermanent lashes, but absolutely thinks that this result is super nice! She does not need mascara if you say so :)

Shout out if you have any questions ♥

Also read: LashLift - All About Lash Lift (Great Guide)

Gold shimmery everyday make-up

Here is a simple but incredibly nice make-up that shimmers nicely in golden, green tones :)

IMG_8586_111

Bassmink:
Face primer - Paese Makeup Base (Matte)
Foundation - Pixi H2O Skintint (Cream)
Powder that neutralizes red - gloMinerals Redness Relief Powder
Contouring - Pixi Book Of Beauty Contour Creator
Rouge - gloMinerals Powder blush (Papaya)
Dehydrating powders - Paese Bamboo Silk Powder
Fixing Mist - Pixi Makeup Fixing Mist

Eyebrows - Beneco's eyebrow designer (brown)
Lipstick - Paese Lipstick (37)

tutoriiial_111

  1. Eyeshadow primer, Pixi eye bright primer
    Brown shade sooted softly along the globe line, Pixi Book Of Beauty Contour Creator
  2. Gold-green shimmer shadow on the entire eyelid and up on top of the brown in the globe line, Pixi Fairy Dust (Olive Gold)
  3. Black eyeliner with wing, Paese Penliner
  4. Wrap the brown shadow along the lower lash line as well, and then dab on some of the golden green eye shadow on top.
  5. Black mascara on the upper lashes, Magentic lash mascara
    White shadow in the corner of the eye, Yag mineral eyeshadow (star white)

IMG_8611_111IMG_8619_111IMG_8637_111

Hope you got off to a great start on this wonderful Wednesday! ♥

Newly dyed hair!

0

Now I'm done at the hairdresser! You who follow my hairdresser Monica on Periscope (@msmonicawerner) or on her Facebook page Hairdresser Monica Werner has probably seen a bit already when she filmed live directly from the salon as well :)

The hair color now has a milder, cooler tone, and we have "prepared the colors" to be able to bleach the more light pink at the beginning of the summer and have a better starting position then.

IMG_8738_111

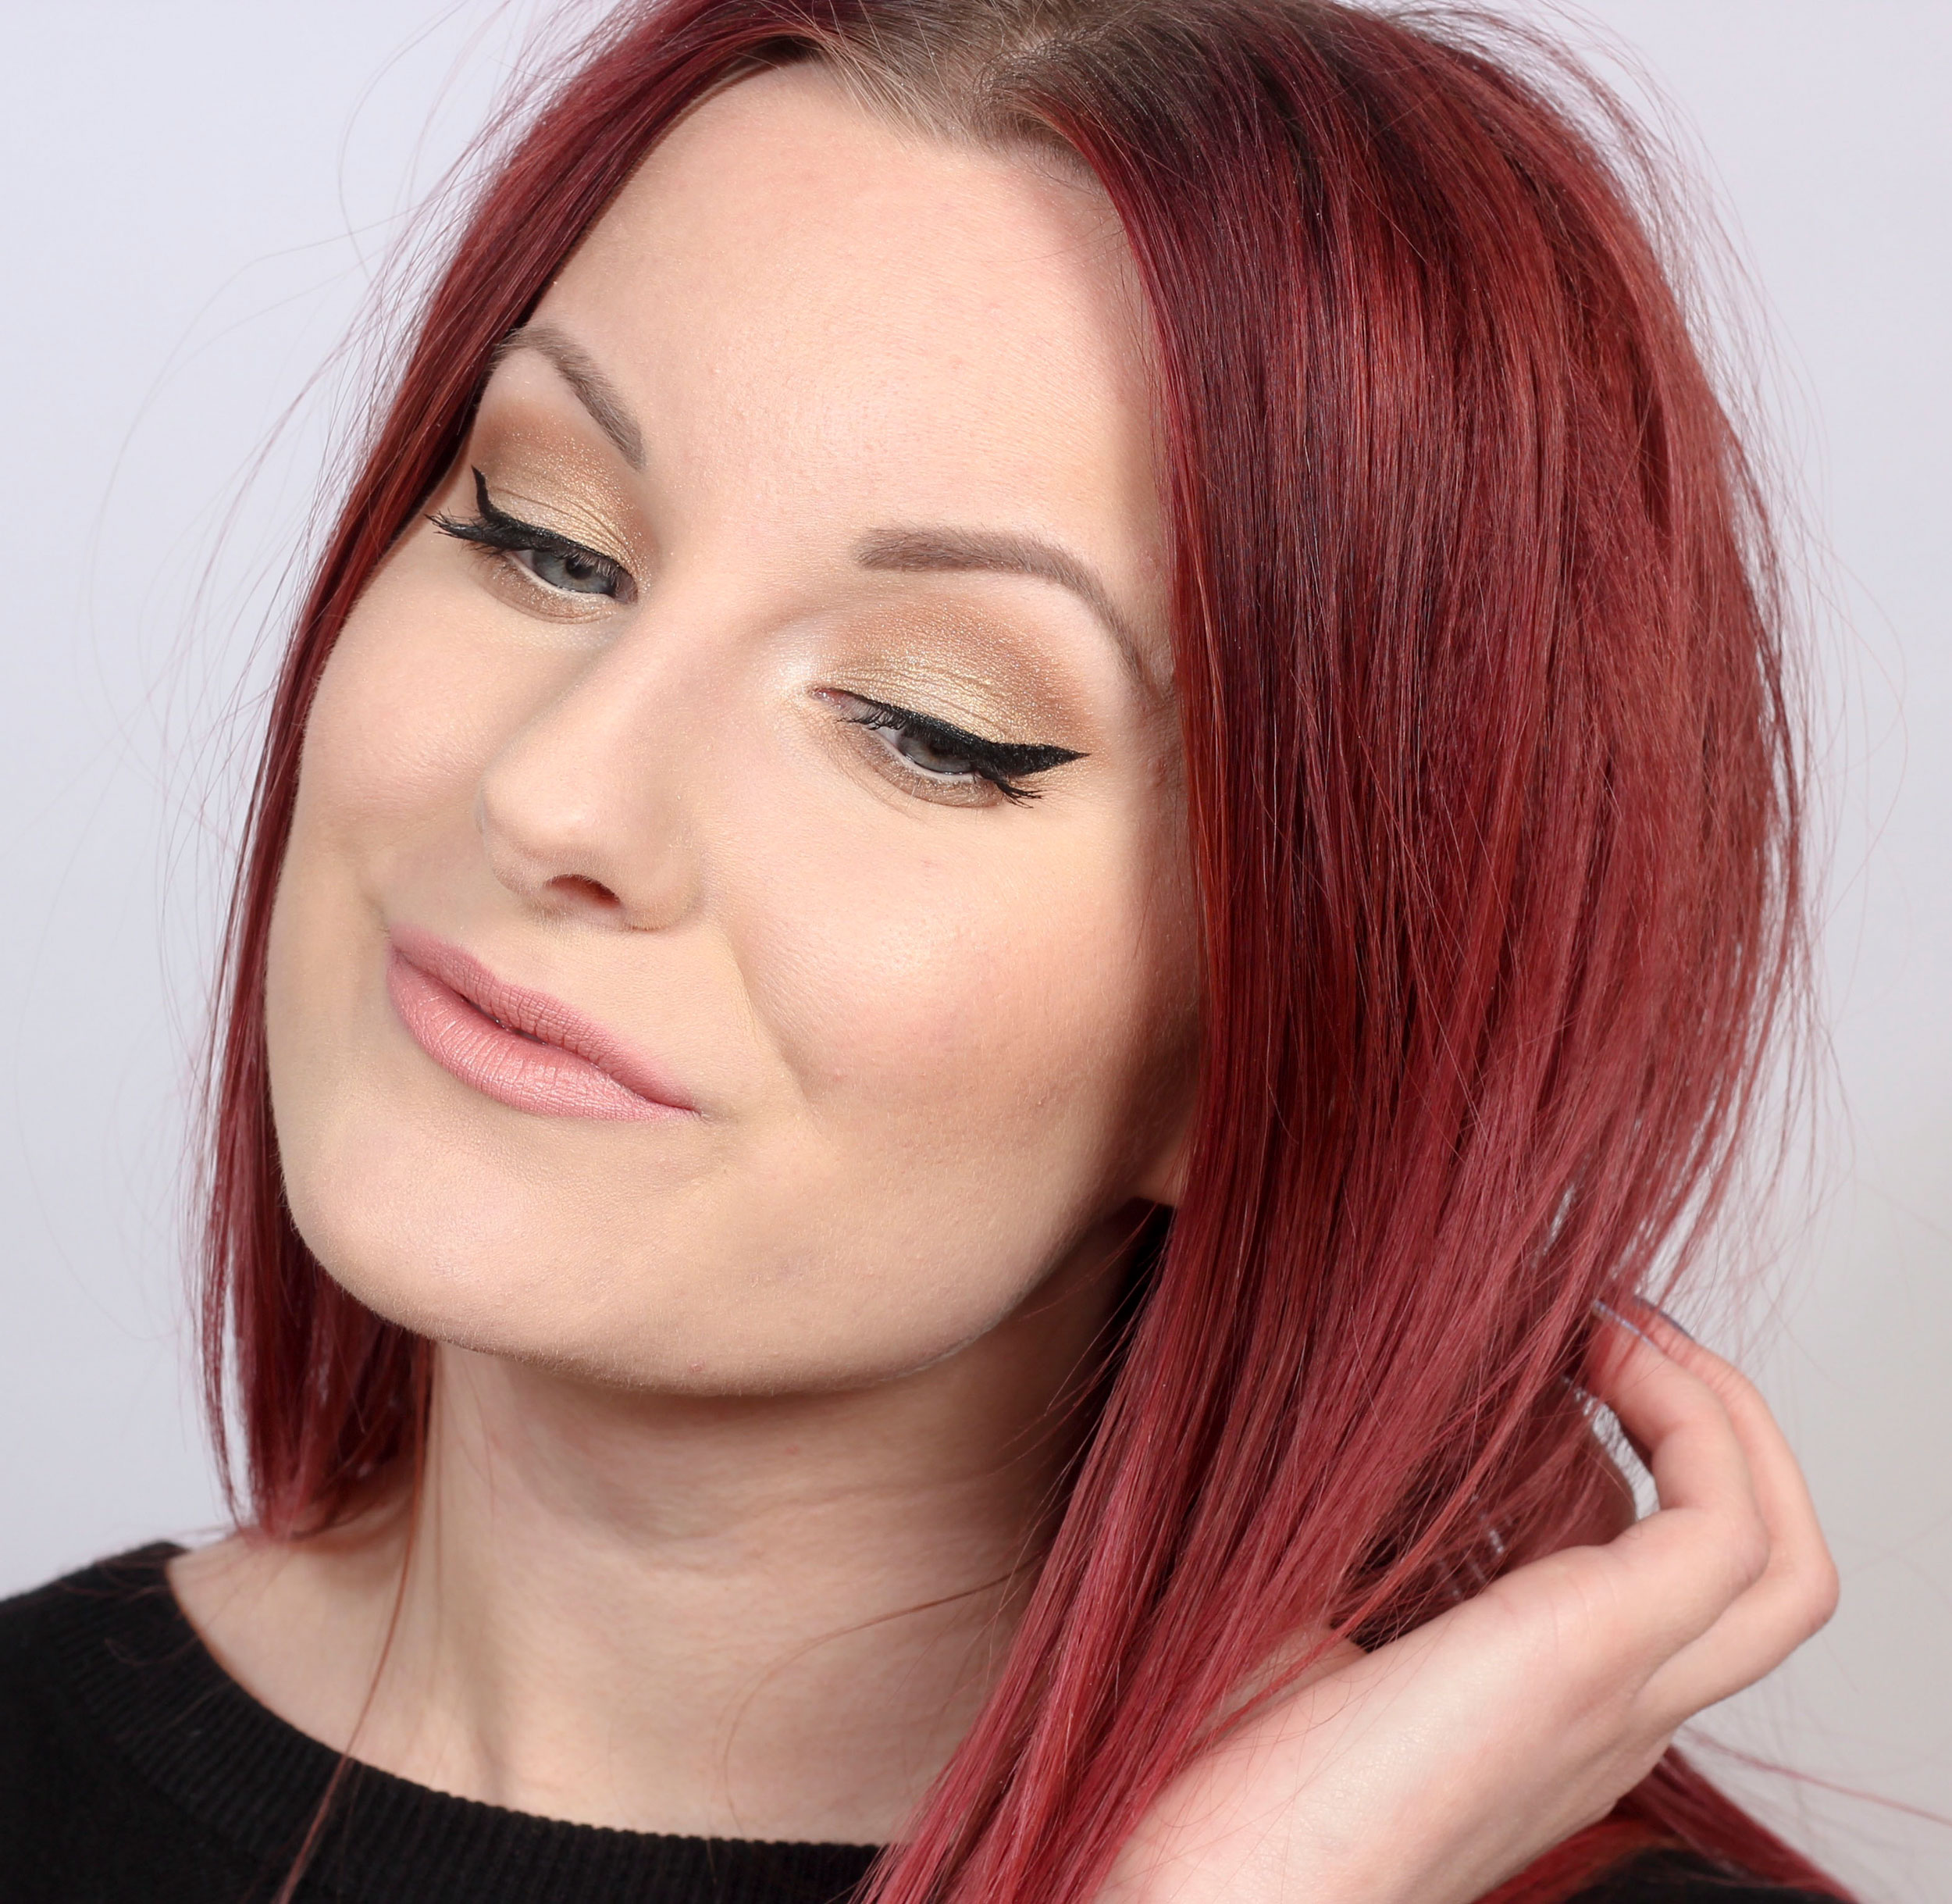
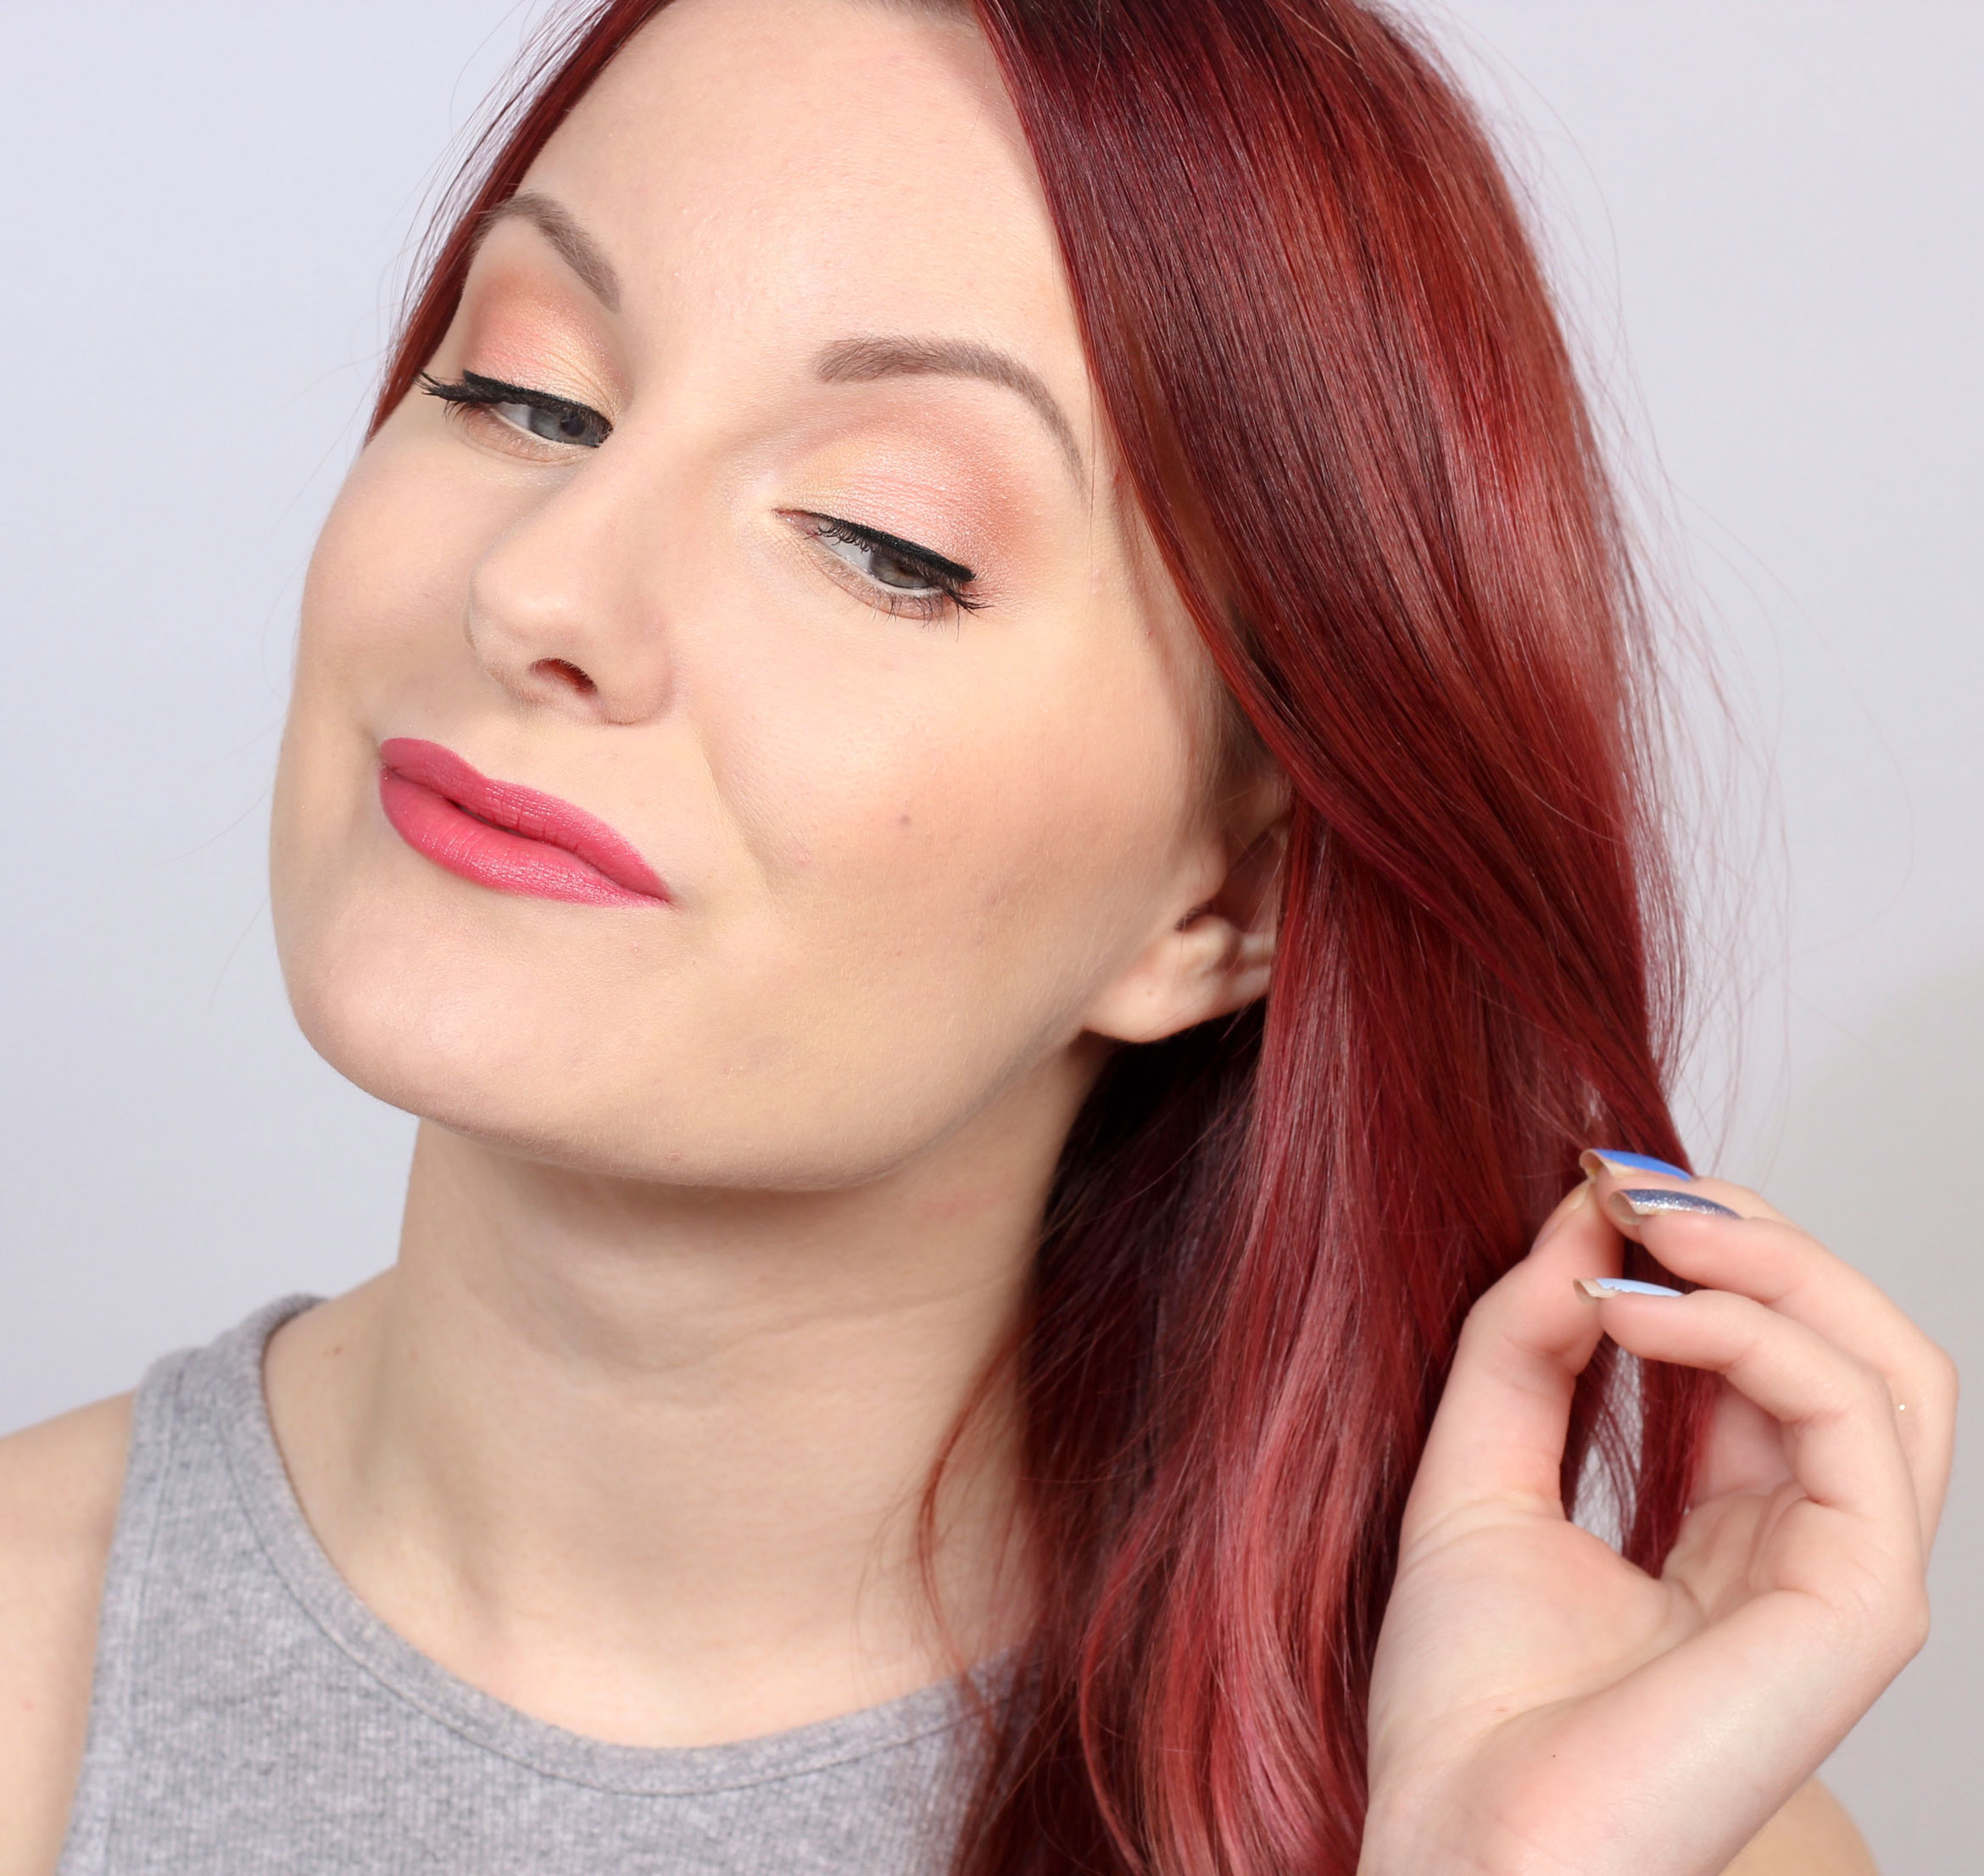
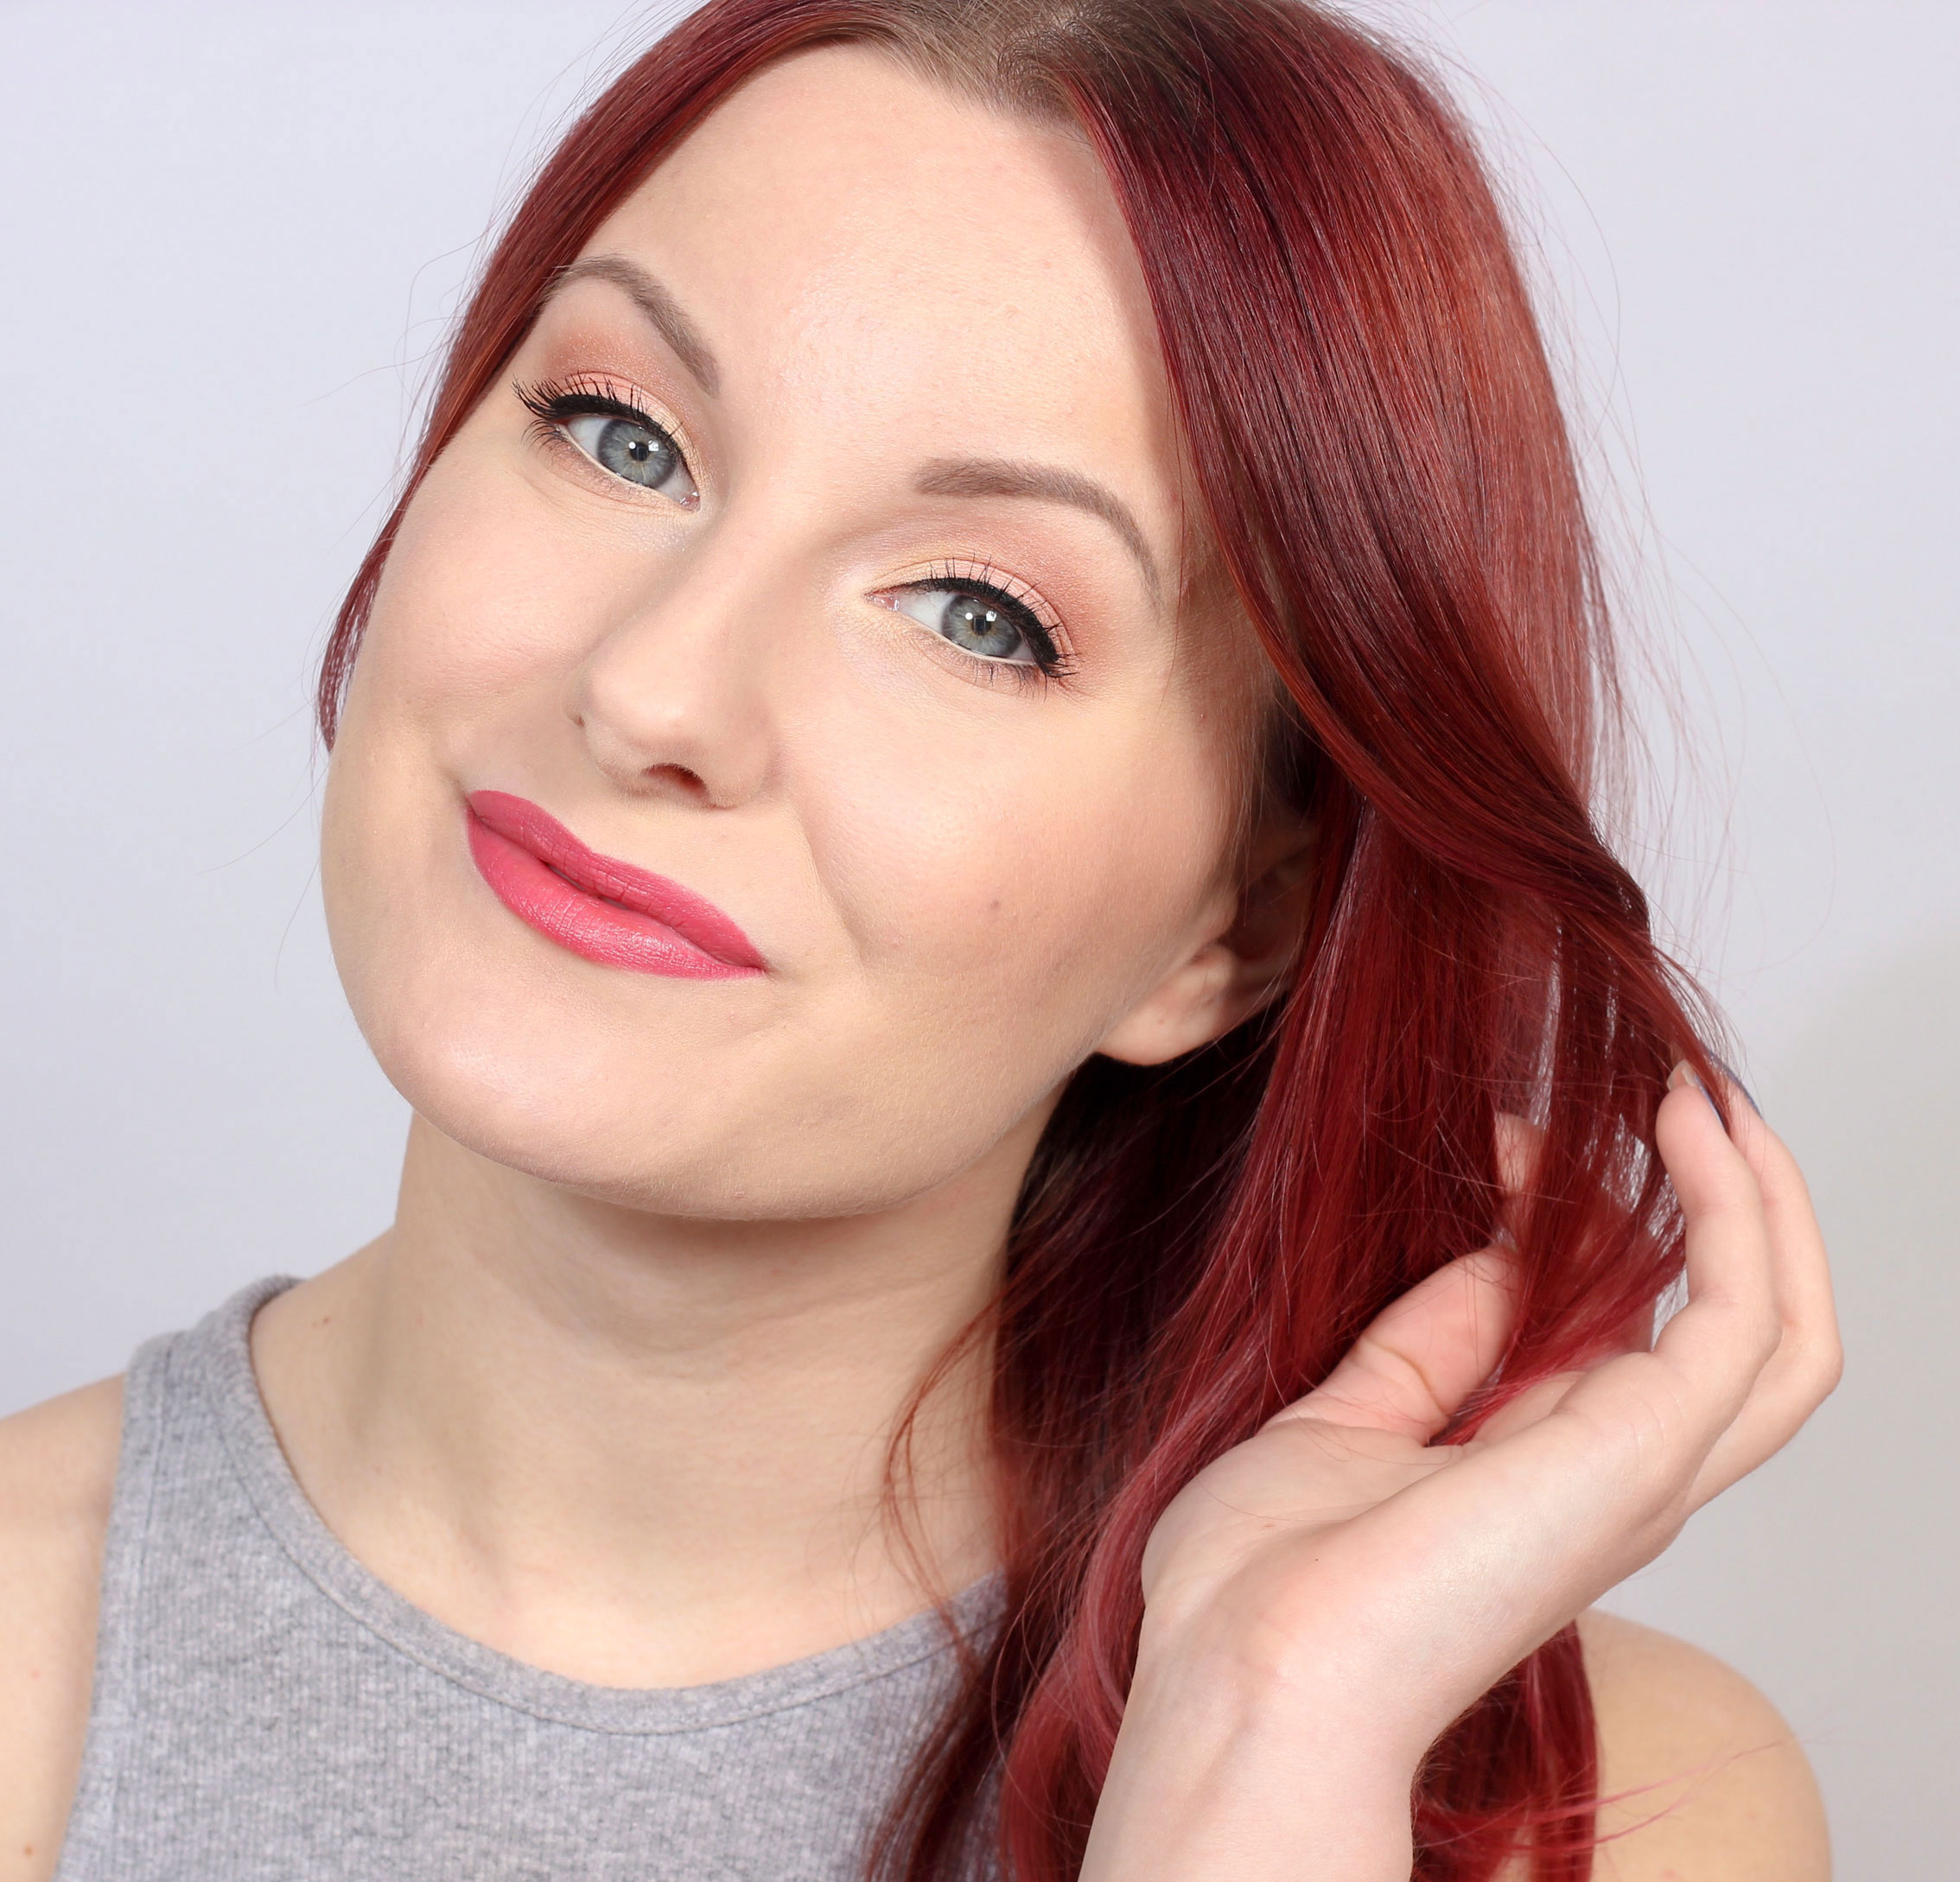
Fint va? :) No big change but I love the tone of the new color!

Starting position
As I mentioned yesterday, I have been eager to get a little brighter, but still in the pink direction. When my previous bright pink color released in the shower, the tone became more pastel pink, which I liked! I think the tops of my color were great before.

So this time we decided to make my current color a little softer, cooler and more pastel, and bleach the more light pink next time instead because then both the base color and the lengths would have better conditions to look good.

The base color
There was still quite a lot of darkness left from the previous outgrowth coloring, which made my outgrowth now lighter, then came a "band" with darker red color and then it became lighter again. So the previous primer must be washed out even more first before we can lighten the hair.

So she chose a tint for the scalp that will be washed out faster, and in addition it is a violet red color mixed with a cold brown so that it is not quite as bright red as we usually are. So the next visit to the hairdresser, my rat-colored outgrowth will not be a bit marked as now and then you can lighten your hair even more.

Luggen
Monica also put some loops in a light coral color at the front closest to the face, it is a color that for some reason (premium for little me) lightened up the hair a bit without being a bleach. So the fringe has become a little lighter than before as well, not much but a little still makes a big difference I think :)

The lengths
The rest of the lengths we dyed with a pastel pink shade, it was a little difficult to attach to the tops but the whole hair got a nicer cooler pink tone which I think is incomparably nice! More "well-thought-out pastel pink" instead of "washed-out bright pink" hehe.

Yellow loop as a test
Monica was very eager to mix in some yellow loops, which I was a bit cowardly for haha. But we did a loop as a test to see if I want to do more next time or if we should just color it off then. But also to test how easily the hair is lightened (as it is a color that also bleaches a bit) which it did very easily so it is also good to know before the next coloring when we will lighten more.

In other words - There were four different colors in total! And since the growth will be softer the next visit to the hairdresser and the whole hair has a milder pink tone, it will be a nicer result in June then when we (if we stick to the plan) will bleach the hair first and then put on a pastel pink color again :)

IMG_8777_1111

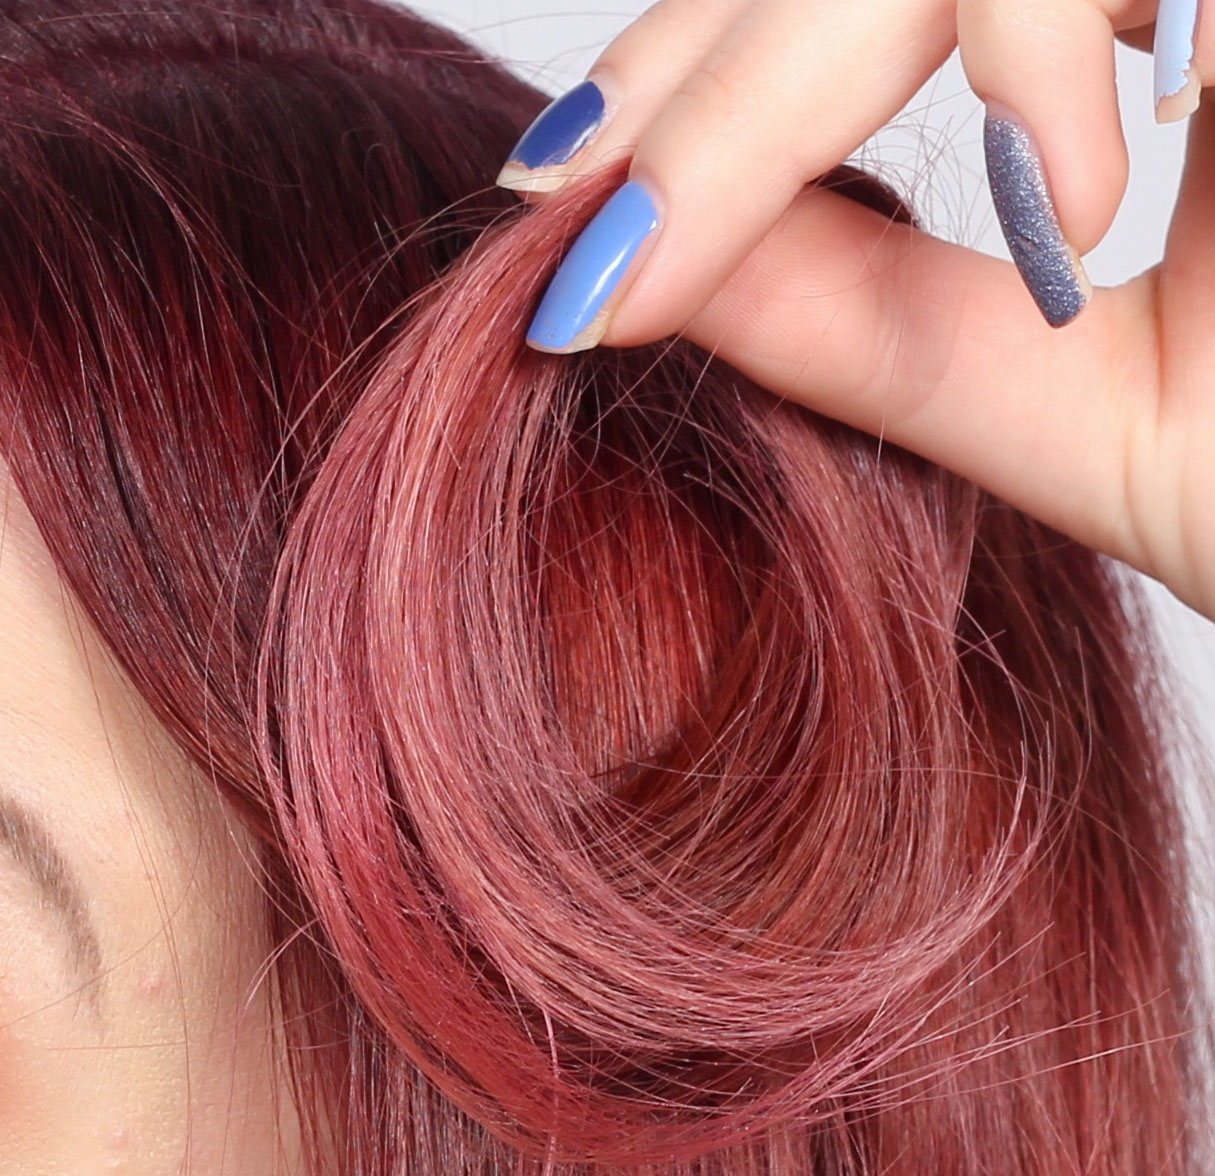
Here you can see the light, pink color in the lengths a little better!

And do you also see a tiny glimpse of the yellow loop, do you see? It is barely visible when it is mixed with all the pink hair, but then I see partly how it will be on my hair but also how it changes after a shower a few times :)

IMG_8811_111

And here you see the fringe color against the darker toning of the scalp, much lighter :)

IMG_8777_111

What do you think? :)

On Monica's new website Monicawerner.se so you can do an online consultation before you book an appointment with her, to know what is possible to do with the hair, how much time you should book in and how much it will cost.

Hugs are! ♥

Light spring make-up

I have received requests for a bright, happy, discreet and invigorating make-up that can be done quickly and fits well this spring. Here comes one! Hope you like it :)

IMG_8319_111

Bassmink:
Face primer - Paese Makeup Base (Matte)
Foundation - Pixi H2O Skintint (Cream)
Powder that neutralizes red - gloMinerals Redness Relief Powder
Contouring - Pixi Book Of Beauty Contour Creator
Rouge - gloMinerals Powder blush (Papaya)
Dehydrating powders - Paese Bamboo Silk Powder
Fixing Mist - Pixi Makeup Fixing Mist

Eyebrows - Benecos eyebrow designer (brown)
Lipstick - gloMinerals Lipstick (Snapdragon)

tutooriial_111

I have used three light, shimmery mineral eye shadows, a light purple, a light pink and a white. Nice, bright, shimmering, invigorating, but still discreet :)

  1. Eyeshadow primer, Pixi eye bright primer
    Light purple eyeshadow on the inside and outside of the eyelid, Yag mineral eyeshadow (soft lilac)
  2. Light pink eye shadow in the middle of the eyelid, Yag mineral eyeshadow (pink love)
  3. Sweep a soft, fluffy brush along the crease line for a smooth transition between colors.
  4. White eye shadow in the corner of the eye and in the middle of the eyelid, Yag mineral eyeshadow (star white)
    Black mascara on the upper lashes, Magnetic lash mascara

IMG_8339_111IMG_8314_111

What do you think? :) ♥

en_USEnglish