All pink - Pink makeup with noodle lips

As usual, I am a season ahead in my "inspiration brain" and have already started doing a lot of spring make-up, even though it is still February, I think wonderful! And there are worse things than being early;)

Today's make - up is a pink make - up with both full matte and super shimmery shadows, and I also offer a step - by - step description.

Hope you like the look!

Lipstick, Paese Lipstick with argan oil in shade 37.

1. Light pink shimmery eye shadow innermost on the eyelid, in the corner of the eye and under the brow, Paese Diamond Eyeshadow (11)
2. Pink matte eye shadow at the end of the eyelid, Paese Kashmir Matte Eyeshadow (673)
3. Dark purple eye shadow at the bottom of the lower lash line, and along the globe line, Paese Kashmir Matte Eyeshadow (674)
4. Fade the edges and apply a little more of it pink carpet shade in the outer edges.
5. Black eyeliner along the lash line, Paese Penliner.
6. Black mascara on all lashes, Oriflame Wonder Lash Mascara.

What do you think? :)

Paese Bronzer & rouge

I've talked about shading, highlighter and blush in so many previous posts that you'm probably tired of it already? :)

But I thought I had to show you how nice, and above all how big a difference, it can be with Paese's relatively new products on Byher.se - Paese Bronzing Powder and Paese Powder Blush!

before-after-shading-highlighter-blush

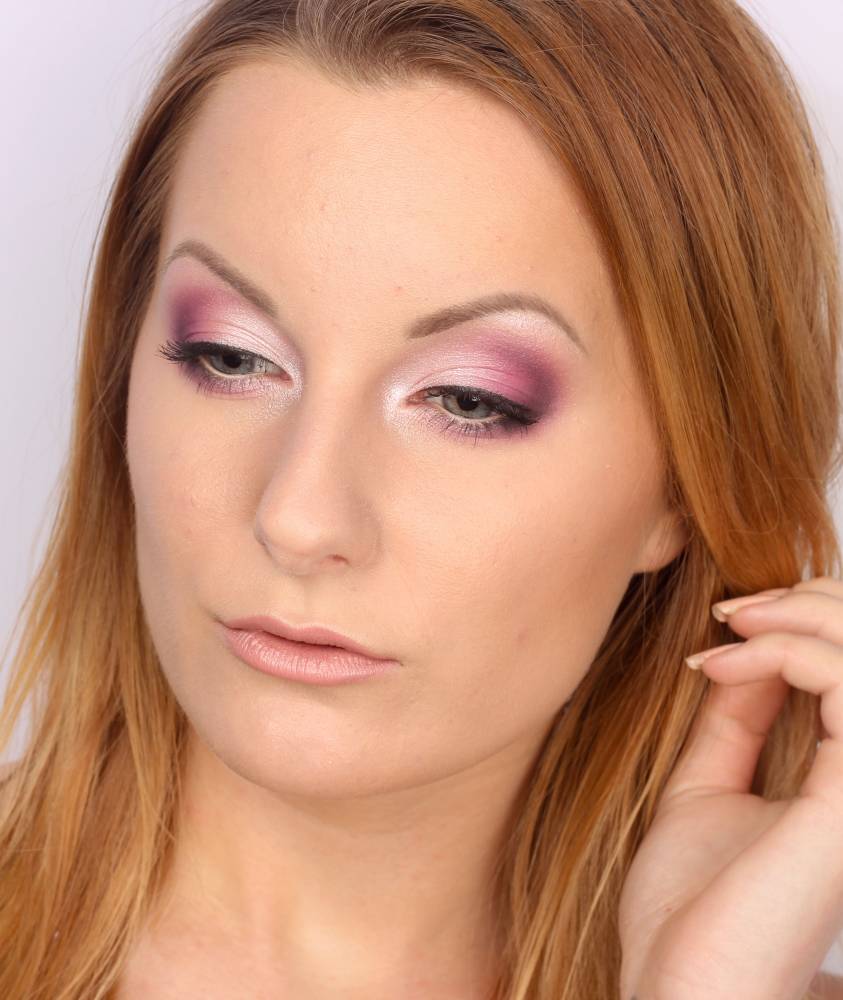
In the pre-image, I have a full-coverage base, which makes the face look flat and lifeless without any more color. In the after-picture I have bronzer in the shade 1M and blush in the shade 40P, and then I have much more shapes and life in the face :)

paese

The blush costs SEK 59 and the bronzing powder costs SEK 159, and both are available, as I said Byher.se.

apply-sun-powder-and-blush

This is how I usually apply on my face! You can conjure a lot with sun powder to reshape the face and make certain parts narrower / wider, but I do not focus on any particular area but work mostly on highlighting the face shapes I already have.

Jawbone tips:
I like when my jawbones are quite clear, so I usually do not apply bronzer on them because it softens the shapes a bit and makes them look rounder. So in that area I just apply on the sides of the chin, and then I jump over the jaw and apply on the sides of the neck and under the chin.

Cheekbone tips:
It is very popular to emphasize your cheekbones with bronzer, but a common detail that I see very often, and which actually has the opposite effect, is that you apply the bronzer too high up. Then you "push" down the cheekbones instead and make them look smaller. If you want high and sharp cheekbones, it is better to apply just below the cheekbone, not on.

The blush on the other hand can be applied higher up, because it does not give as much effect on the shape but gives more color and life to the face!

Boiler tips:
From the cheekbones, I usually continue with the bronzer up along the temples, and in the temples you can afford to apply quite a lot without it looking strange - good trick if you want a lot of effect. Then I usually tone up the bronzer on the sides of the forehead as well, and here it is important to be light on hand not to have too much product on the brush if you want a natural result.

Nose tips:
I usually use the same brush for the nose as for the rest of the face, and just lightly swipe on the sides of the bridge of the nose. If, on the other hand, you want more effect, e.g. to make the nose narrower or wider, a smaller brush is recommended (but still one that is fluffy) because then you get more precision and have more control.

IMG_3219_111

Hope you were inspired by the pictures and that the tips were helpful! Shout out if you have any questions :)

Kiss! ♥

Oriflame The ONE 5-in-1 WonderLash Mascara

Oriflame's popular mascara ”Wonderlash mascaraHas been relatively recently renewed and is now included in The ONE series. I liked their previous mascara, it was one of my favorites actually, and have now also tested the new variant :)

Just like with the previous version, I mainly love the separation (!) But it also gives a nice bend and length. Two thumbs up! And to be honest, I do not immediately notice any difference between the old and the new actually.

I must honestly say that I do not know exactly what differs apart from the packaging, but I have understood it as if the sleeve and the formula are changed, but the brush is at least the same as before - a rubber brush with small spikes on one side and longer on Other.

I think the brush is really good, I prefer most often rubber brushes that comb the lashes, and it really does. This one accesses all lashes, even inside the corner of the eye.

The mascara costs SEK 159 and can be bought online HERE!

The only negative is that it smears a little on the brow bone if you get oily during the day. Not as much as some may do, but a little.

Any of you who have also tested and like this one? :)


Girl next door makeup tutorial (Make-up)

Today is Sunday and I have actually planned to be makeup free today, will see how it goes hehe. But I was going to show you the make-up I had last Friday, because it is actually a good Sunday make-up for you who just want to be a little naturally made up on such a quiet day :)

When I put on my make-up, I had only applied foundation (Dr. Hauschka) and mascara on one the eye, and then my mother called and wanted me to go along with a thing "we should go in 10 minutes" she said and I bounced out of the soft pants and finished the make-up super fast!

With an off-white eyeliner pencil, light shimmer shadow, brow pencil, mascara and lip gloss, you get a quick and invigorating look. And with a little sun powder and blush on it, you look like the girl next door later :)

Basic make-up:
Face primer - Paese Makeup Base Matte
Foundation - Dr. Hauschka Foundation
Powder - Paese Bamboo Silk Powder
Bronzer -  Paese Bronzing Powder (1p)
Rouge - Paese Powder Blush (45)
Highlighter - Paese Kashmir Eyeshadow (667)

Eyebrow:
Eyebrow Pencil, Benecos Eyebrow Designer (Brown)

Lips:
Lip Gloss / Lip Balm - Paese Balm Lip Gloss - shade 621.

Eyes:
Off-white eyeliner along the waterline and out a little in the corner of the eye and under the eyebrow, Benecos White Natural Kajal Pencil
Light, shimmery eyeshadow in the corner of the eye and a little into the eyelid and lower lash line, Annika's Favorite Shadow.
Mascara, Palina Drama Queen Mascara.

Surely you look alert and fresh when you light up so much around the eyes? :)

What I usually think about is not to lighten up around the whole eye, ie on the whole eyelid up to the brow etc. Because if you leave half the eyelid, the crease and a bit of the lower lash line without shadow, the skin color gives the same effect as if you had applied a darker eye shadow, but in a very direct way.

If you had lit up around the whole eye, it would have looked pretty flat instead, if you understand what I mean? :)

Hope you all have a wonderful day today! ♥

Goddess Makeup

My good friend Frida was with me today and had a little extra nice Saturday! She was going to a Goddess-themed dinner, she was studying to be a nurse and all the boys in the class were going to serve all the girls who were goddesses around the dinner table. Cool idea! :)

I fixed both her hair and makeup, and here is the result:

goddes makeup

IMG_4031_111

Fiiiin va? :)

It was a basic make-up with a lot of radiance and rosy cheeks, and golden, shimmery eyes!

It turned out so nice and she was so happy so my idea is to do a similar one and take photos step by step of myself, so the product list comes in that make-up but if you are wondering about something already, shout out :)

IMG_4049_111  make-up goddess

IMG_4096_111

You can guess how I felt when I stood next to her completely unfixed, it was just to avoid all the mirrors in the home hahaha.

Have a wonderful Saturday night fine you! ♥

en_USEnglish