Favorite replay - Kylie Jenner makeup tutorial

Hi Helena! Thanks for a great blog, it really shows how much work you put in! I wonder if you can show a make-up inspired by Kylie Jenner? Think you did one before, but do not remember and can not find the post, maybe you can publish again? :) Hug ”

Gulle du ♥

I absolutely can! :) I have made a post with a make-up inspired by her, and a lip tutorial as well which is mainly about enlarging the lips with make-up. Can publish both again:

kylie-jenner-makeup

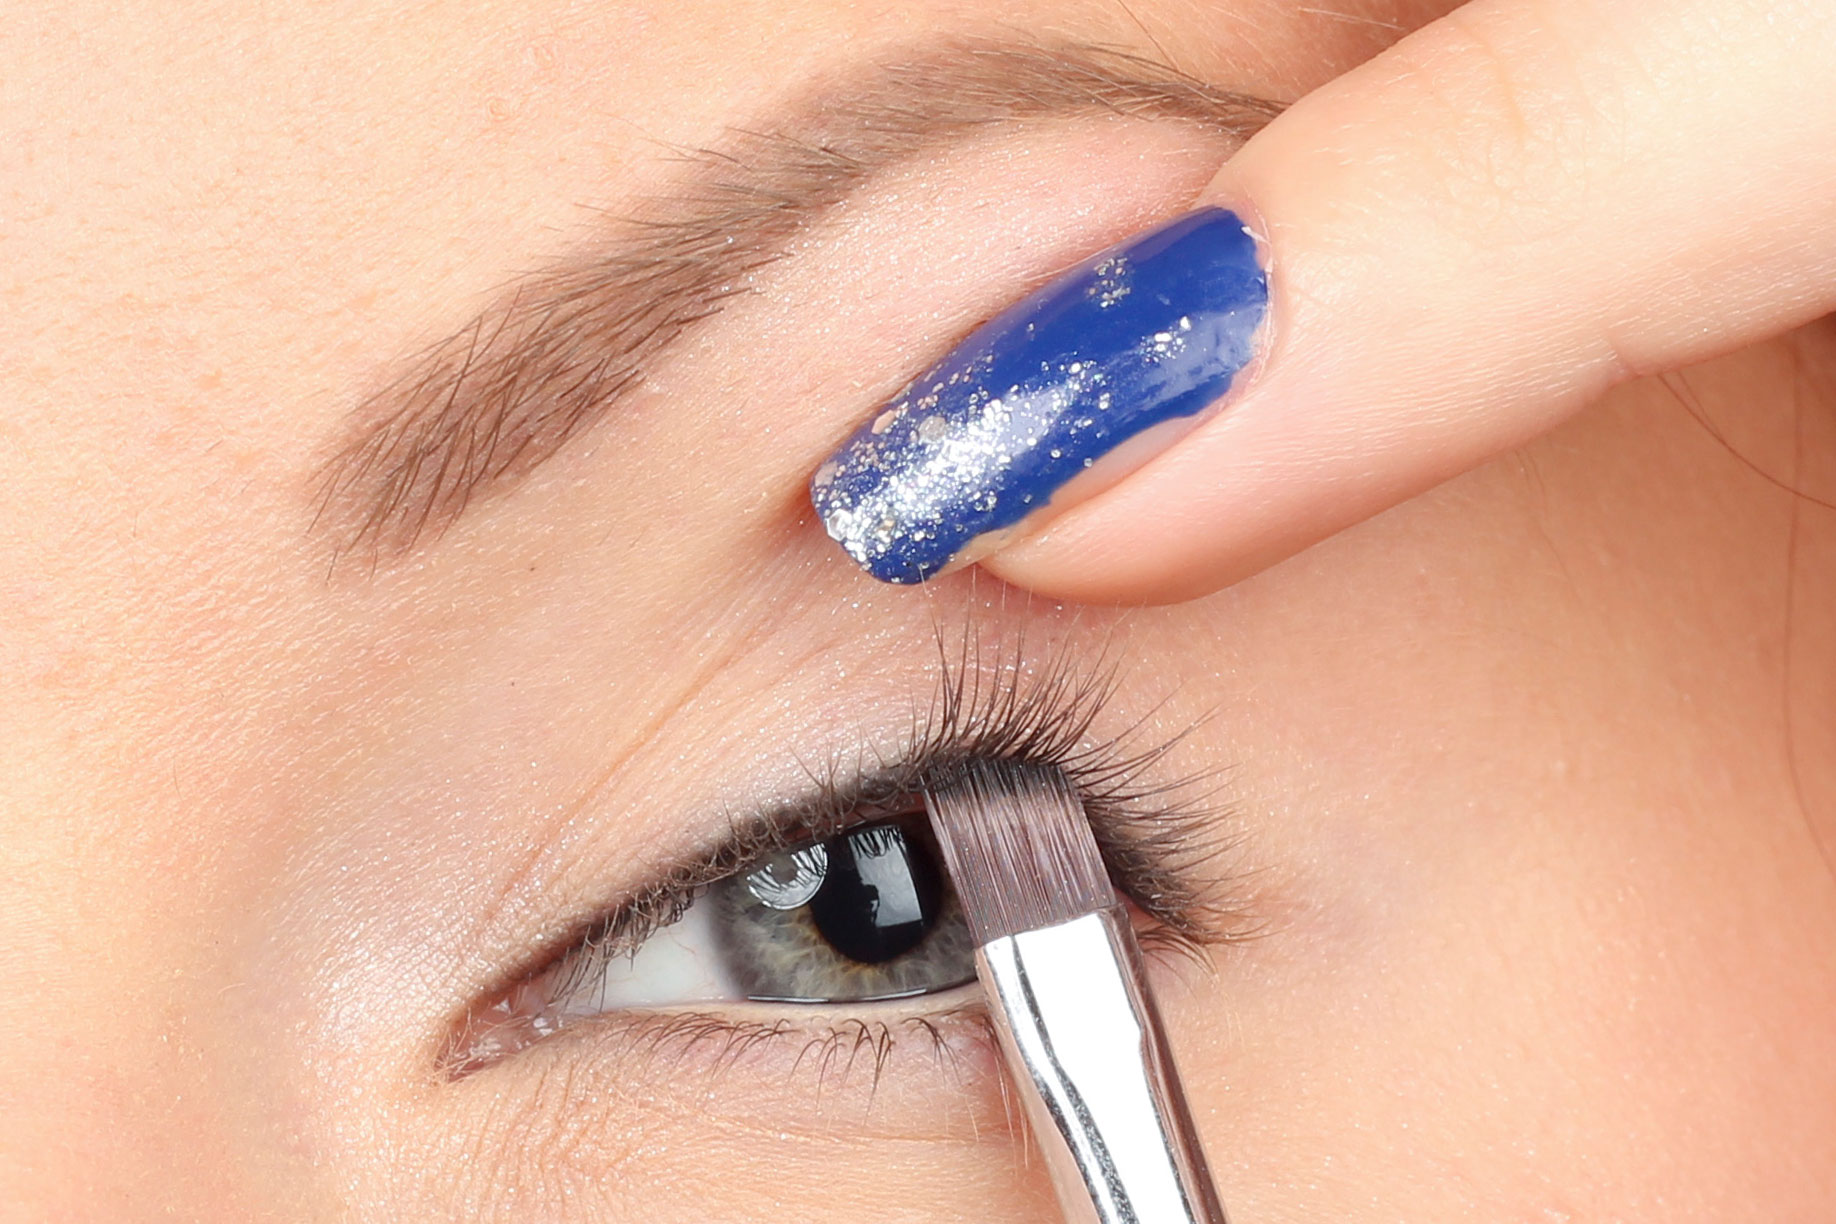
Kylie Jenner's eye makeup is often bright on the entire eyelid, softly framed along the crease and lower lash line (often darker under the eyes than the top) and an eyeliner that is very narrow at the inside of the eye, with a wider eyeliner wing at the outer edges.

Super nice! :) Hope you like my interpretation and that the step-by-step pictures are helpful.

kylie jenner makeup tutorial

The lips are two different lip pencils + a light lipstick in the middle to get more plut.
Dr. Hauschka Lipliner in shades 03 and 01, and Paese Lipstick in shade 35.

kylie jenner eye makeup tutorial

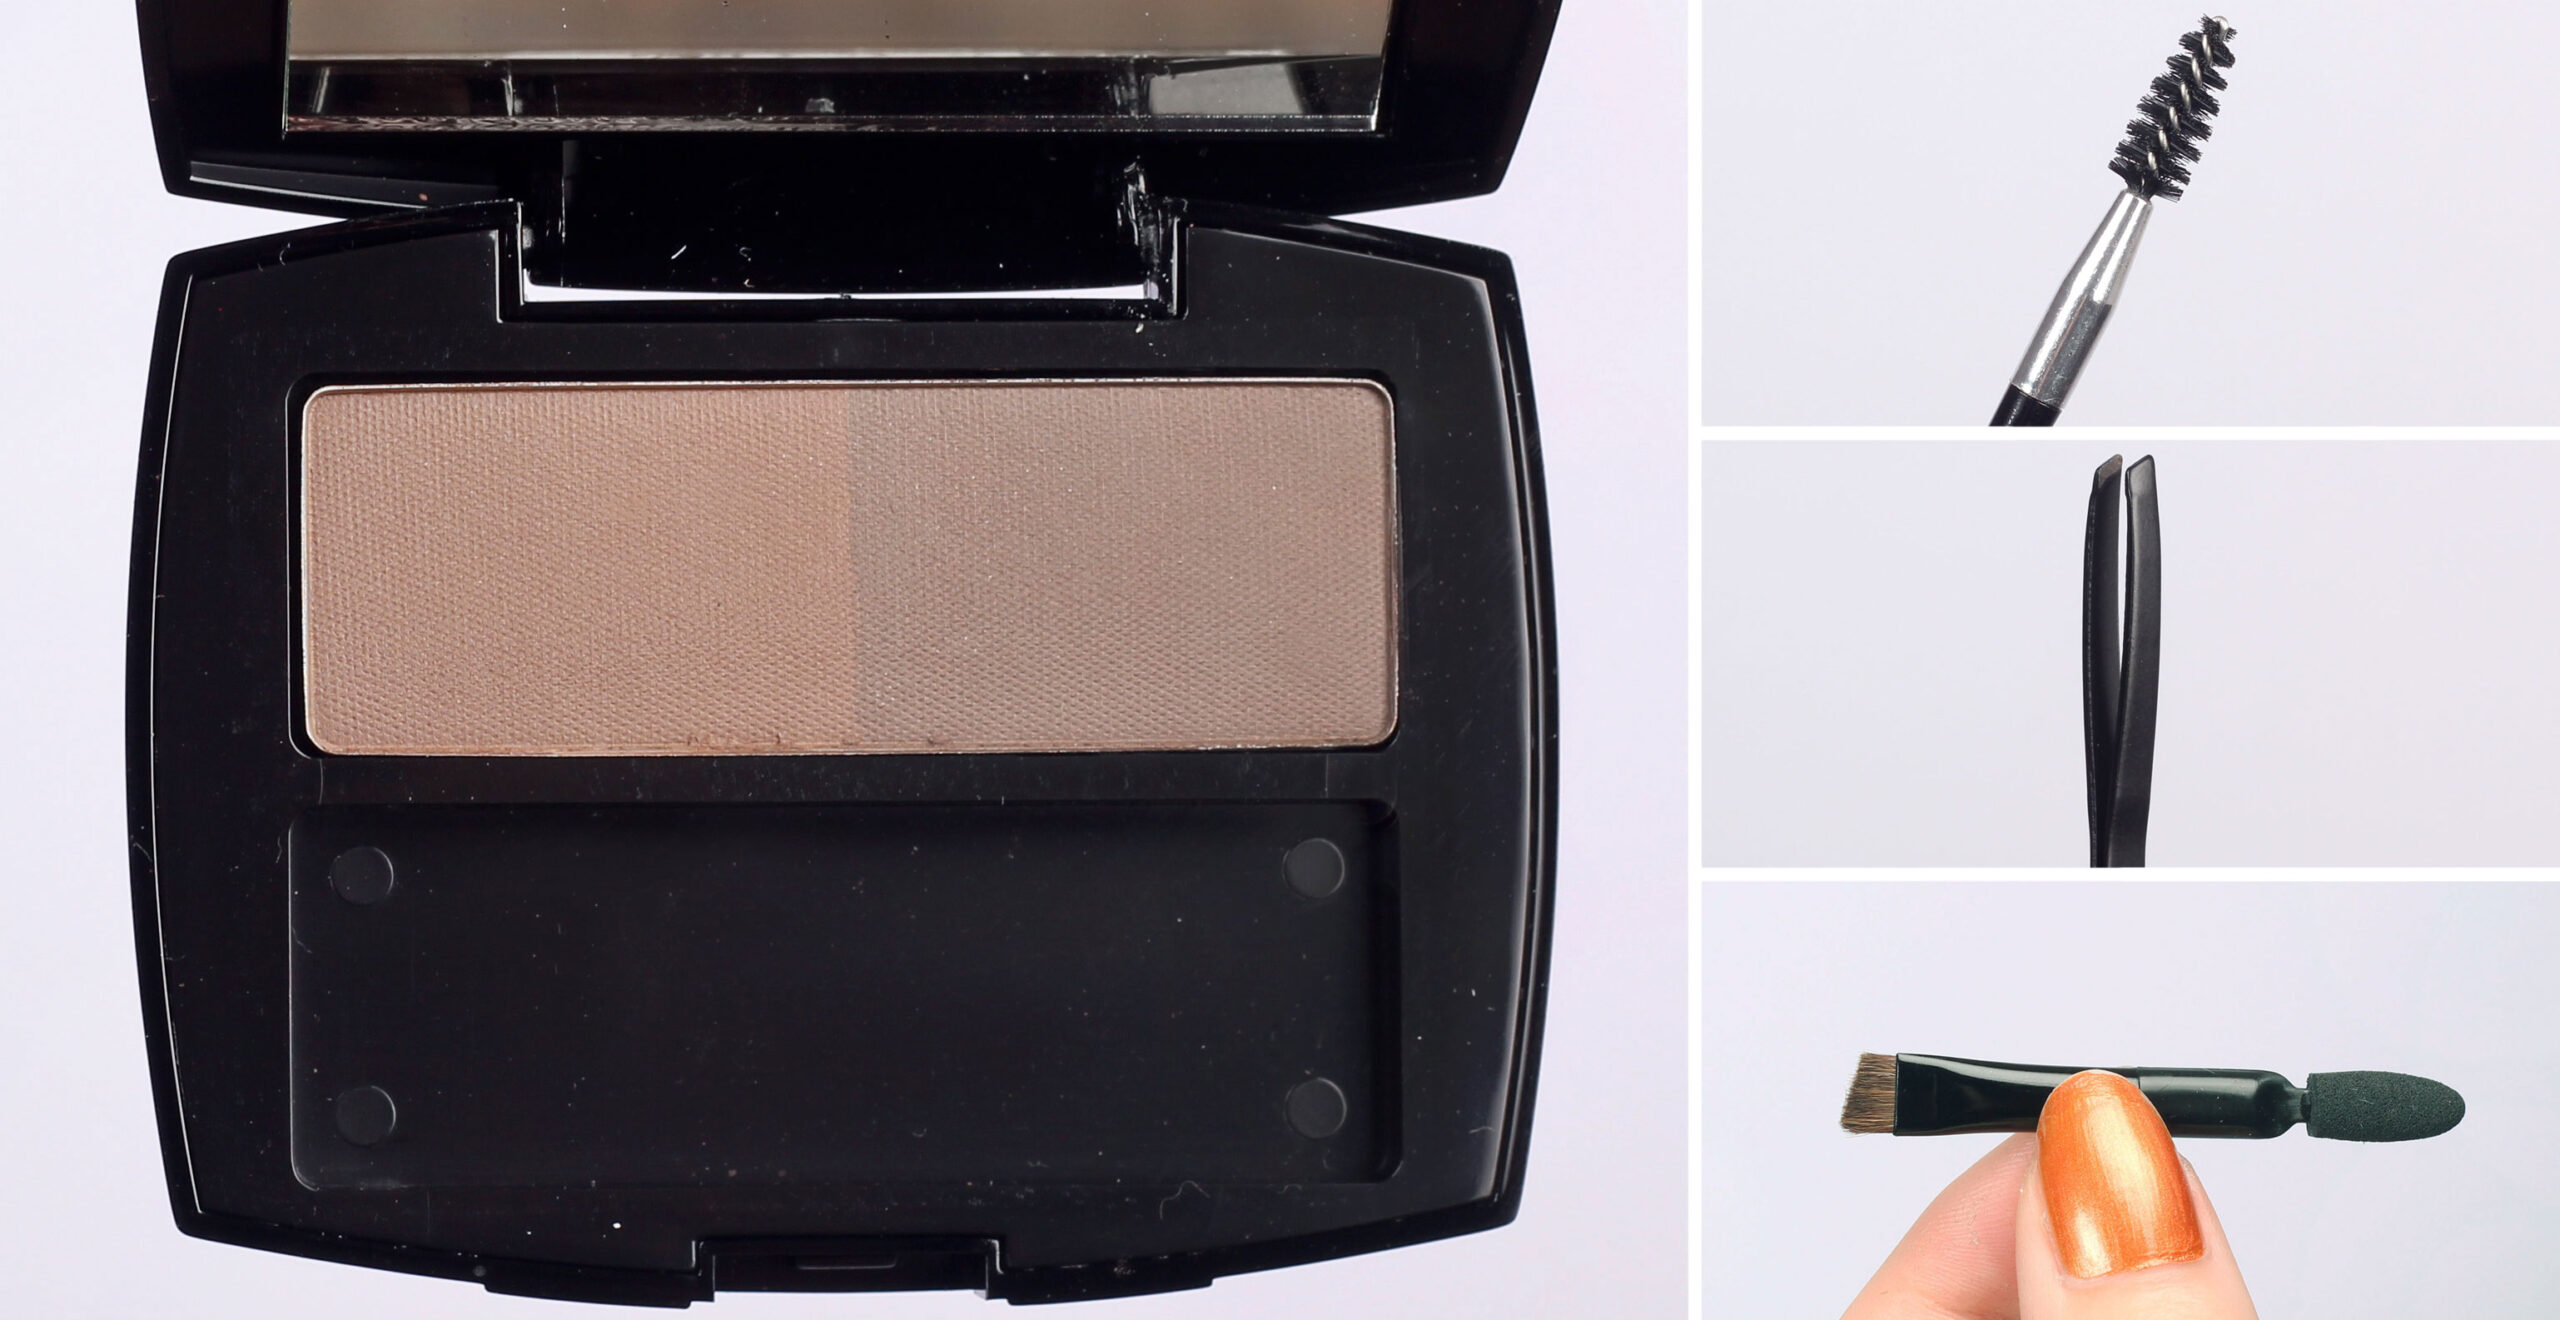
The eye shadows are from the trio palette Paese Matte Trio Eyeshadow in the shade 217 Retro!

1. Light eye shadow on the entire eyelid (Nanshy Tapered Crease Brush)
2. Brown eye shadow along the globe line (Nanshy Tapered Crease Brush)
3. The same shade also along the lower lash line, (Nanshy Pencil Brush)
4. Brown eyeliner along the waterline, Paese Automatic Eyeliner (Brown Glam)
5. Black eyeliner with wing, Kryolan Cake Eyeliner (Nanshy Liner Brush)
6. Black mascara on all lashes, Magnetic Lash Mascara.

217

Paese Matte Trio Eyeshadow 217 Retro costs SEK 79 and is available at Byher.se!

kylie jenner lips

Kylie rarely has ombre lips, but has the same color on the entire lip. But if you, like me, have very flat lips, you also need to lighten up a little in the middle to fake a plut, otherwise it can look a little flat and a little strange.

It is also important not to paint as much outside on the entire lip, because then there will be more clown effect. On the sides, you can go outside the shape mostly to make it look natural!

kylie-jenner-lip

bigger-lips-tutorial

Here you see the result before and after :)

kylie-jenner-lips-tutorial1 - copy

1. If you are going to paint outside the lip, it can be good to primer with a lip primer or transparent lip pencil. I have painted it on the whole lip + outside. Then it is easier to paint a nice edge outside where you often have a little more pores, lines and straws. I have used NYX Lip Primer.

2. I mostly paint outside on the sides of the upper lip, use a lip pencil for a matte and durable result. A creamy pencil can flow out during the day, and a shimmery / glossy product emphasizes the edge and makes it clearer that you have painted outside the lip. I have used the lip pencil Dr. Hauschka Lipliner in shade 03.

3. Also paint the outside on the sides of the lower lip, but not as much.

kylie-jenner-lips-tutorial1 - copy (3)

4. Fill in the contours around the entire lip. You can on most lips paint a little outside even at the cupid's bow, but if you paint too much here, it easily looks unnatural.

5. Then just fill in the whole lip!

6. It can also be a good idea to paint with a slightly darker pencil in the contours as well, then it looks more fluffy and the fake contour looks more natural. I have used the lip pencil Dr. Hauschka Lipliner in shade 01.

If you already have quite full lips, you can stop here! But if you need to fake more plut, you can also do these steps:

kylie-jenner-lips-tutorial1 - copy (2)

7. Light lipstick in the middle of the lips, dab gently with a brush so that you get a diffuse lightening. I have used Paese Lipstick with argan oilai nuance 35.

Light up with a light concealer outside the lip contour and along the lines above the cupid's arch up towards the nose. This makes the lips look fuller and more prominent! I have used Yag mineral concealer Covers Dark.

Then it's ready! :)

kylie-jenner-makeup-lip-tutorial

Here you see the difference between just painting outside the contours and even faking a little plut!

kylie jenner makeup step by step

Kiss on is!

IsaDora Perfect Brows Duo Compact Powder

One of IsaDora's news that came in the press release last week was a new eyebrow palette with two different eyebrow shadows "IsaDora Perfect Brows Duo Compact Powder" which I have put to the test now :)

IsaDora already has a palette like this in the range, but the new one is a different shade. I have not tested the previous variant actually, and in the product pictures the shades look exactly the same, so I do not know what the big difference is in the shades but the new palette has the included makeup brush, brush and tweezers, unlike the previous one which only has one makeup brush.

isadora-brynset

Packaging
A nice box with a mirror in it, always nice! Contains 3 grams which is quite a lot, so it is liked.

Accessories
The spiral brush works really well and the brow brush is okay - better than they usually are in such included kits and you who are not used to a perfect brow brush will probably think that this is very good, but nothing I will use. You can throw the tweezers, haha, no, but it was barely possible to pick straw anyway, but good idea otherwise!

Here you see the shadows:

IMG_1347_111

Shade
The shades have about the same dark mode, but the left one is warmer. Good to be able to mix to your own shade if you want a mix, but I think most of you will only use the right one. A cold brow color usually looks best. And you who have very dark hair will probably think that these are a little too light as well.

When I buy brown kits with different shades, I want them to be nice cool shades all, but with different dark modes. Then you can easily choose whether you want darker eyebrows for a party make-up, or a little lighter for everyday. Or if you want lighter on the edges, and darker on the outer edges, I also like to do :)

But two shades, one of which is warm and one is cold, is not optimal in my opinion, some of you may prefer it but I think many will feel that you have spent money on a product that you will only use half of.

Use
But otherwise I like the shadows! Well pigmented, no superpigment but they adhere well and are easy to use even for you who are beginners. They are easy to get both sharp and to fade out if you want a more discreet result.

Results
I recommend this brow powder for those of you who want a natural result that is quick and easy to fix. The eyebrows look full and nice, and the shade and the end result will be very natural. I used this powder in yesterday's makeup Moon Rock by IsaDora if you want to look at the pictures.

sustainability
I think they hold the brows well all day too, but it's a little difficult for me to decide as I basically have a tattoo as well. But I think it was good :)

Award
It costs SEK 119, and since it is a novelty, it has not been published on so many webshops, but it is available at Lyko.se in any case and they have free shipping too so it's nice!

IMG_1526_111

Here you see the result! I have used the cool shade in the palette.

Shout out if you have any questions ♥

Like a starry sky

A few days ago I showed autumn-inspired nails from OPI to you, and now I jumped straight to a nice winter design haha.

Or starry sky-inspired maybe you can say instead, it feels more relevant;)

IMG_1498_111

Surely these nail polishes will be super nice together ?! The blue lacquer becomes full coverage after a layer, and it was very easy to brush on the glitter lacquer in the tops :)

I have used:
Baslack - Paese Mineral Smooth
Blue nail polish - Yves Rocher Nail Polish (62 Bleu volubilis)*
Silver glitter nail polish - Yves Rocher Nail Polish (93 Silver sequins)*
High gloss topcoat - Paese Top Gloss

It was three days since I made these, and they are still completely flawless, not scrapped anywhere! :)

IMG_1433_111IMG_1447_111

Tip! Just saw that Yvesrocher.se* also has a discount code right now, enter "BACK30" and get 30% on any item - the first to be added to the cart :)

Hope you were inspired! ♥

Follow me on Instagram & snapchat!

0

Hi fine ni!

Before, I was not as active on Instagram, then you saw basically the same material as on the blog, except that you could find much more on the blog. But now I have started instagram more and you who like my blog will probably think that it is very worthwhile to follow me on Instagram as well! :) @ Imakeyousmile.se

On Instagram (in addition to what you see in the blog) very old make-up is also published, and also more personal photos and films. More inspiration and a little "get to know me" you can say, and this autumn when I have a lot of new things going on, pictures from all that will be published as well :)

Some of my latest Instagram photos:

makeup-on-instagram

If you want, you can also follow me on Snapchat and everything I post in my story! I think in any case, if I succeeded with that attitude;) my name is helenaronnblad anyway!

Hugs are ♥

French marking / Lashliner - That's how it works!

Lashliner, or lash marking as it is also called, is the make-up tip that is most appreciated when I help people with make-up consultation / product advice. Lashliner / eyelash marking often makes the person look in the mirror and say "wooow" in a slightly shocked tone, because it makes such a big difference even though it is a discreet detail! :)

Why a lash marker / lashliner?

  • When you are "unmade up" and want to look fitter
  • To mascara to make the lashes look fuller
  • Instead of eyeliner - perfect for people with droopy eyes and hooded eyes, as well as people with shorter lashes. If you have a wide eyeliner, the lashes look shorter.
  • Together with eyeliner to get the eyeliner more intense (otherwise there can easily be gaps between the lashes and the eyeliner, where the skin shines through)

It's super good simply!

French marking / Lashliner before and after:

French marking / Lashliner before and after

But there is a recurring question regarding lashliner that I often get, most recently yesterday when I received this comment:

"Among other things, you have suggested that the eye gets another nice framing (?) If you apply eyeliner / similar in the upper lashes (ie in the 'upper lashes waterline') what you now call it haha. It makes a big difference, but for me the color then ends up on the lower waterline & the whole eye turns black… ”

And so I thought I would sort it out now :)

1. What product can be used to make lash markings / lashliner?

You can make lash markings / lashliner with black eye shadow, eyeliner, cream eyeliner or even mascara + brush. It's a matter of taste!

If you want a completely waterproof result, I recommend either the eyeliner pen Pixi Endless Silky Eye Pen (adlink) in the shade BlackNoir or some waterproof cream eyeliner. The eyeliner from Pixi is very creamy, almost like a gel eyeliner in pen form. And sits like a mountain!

Personally, I usually use black eye shadow which I apply with a brush that I moistened with a fixing mist, for extra blackness (due to damp) and extra good durability (due to fixing mist instead of water). It holds me well enough :) Examples of a good black eye shadow are Make Up Store Paradise Microshadow (adlink) in the shade Super Black and a good fixing mist that I often use for eye shadows is Pixi Makeup Fixing Mist (adlink) which is super good! :)

However, doing this with mascara is not a favorite of mine. It gets a little stiff which makes it harder to apply the mascara on the lashes later. But it works!

2. The application - the lash line and the waterline are different things

But the biggest reason why the fringe marking is smudged is usually not the product you use, but the biggest culprit in the drama is a misunderstanding about where the lash marking should be applied - it is called lash marking and lashliner because it is applied to the scalp of the lashes, right where the straws are stuck, and not along the upper waterline as I have understood that many do.

Note: It is not wrong to apply along the upper waterline as well, but then you must have one very durable product. Many products are kept on the upper waterline but still discolour a little under the eye. One solution is to paint black eyeliner on the lower lash line even then, so it does not matter if it discolours :)

Or you just put on make-up along the lash line itself. Most eyes get an equally fine result from lash marking only in the scalp of the lashes, as if you paint all the way down to the upper waterline. It basically looks the same when you look straight ahead, the difference is that one way is messy, but not the other :)

fringe marking / lashliner

When you look up, you see the difference clearly, do you see the difference between the one who messes up and the one who does not mess up?

I have tattooed a lashliner so I am not completely without the before-picture, but I painted in a little extra late to show you more clearly.

fringe marking-draft copy

Here you see arrows that show what I mean. On the lashliner that does not smudge on the lower lash line, the upper waterline is completely unmade up - that is how I recommend that you do. In the picture on the right, the entire waterline is also made up, but it started to smudge on the underside of the eye directly for me on that eye.

And as I said, you can apply with different products, but this is what I usually do:

  1. Use a good brush! Preferably as narrow as possible and good quality so that it does not start to spread in different directions. For example. so is the brow brush Anastasia Beverly Hills Duo Brush Nr. 12 (adlink) how good at anything!
  2. Spray fixing mist on the back of the hand, dip the brush in the mist so that it is thoroughly moist (but not running wet)
  3. Gently apply the brush on the eyeshadow so that you only get a little black eyeshadow on the brush. Better to apply paint several times than to have excess shadow on the brush that risks falling on the cheeks during application.
  4. Lift the eyelid slightly with your finger. Dab with the brush right into the scalp of the lashes, from the underside.

You can also put a mirror on the table in front of you and look down. Then you also get a clear angle of the lash scalp and see exactly where to apply :)

IMG_1689_111

Then it's ready! So hard to take pictures! It's simpler than it looks, but it may take a few times before you get into the technology. But once you get into the routine, it goes quickly and easily!

Hope that the post about fringe marking / lashliner was helpful, and if you have any follow-up questions, you know that it's just a matter of shouting, leave a comment or email helena@imakeyousmile.se! :)

Hug ♥

Also read:

en_USEnglish